7
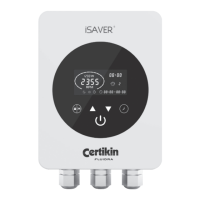
Initial operation
When first powered up, will illuminate. Hold for 3 seconds in order to unlock the screen.
Press
to start the inverter.
Upon starting, the pump will run at maximum speed of 2900rpm for one minute in order to ensure priming. This can be increased to
up to 10 minutes if required – see ‘Parameter Settings’ on page 8.
Press
to choose a running speed. Use the and buttons to adjust the speed in 50rpm increments in order to set a specific
running speed if required.
Once the pump has finished priming, the inverter will automatically adjust the pump speed to the pre-set value.
shows that the pump is running and at which current speed (rpm). Power consumption in Watts (W) is shown for that
particular speed.
Timer setting
Running the pump at different speeds at different times of the day will minimise energy consumption when higher speeds are not
needed and can allow the user to take advantage of lower electricity tariffs, for example during the night.
In order to benefit from this, the iSaver+ allows the setting of up to 4 timers. These are established as follows.
Step 1: Press
to begin using the timer function
Step 2: Use
and to set the current clock time.
Step 3: Press
to toggle to timer 1 and use and to set the start times for that timer. Use to toggle to the stop times,
use
and
to set that time. Use
to toggle to the speed setting.
Note: Each setting is saved as you ‘toggle’ through with the
button.
Step 4: When the time is set, press
to choose a pre-set speed range for that timer 1, or use and to decide on a specific
speed if required.
NOTE: Pressing
together will move the cursor to the previous setting.
Step 5: Repeat steps 3 and 4 to set the remaining times.
Step 6: Hold
for 3 seconds, or wait 10 seconds to save the timer settings automatically.
NOTE: When
is flashing, this means that the device is waiting for a start time.
Step 7: Press
or to check all 4 timers and ensure there are no invalid settings. Any overlapping of timer periods will be
considered as invalid and the device will only run based on the previous valid timer setting.
NOTE: During timer setting, if you want to abandon the process, hold
for 3 seconds.
 Loading...