15
MAINTENANCE
4. Pump care
FX4 IMPELLER MAINTENANCE
The impeller well has an effective self-cleaning feature. However it is recommended that you remove the motor and
inspect the impeller as part of your routine maintenance. Keeping the impeller clean lengthens its life and the life of the
motor. Prior to performing pump care the FX4 Filter must be completely emptied of water, media baskets, and media.
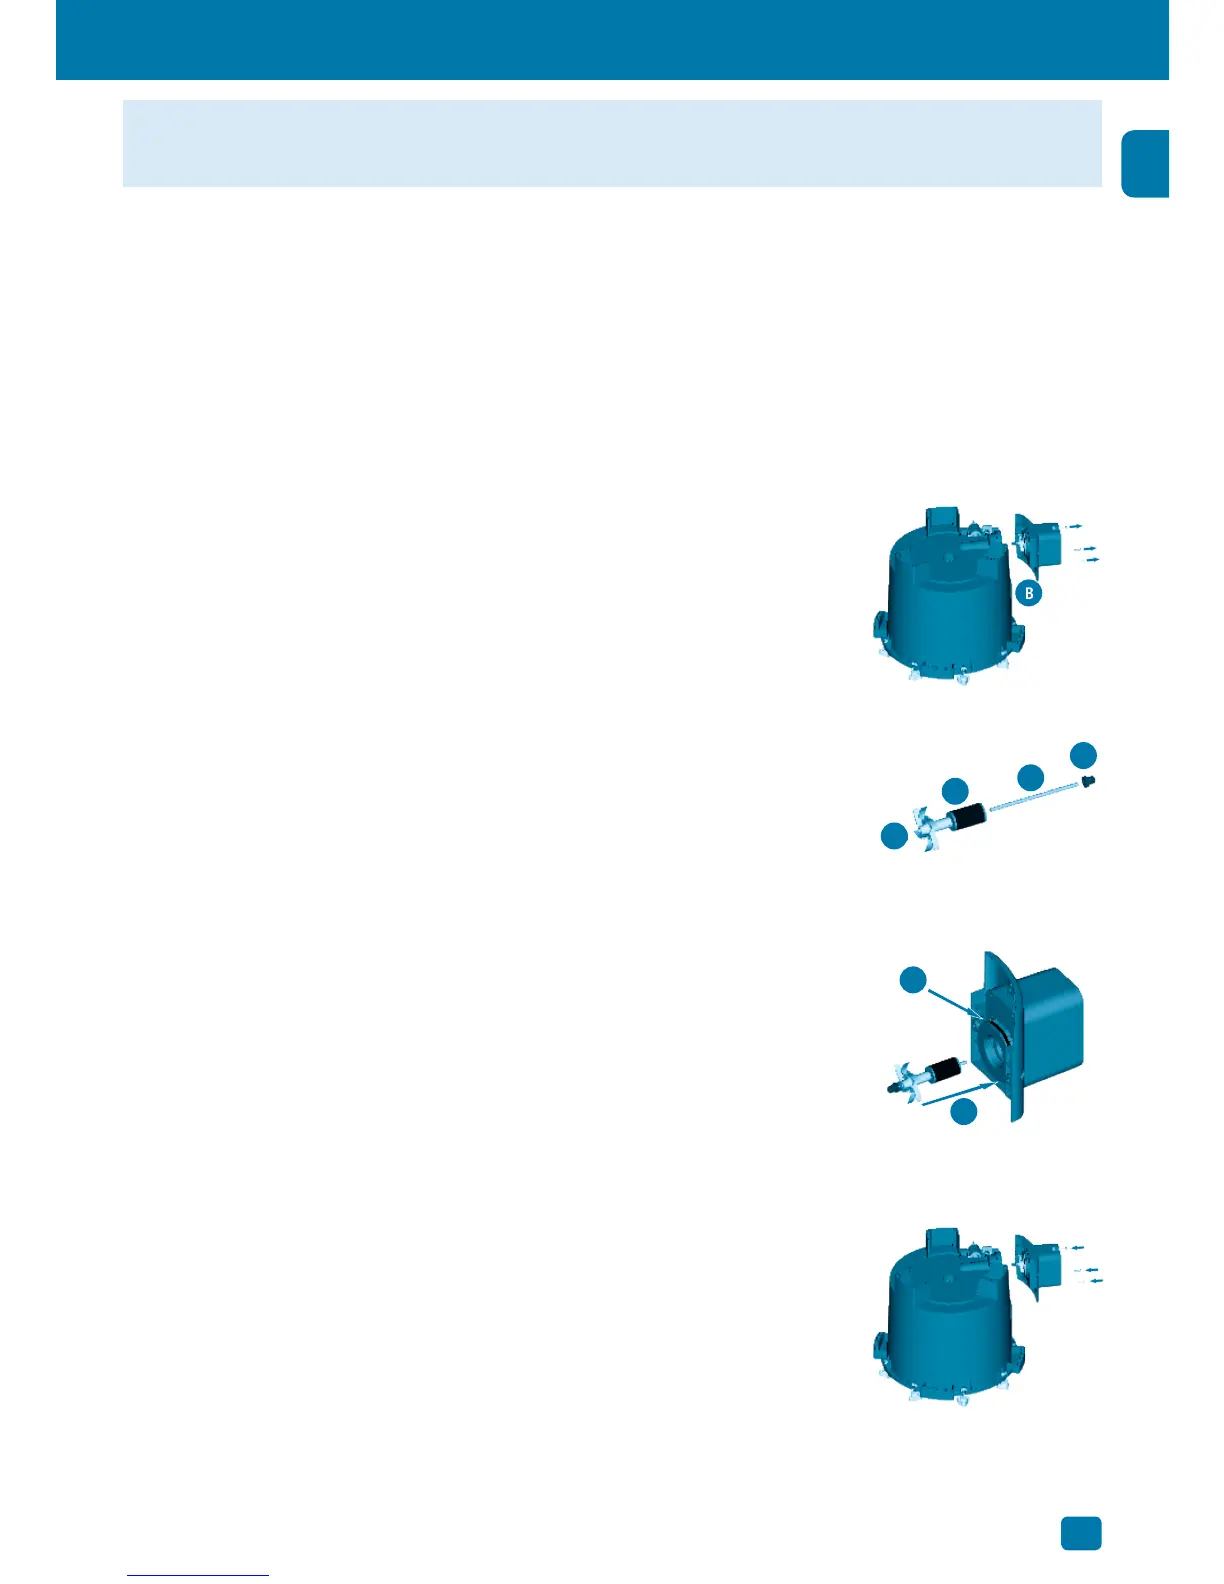
1. To remove the pump unit:
A. Place the filter unit upside down on a secure work area so that the pump screws and screw seats are
visible. Remember that the output tube protrudes slightly from the top rim of the canister. Be sure not to bend
or damage the tube while it is upside down.
B. Unscrew the 3 fixing screws using a Phillips screwdriver (cross headed).
Screws are located around the motor housing.
C. Remove the impeller assembly by grasping the fan and drawing it gently
from the well.
NOTE: There are 4 parts to the impeller:
D. Impeller shaft. The impeller shaft is held on both sides of the impeller well by
two rubber bushings. The shaft can be easily extracted by hand with care.
IMPORTANT: The shaft is made from ceramic, which is resistant to wear and
tear in use, but is fragile. Handle carefully during maintenance.
E. Front rubber bushing. If it remains in the red part of the canister, it’s necessary
to remove it keeping attention to not damage it.
F. Rear rubber bushing. If the rubber bushing remains in its place, it’s not neces-
sary to remove it.
G. Impeller assembly (Magnet + impeller fan)
2. Clean the impeller and the impeller well thoroughly by rinsing with clear
running water.
3. Re-assemble all pump components with care:
H. Replace seal ring if necessary: Remove it from the loophole. Please refer to the
“maintenance frequency chart”. For this operation do not use any tools because
there is a risk of damage to the O-ring.
I. Re-assemble all parts in the following order: Rear rubber bushing at the bottom
of the well (if removed), ceramic shaft (pushing it until it stops); subsequently
the impeller assembly and at the end the front rubber bushing at the top of the
ceramic shaft. The shaft can be easily reinserted by hand; however, pay close
attention and be certain the rubber bushing does not become unseated.
4. Replace the pump unit with care into the canister and affix it using
the 3 fixing screws with a Phillips screwdriver (cross headed). While
re-assembling the pump, the 3 fixing screws should be gently screwed in
until pump motor cover and canister are securely attached.
NOTE: Do not over tighten housing to canister.
IMPORTANT: Be sure that the seal ring does not slip out of its seat.
CAUTION: Always unplug any appliances from an outlet when not in use, before putting on or taking off
parts, and before cleaning. Never yank cord to pull plug from outlet. Grasp the plug and pull to disconnect.
H
I
B
E
G
D
F
 Loading...