www.x.bike18
The Babymaker|OwnersManual
19www.x.bike
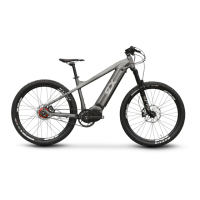
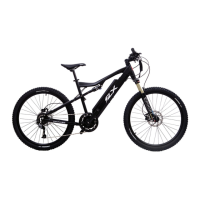
STEP 8: Charge Your Battery
2.Plugyourchargerintoanoutlet.The
indicatorlightwillturngreen.
GreenLight:
Notcharging/Fullycharged
RedLight:
Charging/Notfullycharged
Figure20.ChargingLight
Figure21.ChargingYourBattery
1.Connectthechargerintothecharging
portlocatedontherightsideofyour
Babymaker.
Tip:Allowthebatterytofullycharge
beforeriding(about4-8hoursthe
rstfewcycles).Afterthis,youmay
chargenormally(2hours).
The Babymaker|OwnersManual
STEP 6: Installing the Brake levers
Figure19.TighteningtheLDCDisplay
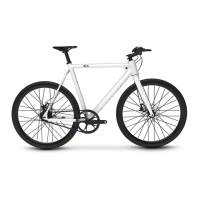
Step 7: Tighten the Display
1.Grabthe2.5mmallenkey,andlocate
theboltonthebottomsideoftheLCD
display
2.Makesurethedisplayisatacomfort-
ableangleforyou,thentightenthebolt
(clockwise)untilitisfullysecured.
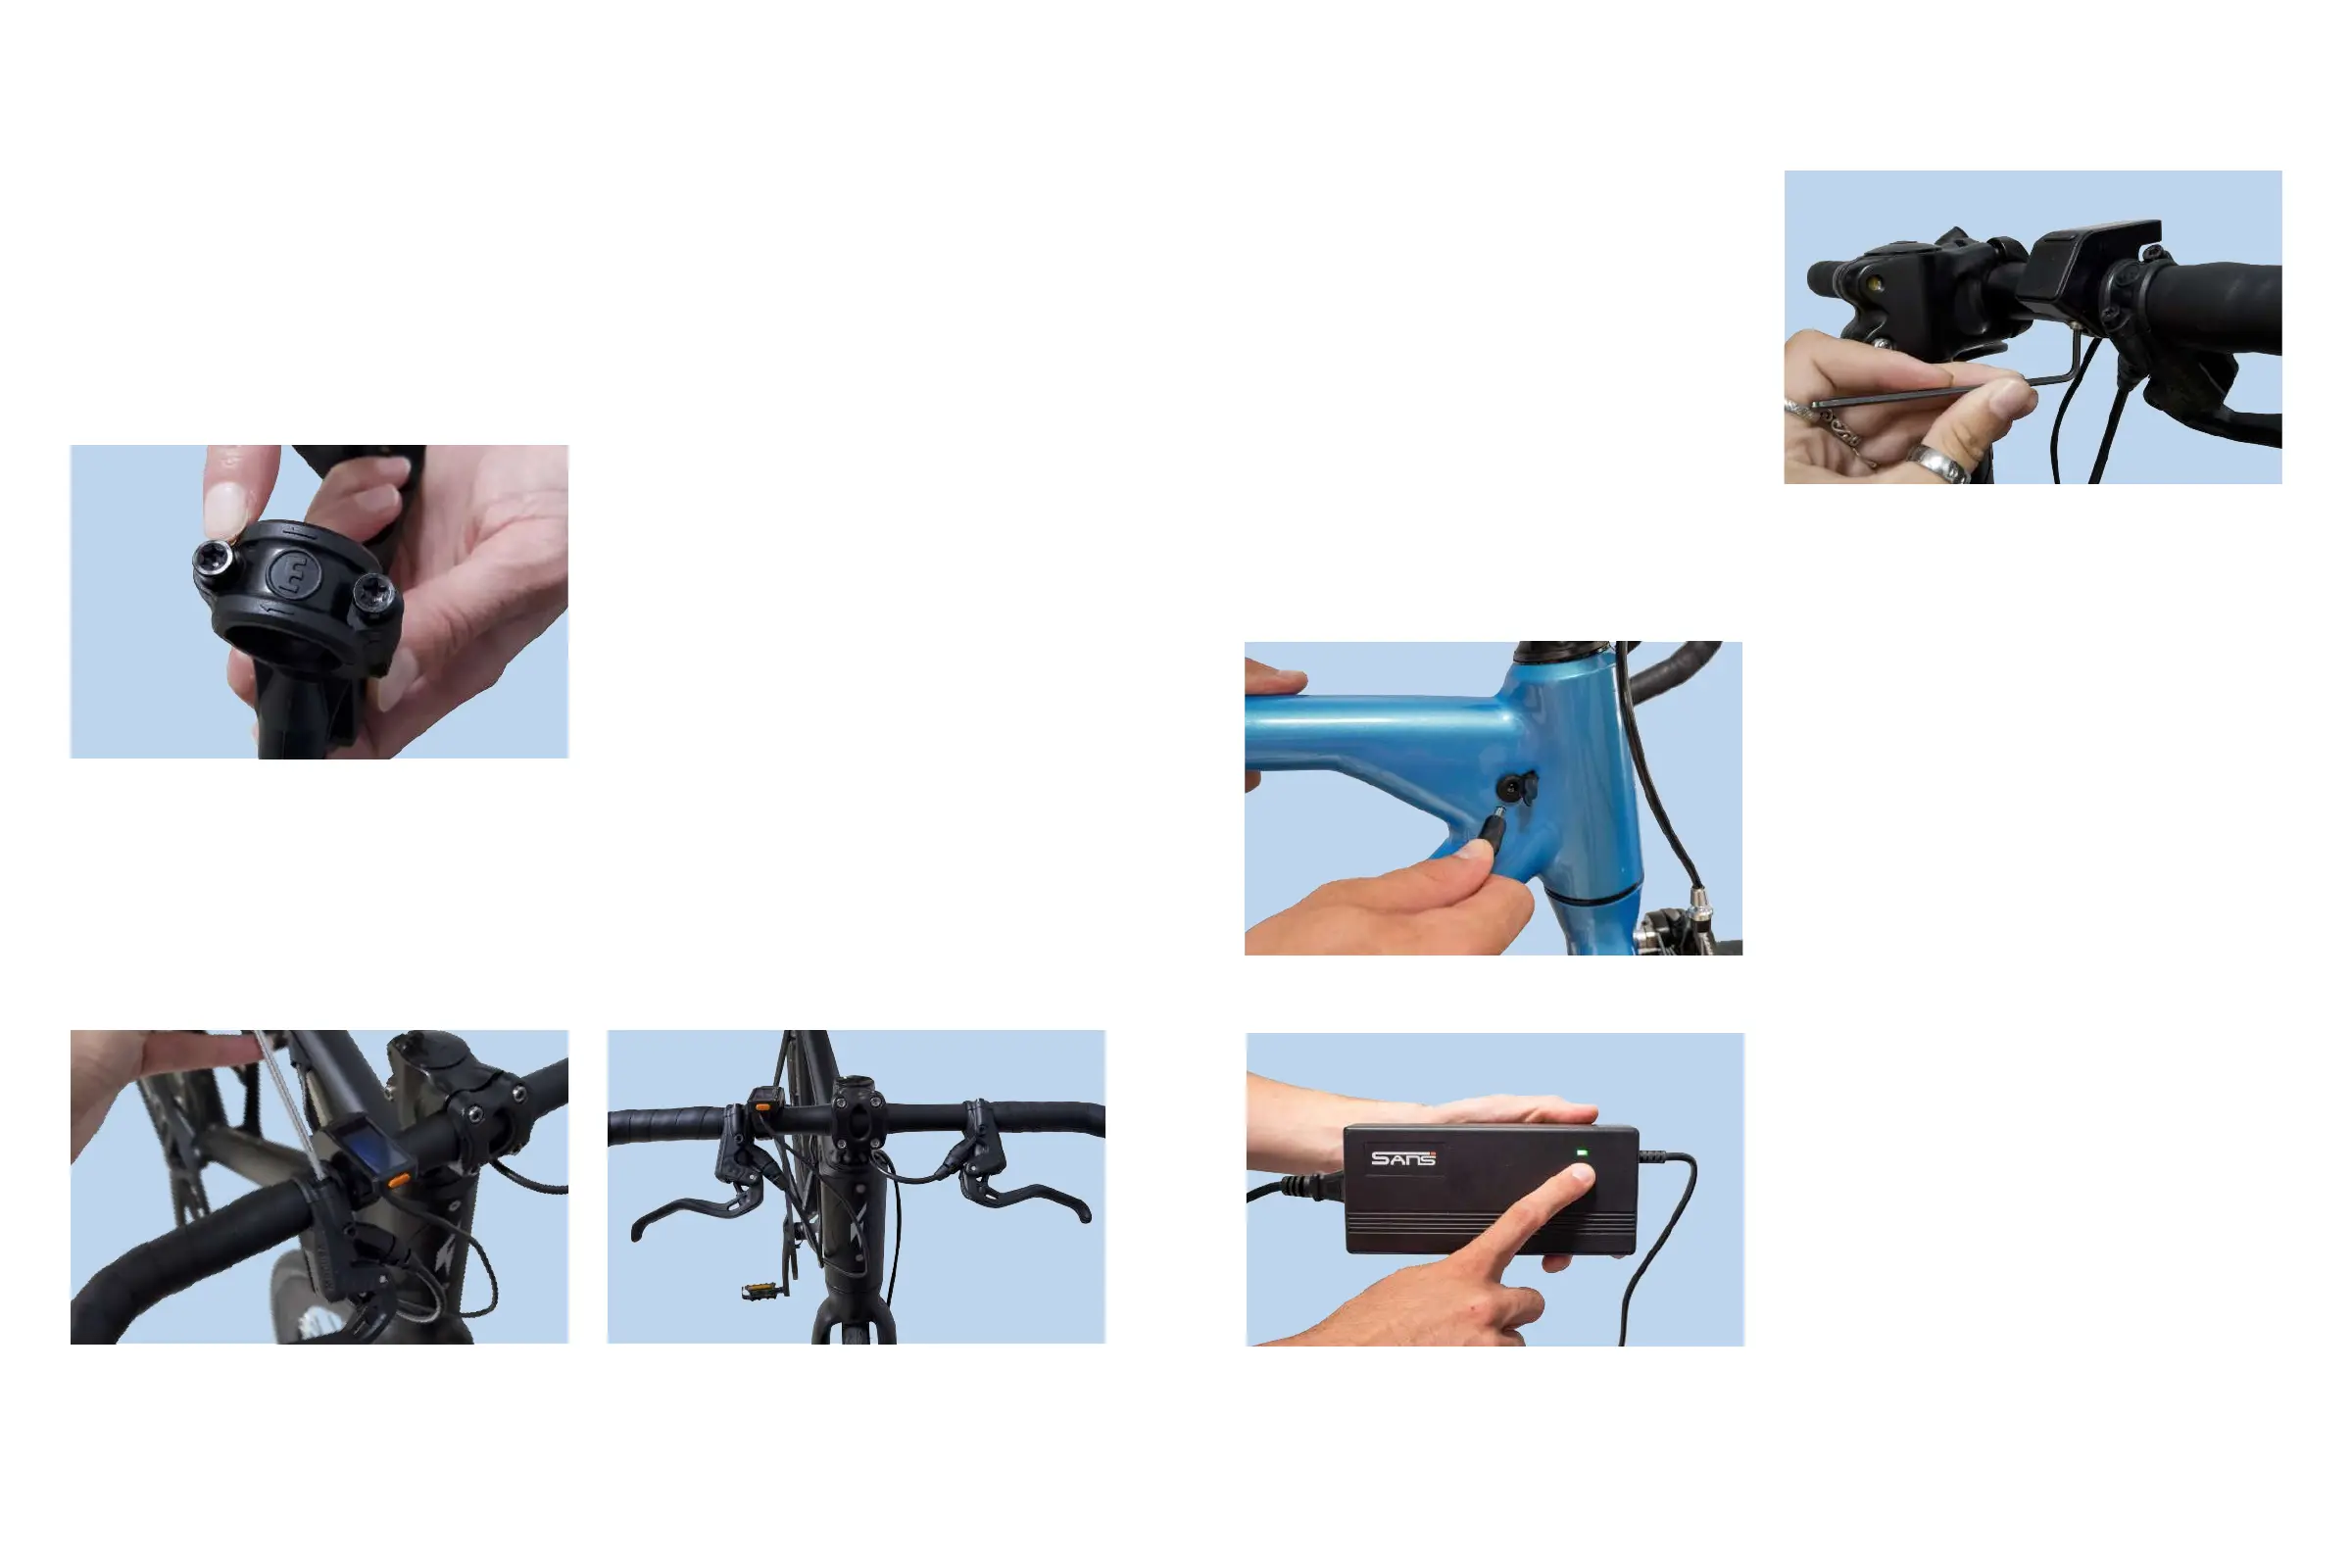
Note: If your brake levers are already attached, you may check that the
brake levers are properly secured, and move on to the next step.
If they are not properly secured, use the torx bit to tighten the bolts
(see Figure 17).
Figure16.LocatingtheBrakeLeverBolts
1.UsingtheT25Torxbit,unscrewthetwo
boltsoneachbrakelever.
2.Placetheleveroverthehandlebarsand
tightentheboltsjustenoughsothatyou
canstilladjusttheangleofthebrake
leverstosuityourcomfortprefrerence.
Tip:IntheUS,itisstandardtohavethefrontbrakeontheleftsideandthe
rearbrakeontherightside.Youmaychoosetoset-upyourbrakesbasedon
whatisstandardinyourcountry.
3.Tightentheboltstherestoftheway.Theyshouldnotbeabletorotateatall.
Figure17.AttachingtheBrakeLevers Figure18.AttachedBrakeLevers