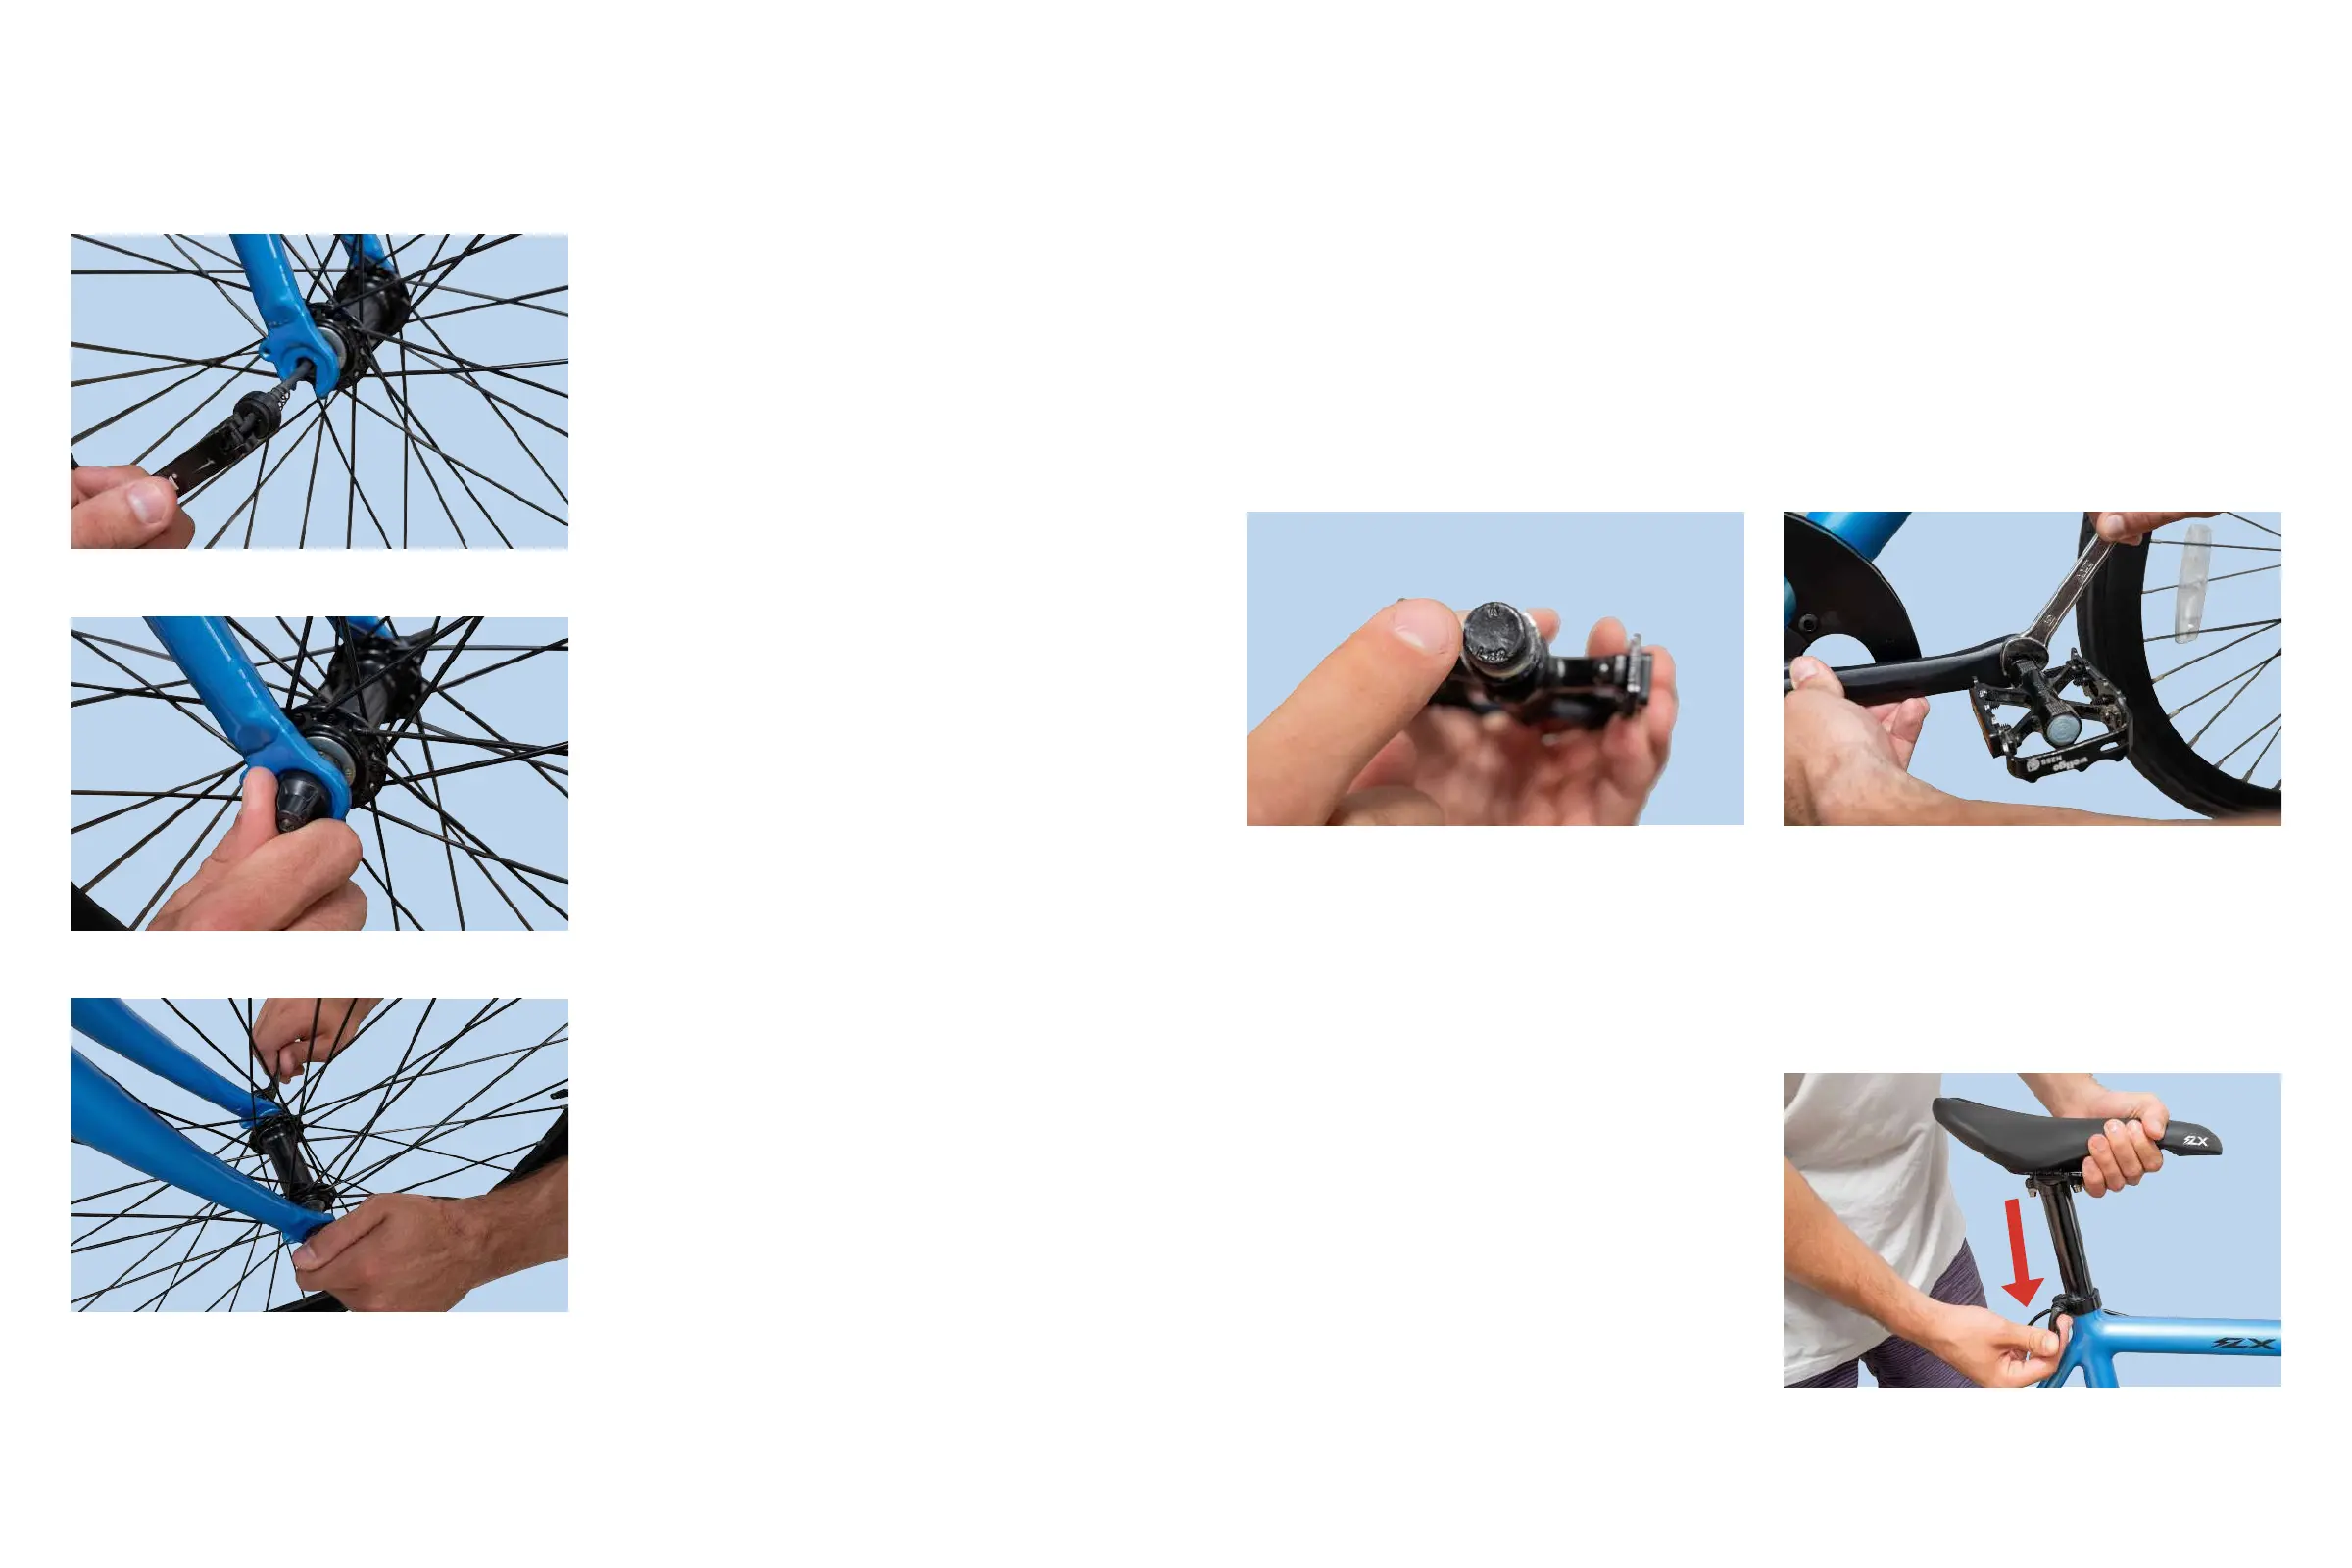
4.Grabthequickreleaseskewerand
removetheendcapalongwiththespring
beingcarefulnottolosethem.
5.Insertthequickreleaseskewerallthe
waythroughtheaxle.
Figure10.InsertingtheQuickReleaseSkewer
5.Replacethespring,andtheendcap.
Tip:Makesurethespringisonthe
outsideoftheforkwiththefatside
facingoutwards.
6.Tightenthecapabouthalfway,andin-
spectthewheeltomakesureit’s
positionedcorrectlybetweentheforks.
7.Tightenthecaptherestoftheway.
Figure11.TighteningQuickReleaseSkewer
6.Whiletighteningtheendcap,besure
totestthetensionbyopening/closingthe
levereveryfewturns.Youwantittofeel
tightandsecure,sothatyourwheelcan-
noteasilycomeundone.
Again, please seek professional
assistance if you are unsure of your
ability to complete these steps.
Figure12.TestingWheelTension
16 www.x.bike 17www.x.bike
The Babymaker|OwnersManual The Babymaker|OwnersManual
STEP 4: Attach the Pedals
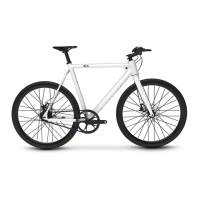
1.Checktheend-caponbothpedalsinordertoidentifytheleftvs.rightpedal.
Tip:Imagineyouaresittingonthebiketocorrectlydetermineleftvs.rightside
Note: Please note that the right pedal will tighten clockwise, while the left
pedal will tighten counter-clockwise.
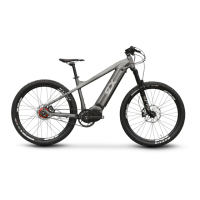
2.Grabyourwrench,andscrewthepedaltightlyintothecorrectcrank.Thepedals
shouldthreadsmoothlyandeasilyifproperlyaligned.
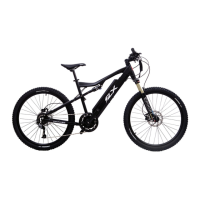
STEP 5: Install the Seat
1.Loosenthequickreleaseleverontheframeanddroptheseatintotheopening.
Findaheightthatworksforyouandclosethequickrelease.
Figure13.LeftVs.RightPedal Figure14.AttachingPedaltoCrank
Figure15.DroppingSeatintoBike
Note: The seat post must be
inserted to at least 5” in depth
to avoid damage to your frame.
If you need to raise the seat
above this height, please
purchase a longer seat tube to
satisfy the depth requirements.