www.x.bike
10
Bandit |OwnersManual
Overview
ThefollowingsectioncoverstheassemblydirectionsfortheBandit.Proper
assemblyisanessentialstepinensuringyoursafetyandtheproperoperationofthe
bike.If at any point you do not feel comfortable assembling the bicycle your-
self, please seek professional assistance or reach out to our support team.
YoucanalsondadetailedassemblyvideoontheFLXYouTubechannel:
www.x.bike/banditassembly
If you do not feel that you have the ability or skill to assemble the bike
yourself, please take it into a local bike shop for professional assistance.
Failure to properly assemble your eBike can result in serious injury or
death.
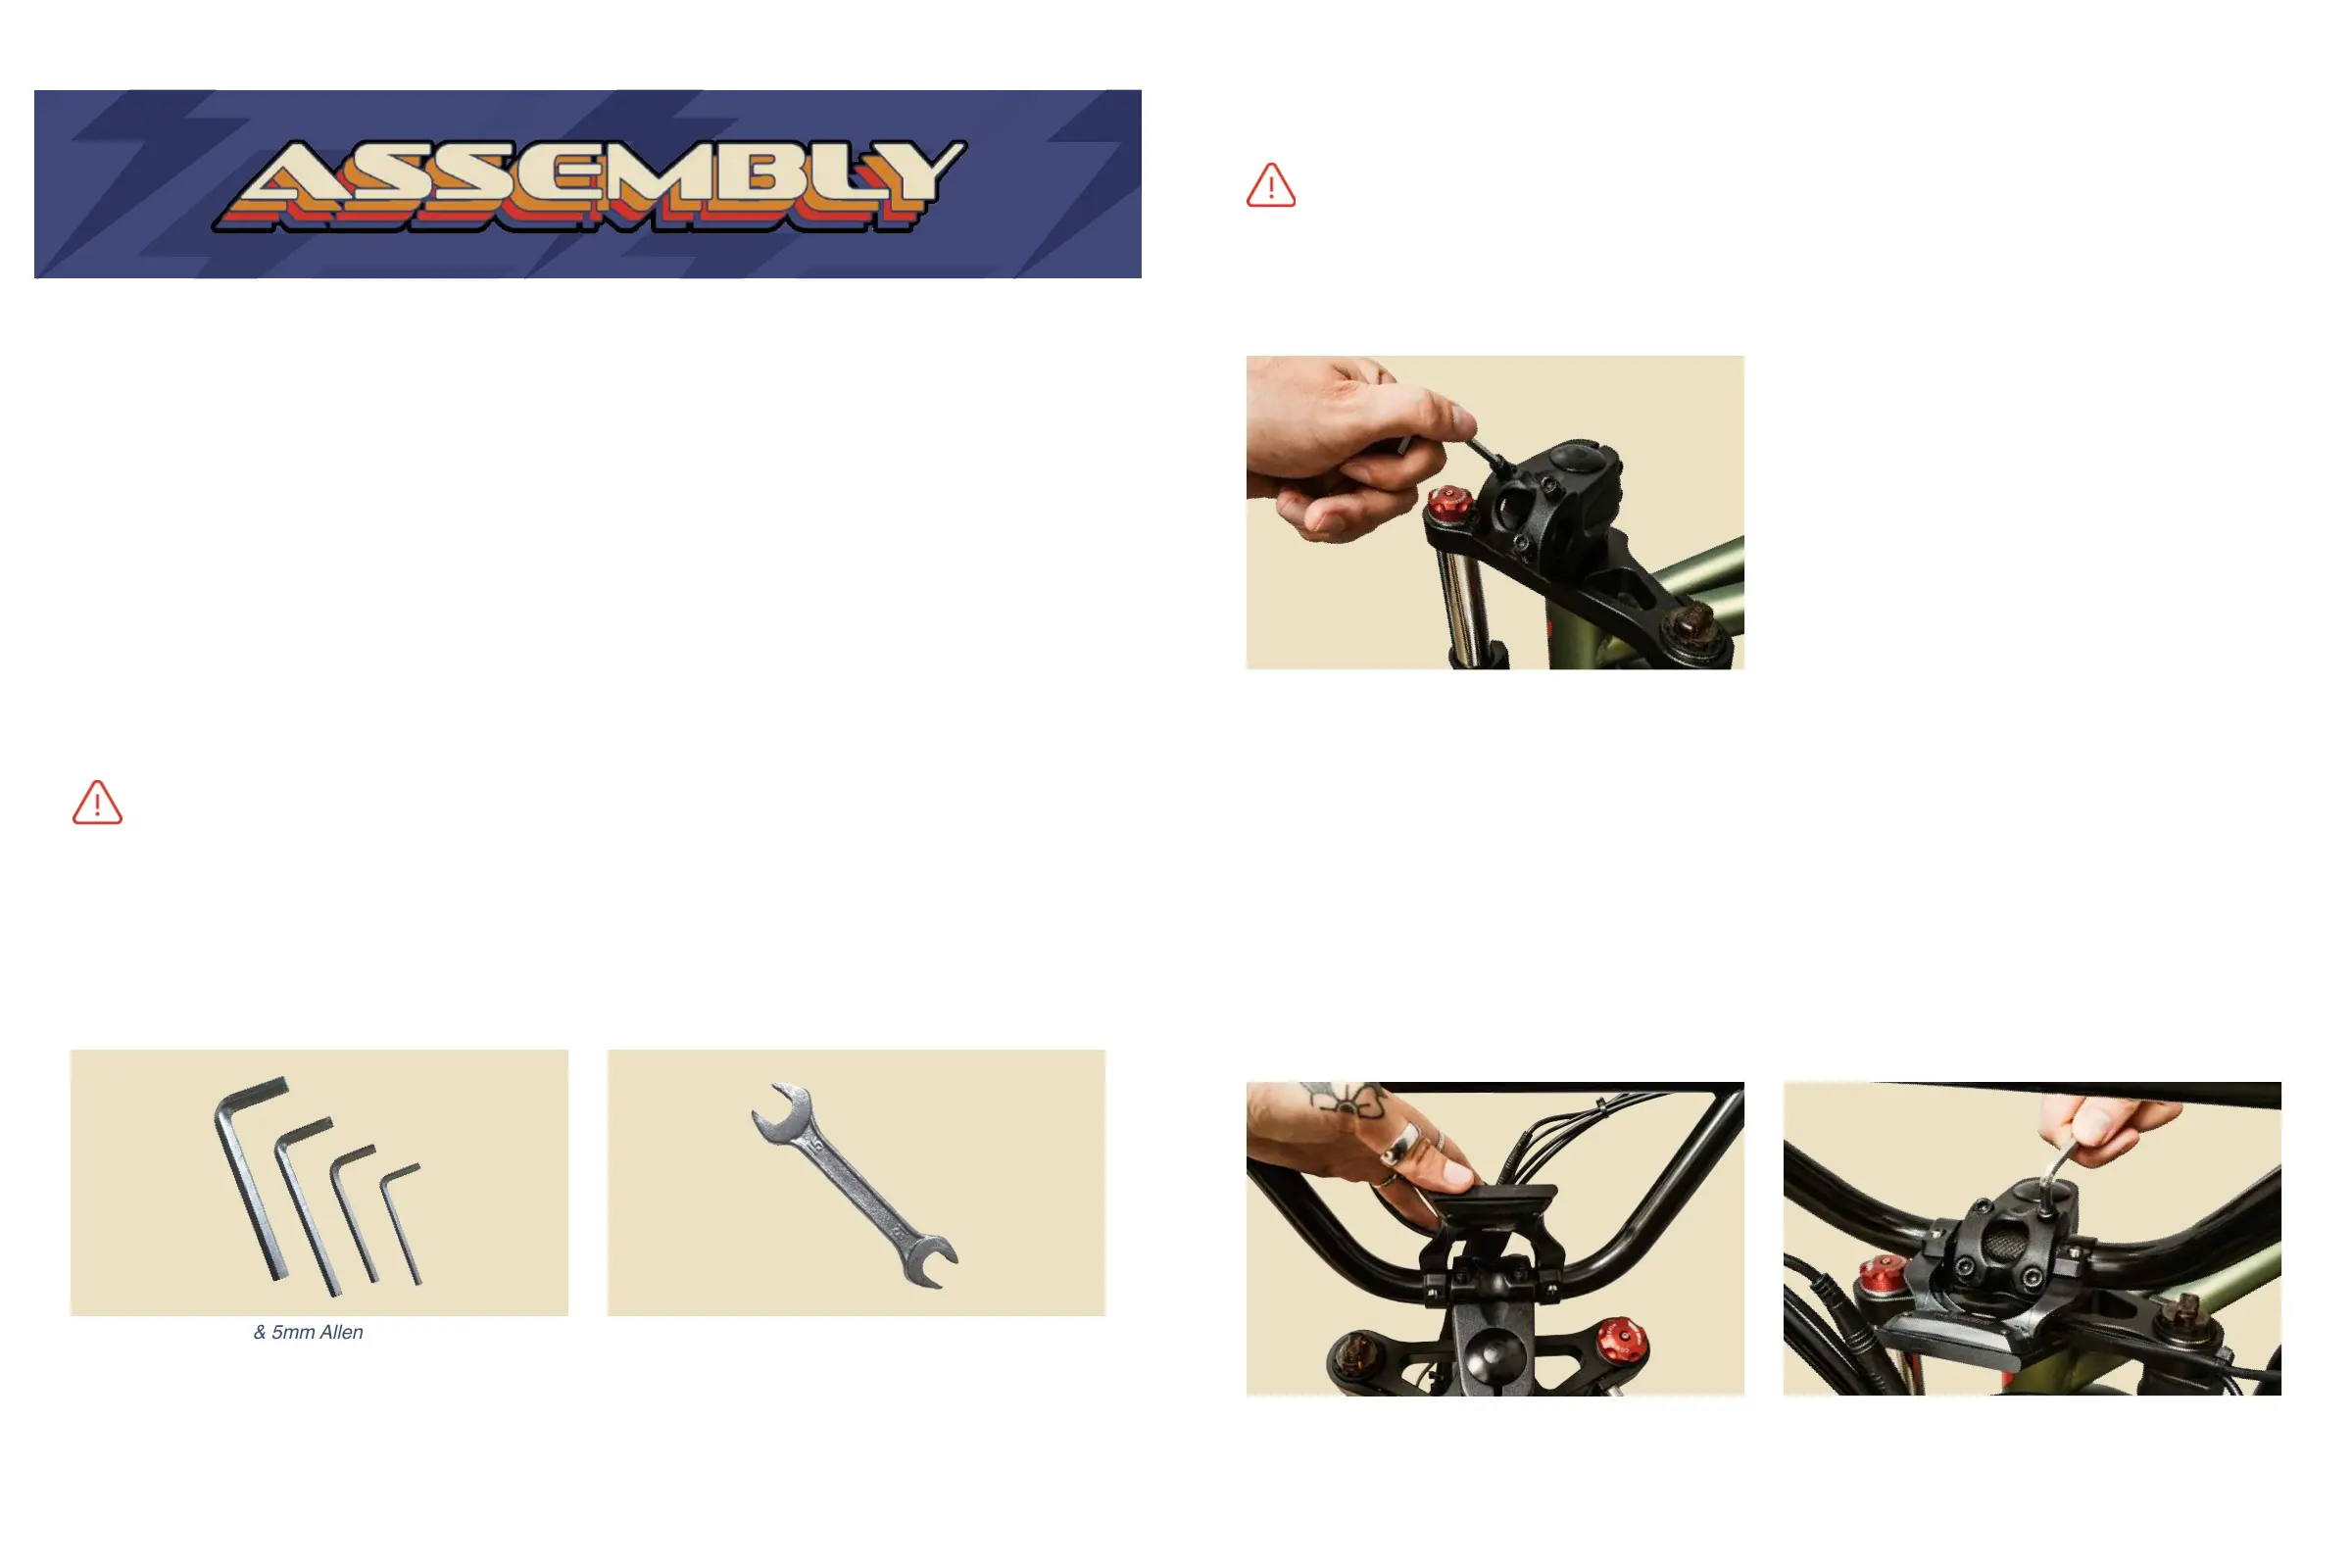
ToolsIncluded:
11www.x.bike
STEP 1: Install the Handlebars
Bandit|OwnersManual
Please read through the entire assembly instructions section before you
begin. Proper assembly is important in order to ensure your safety and
satisfaction while operating your eBike.
Figure 1. Stem Plate Bolt Removal
1.Usingthe4mmAllenwrench,loosen
the4boltsonthestemplate.
2.Removethestemplateandcarefully
setitasideforlater.
3.Placeyourhandlebarsinthegroove
andreplacethestemplate.
Figure 3. Tightening Stem Plate Bolts
Figure 2. Tilting LCD Screen
Tip: You can tilt your LCD display to get better access to the stem plate/bolts.
4.Tightentheboltshalfway,leavingenoughwiggleroomtomakeadjustments.
5.Doublechecktoseethatthehandlebarsareproperlycenteredandthattheyare
angledtoyourridingpreference
6.Tightenthestemplateboltsallthewayuntilyourhandlebarsarefullysecured.
Tip: Tighten them in a “Figure-8” pattern to ensure the plate is secured evenly.
4mm & 5mm Allen Wrench 15mm Wrench