4
(GB) ASSEMBLY
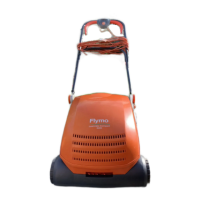
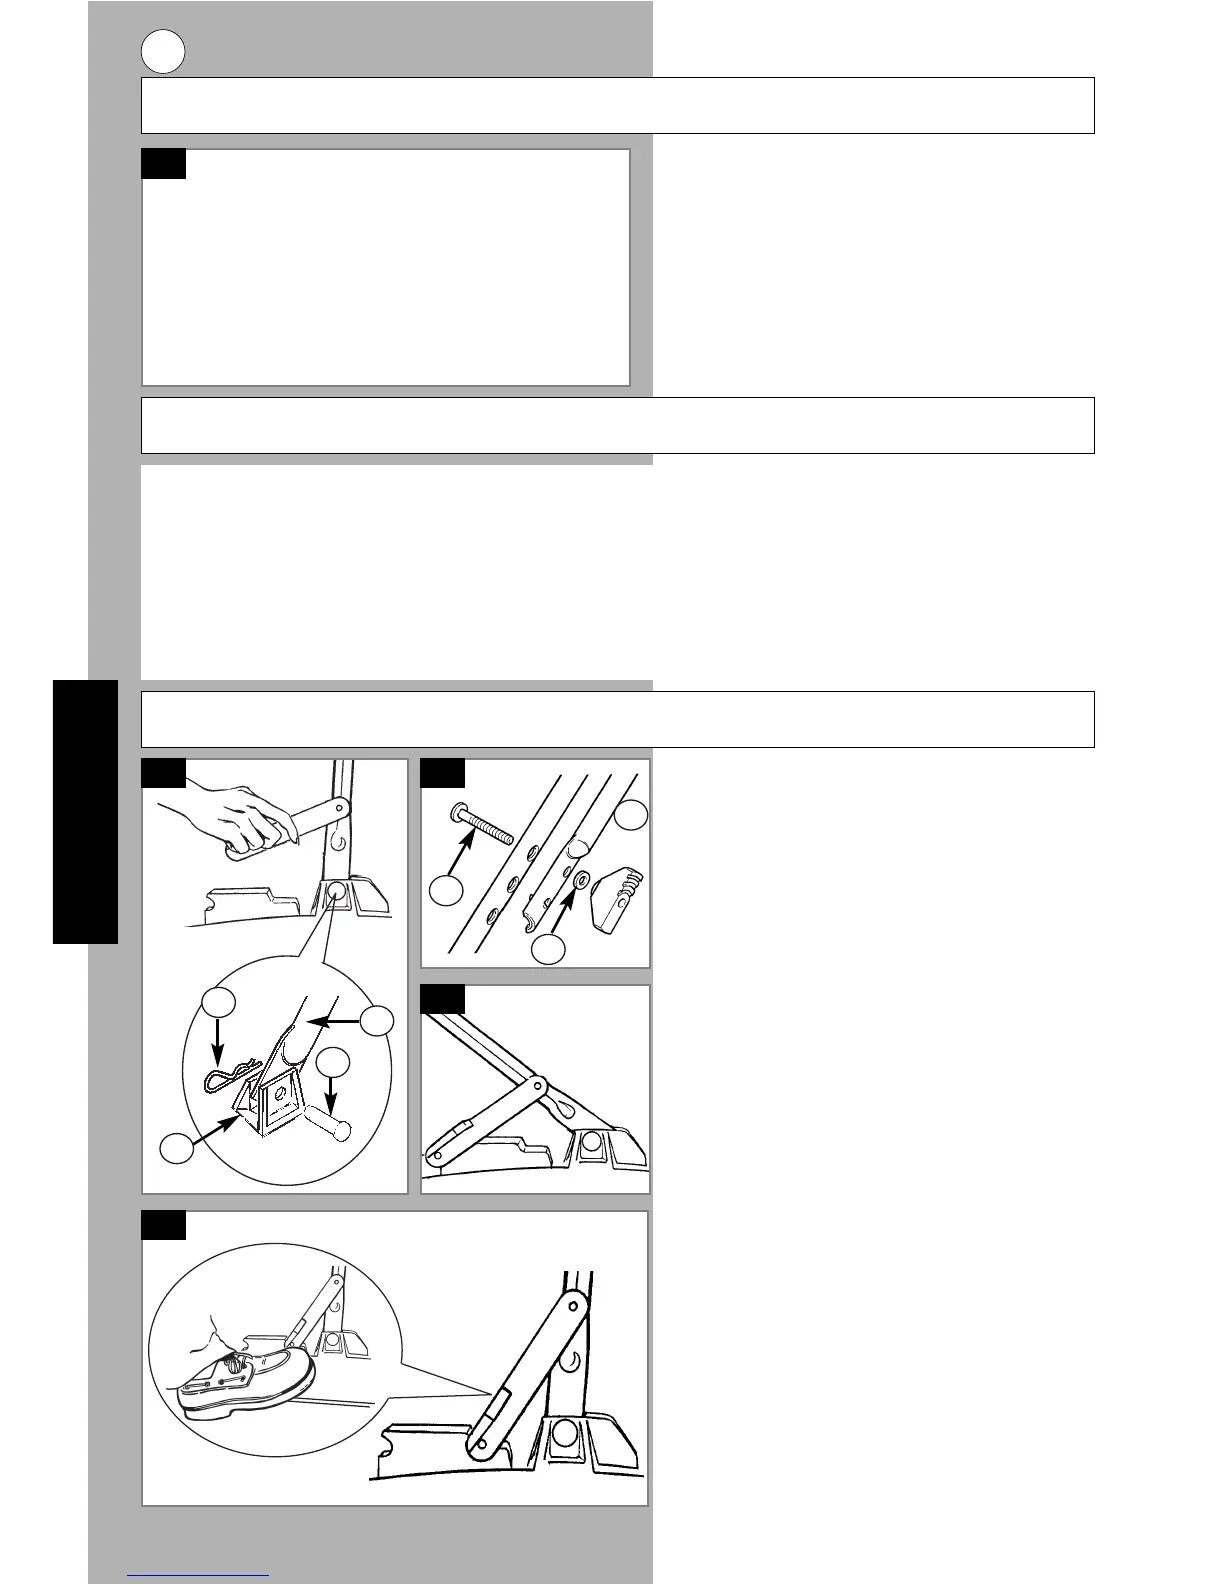
Fitting the Lower Handle to the
Lawnmower
With the lawnmower on the ground:-
1. Ensure that the upstop latch (A9) attached
to the lower handle (A8) is at the right-
hand side when viewed from the rear.
2. Place the end (C2) of the lower handle
into the slots (C1). Insert the pins (C3)
and secure with the retaining clips (C4)
Fitting the Upper Handle (A3) to the
Lower Handle (A8)
● The upper handle can be fitted in two
different positions by using either the
middle or upper hole to fit the bolt, washer
and handle knob as described below.
1. Ensure the Plastic Switch Housing (A2) is
on the left-hand side when viewed from
the rear.
2. Align the lower and upper handles (see
fig. 'D'). Locate the bolts (D1), washers
(D2) and secure with the handle knobs
(D3).
3. Secure the cable to the handles with the
clips (A4) provided. Ensure the cable is
not trapped between the handles.
Handle Position
The handle position can be altered by lifting
up the upstop latch and moving it to the
required position (See Fig F).
Parking Position (See Fig F)
Mowing Position (See Fig E)
Product Rating Label
Product Number . . . . . . . . . . . . . . . . . .
Model Number . . . . . . . . . . . . . . . . . . . .
Serial Number . . . . . . . . . . . . . . . . . . . .
Date of Purchase . . . . . . . . . . . . . . . . . .
Place of Purchase . . . . . . . . . . . . . . . . .
•PLEASE KEEP PROOF OF PURCHASE•
Your product is uniquely identified by a
silver and black product rating label. To
ensure you have full product information
when obtaining spares or advice from one
of our approved service centres or if you
need to contact our customer service
department you should make a note in
the space provided of the information
shown in Fig B
B
Assembly and Adjustment
Fuel Mixing Instructions
1. Ensure mixing bottle and cap are clean and standing on a level surface.
2. Add fresh regular grade unleaded petrol up to the 1 litre mark on the bottle.
3. Add a good quality 2 stroke oil, to the 25 : 1 mark (40 ml of oil) on the bottle.
4. Screw cap on, shake container until petrol and oil are thoroughly mixed.
5. Clean fuel tank filler cap and fill fuel tank.
● UK ONLY:- Electrolux Outdoor Products manufacture a specially designed fuel mixing bottle.
For further information contact your local Electrolux Outdoor Products Service Centre/Stockist or
contact the Electrolux Outdoor Products Customer Careline on 01325 300303
4
1
2
3
1
2
3
C
D
F
E