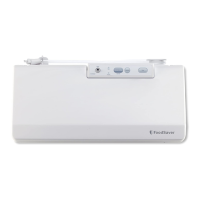
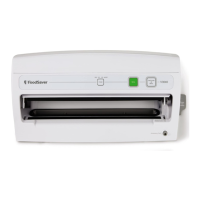
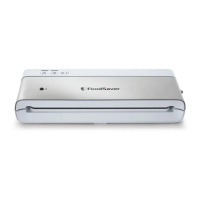
The FoodSaver QuickStart V1205 is a vacuum packaging appliance designed to preserve food by removing air from specially designed bags, canisters, and accessories. This process helps to extend the freshness of various food items, from dry goods to moist meats.
Function Description:
The core function of the FoodSaver V1205 is to create an airtight seal around food, either by vacuuming air out of a bag or by sealing a bag without vacuuming. It can also be used with various FoodSaver accessories to vacuum seal items in canisters, jars, and bottles.
Important Technical Specifications:
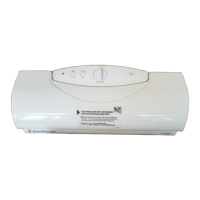
While specific technical specifications like power consumption or motor type are not detailed in the provided manual, the device features a robust sealing mechanism and a vacuum pump. It operates with a Seal Control Switch (D) offering multiple settings:
- Position 1: For resealing non-FoodSaver Bags (e.g., potato chip bags) or vacuum packaging in FoodSaver accessories, indicating a shorter seal time.
- Position 2: For vacuum packaging using a FoodSaver Bag, indicating a medium seal time.
- Position 3: For vacuum packaging moist or juicy foods such as raw meat, indicating a longer seal time.
- Accessory (if available on model): For vacuum packaging with FoodSaver accessories.
The appliance is designed for intermittent use, requiring a 20-second cool-down period between uses to prevent overheating. Under very heavy usage, it will automatically shut off for 20 minutes to cool down.
Usage Features:
The FoodSaver V1205 offers several user-friendly features to facilitate efficient food preservation:
- Indicator Light (A): Provides visual feedback on the appliance's operational status.
- Cancel Button (B): Allows users to stop the vacuum process at any time without sealing the bag, useful if fragile foods begin to crush.
- Instant Seal Button (C): Stops the vacuum process early and immediately seals the bag, preventing fragile foods like cookies from being crushed.
- Extended Vacuum Button (E): Designed to remove extra air from large canisters and bags, ensuring a more thorough vacuum. Users press and hold this button for 10-15 seconds during the vacuum process.
- Accessory Port (F) and Accessory Hose (G): These components enable the appliance to connect with FoodSaver vacuum packaging canisters, universal lids, jar sealers, and bottle stoppers, expanding its versatility beyond bags.
- Vacuum Channel (I): The area where the open end of a bag is placed for vacuuming.
- Sealing Strip (J): The heating element that creates the airtight seal on bags.
- Rubber Gasket (L): A crucial component that helps create a vacuum seal around the bag opening.
Making a Bag from a FoodSaver Roll:
- Cut bag material from the roll, ensuring it's 3 inches longer than the item to be packaged and cut straight.
- Place one end of the bag material across the Sealing Strip (J), avoiding the rubber gasket (L).
- Close the lid.
- Turn the Seal Control Switch (D) to position 2.
- Press down firmly on the lid with both hands until the motor starts (3-5 seconds), then release. The motor will continue to run.
- Once the motor and Indicator Light (A) turn off, open the lid and remove the newly formed bag.
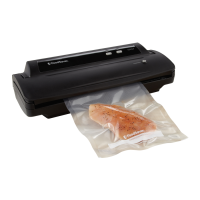
Vacuum Packaging with FoodSaver Bags:
- Place items in the bag, leaving at least 3 inches of space between contents and the top of the bag.
- Open the appliance lid and place the open end of the bag into the Vacuum Channel (I).
- Close the lid.
- Turn the Seal Control Switch (D) to the appropriate setting (1 for non-FoodSaver bags/accessories, 2 for FoodSaver bags, 3 for moist foods).
- Press down firmly on the lid with both hands until the motor starts (3-5 seconds), then release.
- When the motor and light turn off, open the lid and remove the bag.
Vacuum Packaging with FoodSaver Accessories:
- Prepare the container according to FoodSaver Accessory Guidelines (leaving 1 inch of space, wiping the rim clean, placing the lid/stopper).
- Insert one end of the Accessory Hose (G) into the Accessory Port (F) on the appliance, and the other end into the port on the accessory, twisting the gray tab for a tight fit.
- Turn the Seal Control Switch (D) to position 1 or "Accessory" (if available).
- Press down firmly on the lid until the motor starts (3-5 seconds), then release.
- When the motor turns off, the vacuum process is complete.
- Gently twist and remove the Accessory Hose from both the accessory and the appliance.
- To test the vacuum, tug on the accessory lid; it should not move.
Opening FoodSaver Accessories:
- Canisters (without large knob): Push the gray rubber button on the lid.
- Bulk Canisters, Quick Marinators, Universal Lids (with large knob): Turn the knob on the lid to "Open."
- Jar Sealer with Mason Jars: Wedge a spoon between the Mason jar lid and the highest part of the threaded rim, then gently twist to release the vacuum. (Do NOT use screw bands when vacuum packaging jars).
- Bottle Stoppers: Simply twist and pull up on the Bottle Stopper.
Maintenance Features:
- Removable Antibacterial Drip Tray (K): This tray fits inside the Vacuum Channel (I) and collects small amounts of liquids that may be inadvertently pulled into the channel during vacuum packaging. Its antibacterial properties help inhibit bacterial growth. After each use, the Drip Tray should be emptied and washed in warm soapy water or placed on the top rack of a dishwasher. The appliance can be used without the Drip Tray, but its presence aids in cleanup and hygiene.
General Tips for Successful Vacuum Packaging:
- Always ensure the bag is properly placed on the Sealing Strip (J) and not over the rubber gasket (L) or in the Vacuum Channel (I) when making a bag from a roll.
- When vacuuming and sealing a bag, the open end must be inside the Vacuum Channel (I).
- Prevent moisture or liquid from being pulled into the Vacuum Channel by pre-freezing moist foods or placing a folded paper towel between the food and the end of the bag (leaving 3 inches of space).
- Ensure the appliance has adequate cool-down time (20 seconds between seals, 20 minutes if it overheats).
- Check for wrinkles along the Sealing Strip, as they can cause leaks. If wrinkles are found after sealing, cut the bag open and re-package.
- If the motor runs for more than 30 seconds without stopping, adjust the bag and try again.
- Leave at least 3 inches of space between bag contents and the top of the bag, plus an additional inch for each time the bag is reused.
- Do not create your own side seams for FoodSaver Bags, as they have specially manufactured side seams.
- Gently stretch bulky items flat along the Sealing Strip to prevent wrinkles.
- If unsure about a seal, reseal the bag about 1/4 inch above the first seal.
- Protect bags from sharp-edged items by wrapping them in soft cushioning material or using a canister/Mason jar.
- Pre-freeze fruits and blanch vegetables for best results.
- Vacuum packaging is not a substitute for canning; perishables still require refrigeration or freezing.
- Use FoodSaver Bags, Canisters, and Accessories for best results.
- To prevent pump clogging from liquids, crumbs, or food particles, freeze moist/liquid foods first, avoid overfilling, use a canister, or place a coffee filter/paper towel inside for powdery foods. Empty the Drip Tray after each use.