PKG0001311432
See Owner’s Manual for full instructions and safeguards.
STEP 6
Press Vac/Seal Button to vacuum
and seal bag. When the indicator
lights turn off, your item is sealed!
STEP 5
Close lid and turn latch to the
operate position.
STEP 4
Place item(s) in bag, allowing at
least 3 inches of space between
the contents and the top of the
bag. Open lid and place open
end of bag into vacuum channel.
To ensure bag is vacuum sealed,
do not insert bag too far into the
appliance. Only insert bag just
over the edge of the removable
drip tray.
STEP 3
Press Seal button. When seal
indicator light turns off, sealing is
complete. Turn latch to open
position, lift lid and remove bag.
STEP 2
Close lid and turn latch to the
operate position.
STEP 1
Using scissors, cut desired bag
length from the roll. Turn latch to
the open position. Open lid and
insert one end of bag across
selling strip. (If using a premade
bag, skip to step 4).
HOW TO:
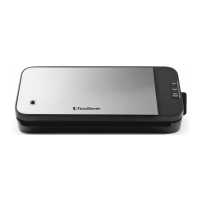
VS1100 SERIES QUICK START GUIDE
Español
p. 3
Français
p. 2
MAKE A FOODSAVER
®
BAG:
1. Using scissors, cut
enough bag material
from roll to hold item,
plus 3 inches (7.62 cm).
Be sure to cut straight.
2. Slide Lock Latch to the
Open position. Open
appliance lid. Insert one
end of bag material
across Sealing Strip.
3. Close lid and slide
Lock Latch to Operate
position. Both indicator
lights will turn on once
the latch has been
pushed all the way
down.
4. Press Seal button.
5. When Seal Indicator Light stops ashing and becomes
constant, sealing is complete. Slide latch to Open
position, lift lid and remove bag.
VACUUM SEAL FOODSAVER
®
ZIPPER BAGS:
(sold separately)
1. Prepare zipper bags according to FoodSaver
®
Accessory Guidelines, which are
included with accessory purchases.
For zipper bags, make sure not to
put any food under the valve and
press zipper closed with nger
while bag is lying down on a at
surface.
2. Close lid and slide Lock Latch to Operate position.
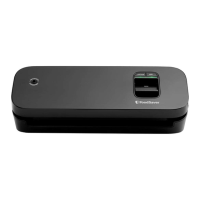
3. Insert one end of Accessory Hose into Accessory Port
on Appliance. Place Handheld Sealer on zipper bag
valve.
4. Press Vacuum Button.
VACUUM SEAL A FOODSAVER
®
BAG:
1. Place item(s) in bag,
allowing at least 3 inches
(7.62 cm) of space
between bag contents
and top of bag.
2. Open appliance lid and
place open end of bag
into Vacuum Channel (Drip
Tray).
3. Close lid and slide Lock
Latch to Operate position.
Both indicator lights will
turn on once the latch has
been pushed all the way
down.
4. Press Vacuum button to
begin vacuum and sealing process. Motor will continue
to run until bag is fully vacuumed, then will automatically
seal.
5. When Seal Indicator Light stops ashing and becomes
constant, slide Latch to Open position and open lid.
Remove bag. Refrigerate, freeze or store as needed.
VACUUM SEAL FOODSAVER
®
CONTAINERS:
(sold separately)
1. Prepare FoodSaver
®
Preserve & Marinate Container
according to Guidelines, which are included with
container purchase.
2. Close lid and slide Lock Latch to Operate
position.
3. Insert one end of Accessory Hose into
Accessory Port on Appliance. Place
Handheld Sealer on container valve.
4. Press Vacuum Button.
See Owner's Manual for full instructions and safeguards.
Place Bag on Sealing Strip
Press Seal Button
OPEN END
Place Bag on Sealing Strip
Press Seal Button
OPEN END
SEALED END
Zipper Bags are safe for pantry and fridge use only.
VS1100_22EFSQSG1 (digital) QSG.indd 1VS1100_22EFSQSG1 (digital) QSG.indd 1 2022/2/22 9:20 AM2022/2/22 9:20 AM