2 To remove the plugs, first mark the HT
leads to ensure correct refitment, then pull
them off the plugs. When removing the leads,
pull the terminal insulator at the end of the
lead - not the lead itself.
3 Using a spark plug spanner or deep socket
and extension bar, unscrew the plugs and
remove them from the engine (see
illustration).
4 The condition of the spark plugs will also
tell much about the condition of the engine.
5 If the insulator nose of the spark plug is
clean and white, with no deposits, this is
indicative of a weak mixture, or too hot a plug.
(A hot plug transfers heat away from the
electrode slowly - a cold plug transfers it away
quickly.)
6 If the tip and insulator nose are covered
with hard black-looking deposits, then this is
indicative that the mixture is too rich. Should
the plug be black and oily, then it is likely that
the engine is fairly worn, as well as the mixture
being too rich.
7 If the insulator nose is covered with light tan
to greyish brown deposits, then the mixture is
correct and it is likely that the engine is in
good condition.
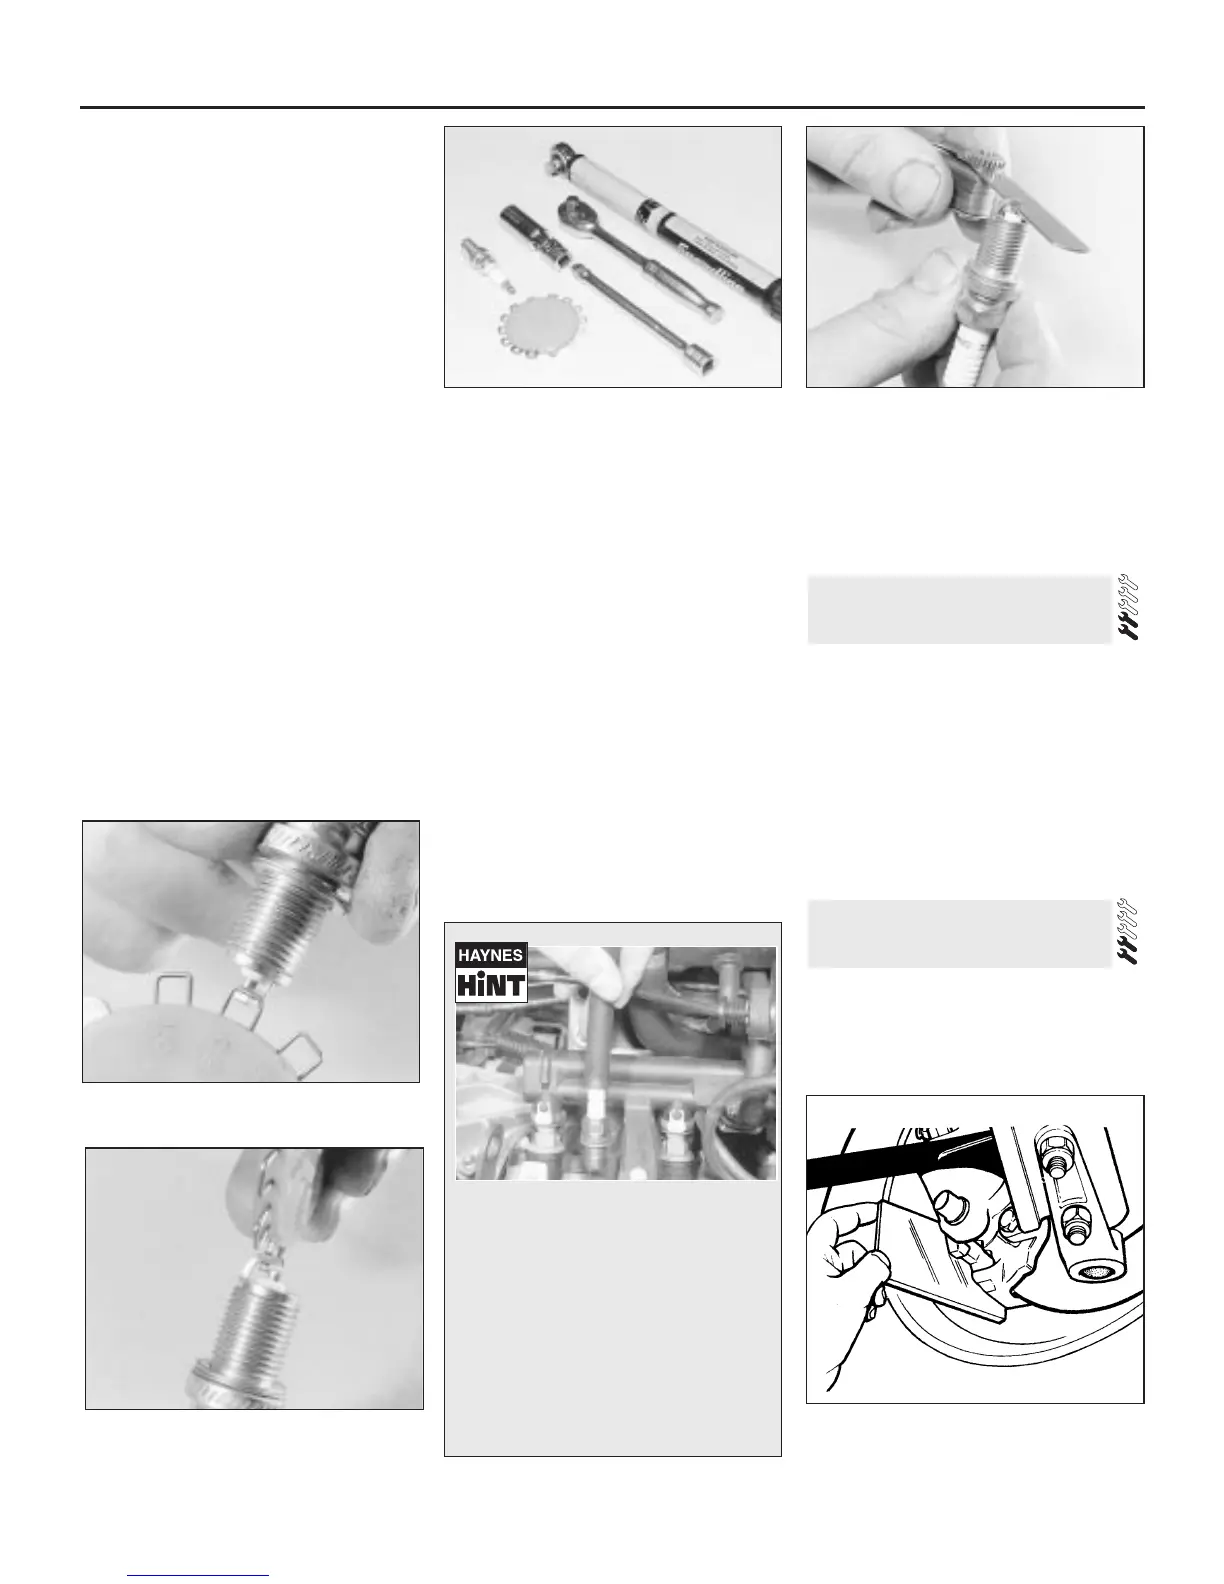
8 The spark plug gap is of considerable
importance, as if it is too large or too small,
the size of the spark and its efficiency will be
seriously impaired. The spark plug gap should
be set to the figure given in the Specifications
at the beginning of this Chapter.
9 To set it, measure the gap with a feeler
blade, and then bend open, or close, the outer
plug electrode until the correct gap is
achieved (see illustration). The centre
electrode should never be bent as this may
crack the insulation and cause plug failure, if
nothing worse.
10 Special spark plug electrode cap
adjusting tools are available from most motor
accessory shops (see illustrations).
11 Before fitting the plugs first ensure that the
plug threads and the seating area in the
cylinder head are clean, dry and free of carbon.
12 Screw the plugs in by hand initially and
then fully tighten to the specified torque. If a
torque wrench is not available, tighten the
plugs until initial resistance is felt, then tighten
by a further
1
⁄16 of a turn for the taper seat plugs
fitted to OHV engines, or
1
⁄4 of a turn for the
gasket seat type fitted to CVH engines. Do not
over-tighten the spark plugs, otherwise
damage to the threads may occur and they
will also be extremely difficult to remove in the
future.
13 Refit the plug leads in the correct order
ensuring that they are a secure fit over the
plug ends. Periodically wipe the leads clean to
reduce the risk of HT leakage by arcing and
remove any traces of corrosion that may
occur on the end fittings.
1 Place a mirror between the roadwheel and
the caliper and check the thickness of the
friction material of the disc pads (see
illustration). If the material has worn down to
the specified minimum or less, the pads must
be renewed as an axle set (four pads).
2 For a comprehensive check, the brake
pads should be removed and cleaned. This
will permit the operation of the caliper to be
checked, and the condition of the brake disc
itself to be examined on both sides. Refer to
Chapter 9 for further information.
1 Due to the fact that the rear brake drums
are combined with the hubs, which makes
removal of the drums more complicated than
is the case with detachable drums, inspection
of the shoe linings can be carried out at the
17 Rear brake shoe lining check
16 Front brake disc pad check
1•14 Every 6000 miles or 6 Months
15.9 Measuring the spark plug gap with a
feeler blade
15.10a Measuring the spark plug gap with
a wire gauge . . .
16.1 Checking the front disc pad wear
using a mirror
15.10b . . . and adjusting the gap using a
special adjusting tool
15.3 Tools required for spark plug
removal, gap adjustment and refitting
It is very often difficult to insert spark
plugs into their holes without cross-
threading them. To avoid this
possibility, fit a short length of 5/16-
inch internal diameter rubber hose
over the end of the spark plug. The
flexible hose acts as a universal joint
to help align the plug with the plug
hole. Should the plug begin to cross-
thread, the hose will slip on the spark
plug, preventing thread damage to the
aluminium cylinder head.
 Loading...