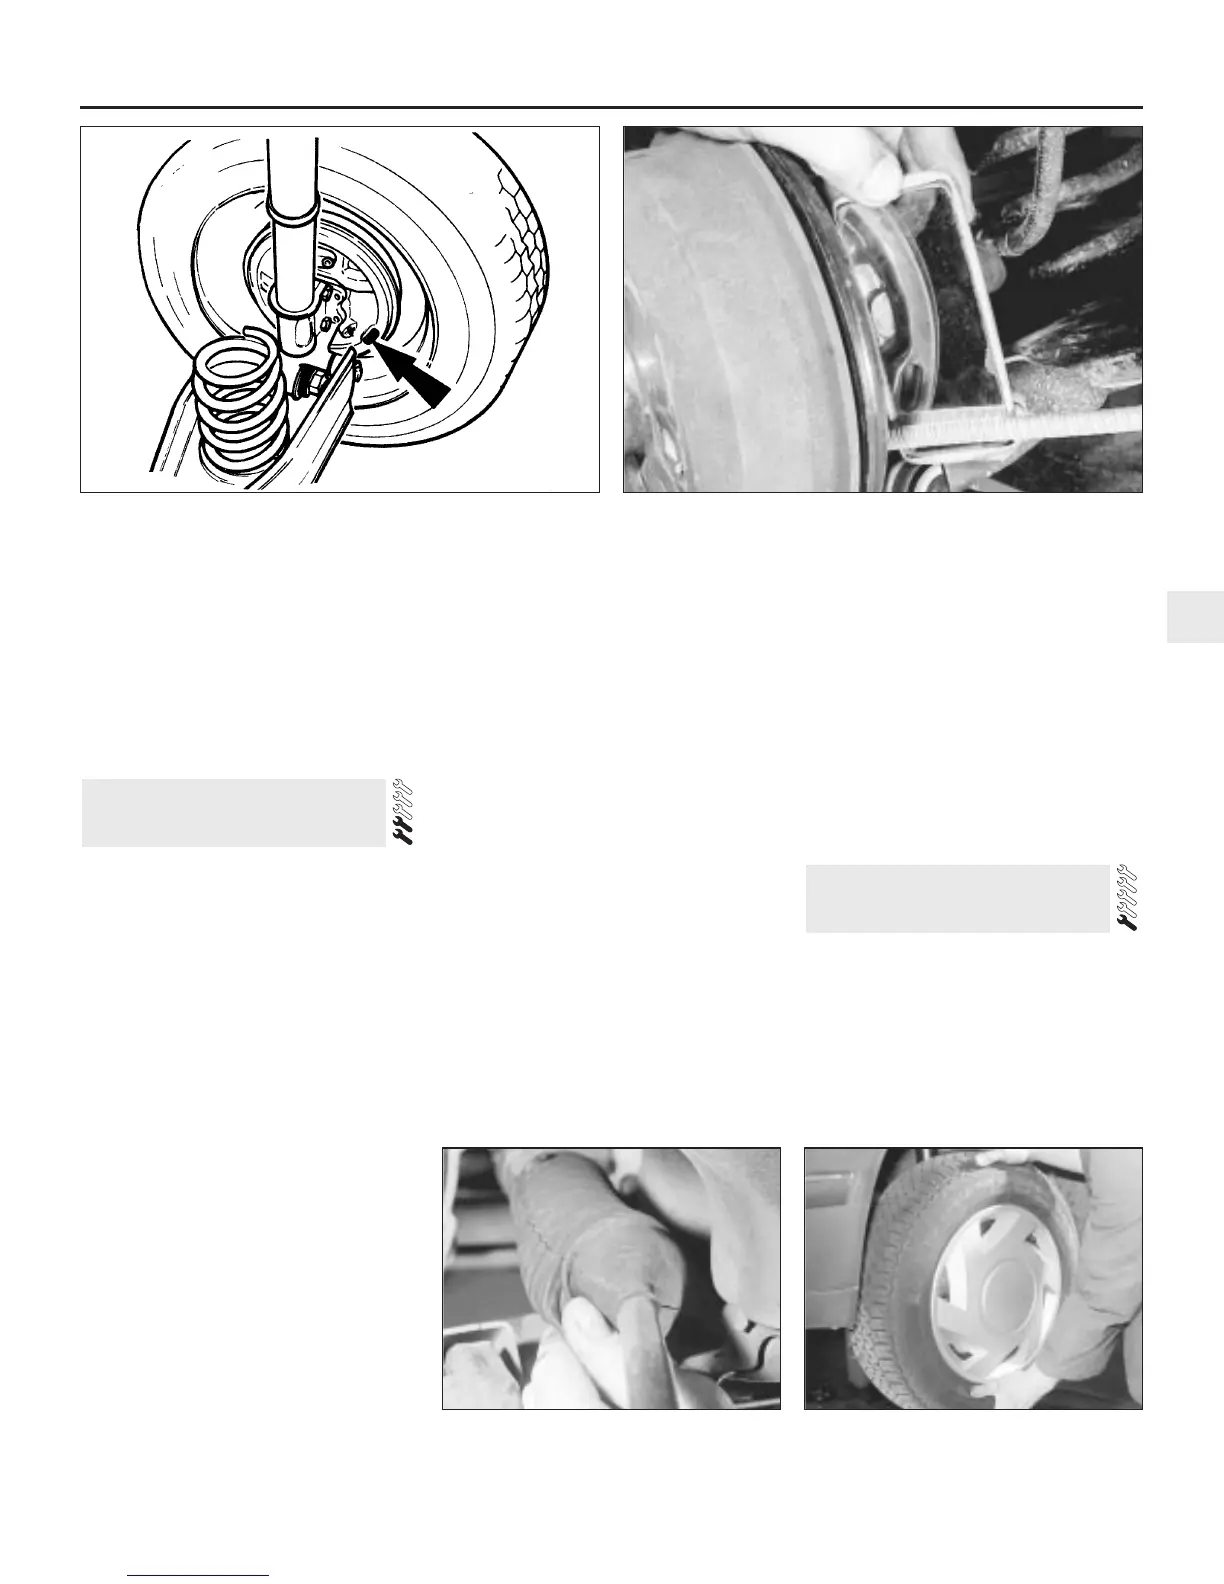
specified intervals by prising out the small
inspection plug from the brake backplate and
observing the linings through the hole using a
mirror (see illustrations).
2 A minimum thickness of friction material
must always be observed on the shoes. If it is
worn down to this level, renew the shoes.
3 Do not attempt to re-line shoes yourself but
always obtain factory re-lined shoes.
4 Renew the shoes in an axle set (four shoes),
even if only one is worn to the minimum.
Front suspension and steering
check
1 Raise the front of the vehicle, and securely
support it on axle stands (see “Jacking and
Vehicle Support”).
2 Visually inspect the balljoint dust covers
and the steering rack-and-pinion gaiters for
splits, chafing or deterioration (see
illustration). Any wear of these components
will cause loss of lubricant, together with dirt
and water entry, resulting in rapid
deterioration of the balljoints or steering gear.
3 Grasp the roadwheel at the 12 o’clock and
6 o’clock positions, and try to rock it (see
illustration). Very slight free play may be felt,
but if the movement is appreciable, further
investigation is necessary to determine the
source. Continue rocking the wheel while an
assistant depresses the footbrake. If the
movement is now eliminated or significantly
reduced, it is likely that the hub bearings are
at fault. If the free play is still evident with the
footbrake depressed, then there is wear in the
suspension joints or mountings.
4 Now grasp the wheel at the 9 o’clock and 3
o’clock positions, and try to rock it as before.
Any movement felt now may again be caused
by wear in the hub bearings or the steering
track-rod balljoints. If the inner or outer balljoint
is worn, the visual movement will be obvious.
5 Using a large screwdriver or flat bar, check
for wear in the suspension mounting bushes
by levering between the relevant suspension
component and its attachment point. Some
movement is to be expected as the mountings
are made of rubber, but excessive wear
should be obvious. Also check the condition
of any visible rubber bushes, looking for splits,
cracks or contamination of the rubber.
6 With the car standing on its wheels, have an
assistant turn the steering wheel back and
forth about an eighth of a turn each way.
There should be very little, if any, lost
movement between the steering wheel and
roadwheels. If this is not the case, closely
observe the joints and mountings previously
described, but in addition, check the steering
column universal joints for wear, and the rack-
and-pinion steering gear itself.
7 Visually check that each lower arm balljoint
is correctly located in the hub carrier, ensuring
that the Torx type pinch-bolt is fully engaged
in the groove in the balljoint stud.
Suspension strut/shock absorber
check
8 Check for any signs of fluid leakage around
the suspension strut/shock absorber body, or
from the rubber gaiter around the piston rod.
Should any fluid be noticed, the suspension
strut/shock absorber is defective internally,
and should be renewed. Note: Suspension
struts/shock absorbers should always be
renewed in pairs on the same axle.
9 The efficiency of the suspension
strut/shock absorber may be checked by
bouncing the vehicle at each corner.
Generally speaking, the body will return to its
normal position and stop after being
depressed. If it rises and returns on a
rebound, the suspension strut/shock
absorber is probably suspect. Examine also
the suspension strut/shock absorber upper
and lower mountings for any signs of wear.
1 Periodically check the belts for fraying or
other damage. If evident, renew the belt.
2 If the belts become dirty, wipe them with a
damp cloth using a little detergent only.
3 Check the tightness of the anchor bolts and
if they are ever disconnected, make quite sure
that the original sequence of fitting of
washers, bushes and anchor plates is
retained.
19 Seat belt check
18 Suspension and steering
check
Every 6000 miles or 6 Months 1•15
1
17.1a Brake shoe viewing hole location (arrowed) in backplate 17.1b Checking rear brake lining wear with a mirror
18.3 Rocking the roadwheel to check
steering/suspension components
18.2 Checking a steering gear gaiter
 Loading...