4. Adjustments
Adjustments set the safe running of the gate. Follow the order
below. On completion additional controls and safety devices can
be wired in without the need to re-adjust.
DIP switches. Typical setting; DIP1,2,3 on, DIP4 off. Refer to
diagrams on previous page for DIP5. Pause times add
together. (eg DIP6&7 ON gives 50secs).
____________________________________
RV. Speed setting. It determines kinetic energy of the gate which
affects mid travel safety. Set heavy gates to run slower.
____________________________________
LV. Sets the speed in slow down zone. Set to close the gate
firmly against the post within force test limits.
____________________________________
Force. Regulates the maximum force applied by the motor before
obstacle detection kicks in. Set it high enough to move the
gate reliably, but not much more. The finer it is set, the more
sensitive to reversal.
____________________________________
Limit learning. Reset the skis after setting speed and force then re-
run the limit learning. Hold down ST button for 5 secs until
DL5 lights then let go. Press ST again. Gate opens and stops
at the limit. Run a cycle.
5. Remotes
Each remote button must be programmed individually. Buttons can
be set for full opening (stops at limit switch), or pedestrian opening
stops after 1.5m. To enable partial opening set DIP1 off, DIP2 on.
Up to 16 remotes can be programmed in. A programmed button
when pressed, will light DL6 brightly. An un-programmed button
flashes DL6 briefly, but shows the remote is functioning.
Full opening. Press CODE button for 2secs until DL6 lights. Press
the new remote button twice. DL6 switches off
Pedestrian opening. Set DIP1 off and DIP2 on. Press CODE for
2secs until DL6 lit. Press CODE again. DL6 flashes. Press
remote’s pedestrian button twice. DL6 switches off.
1. Quick setup
Motor must be engaged with the rack and skis set for short travel.
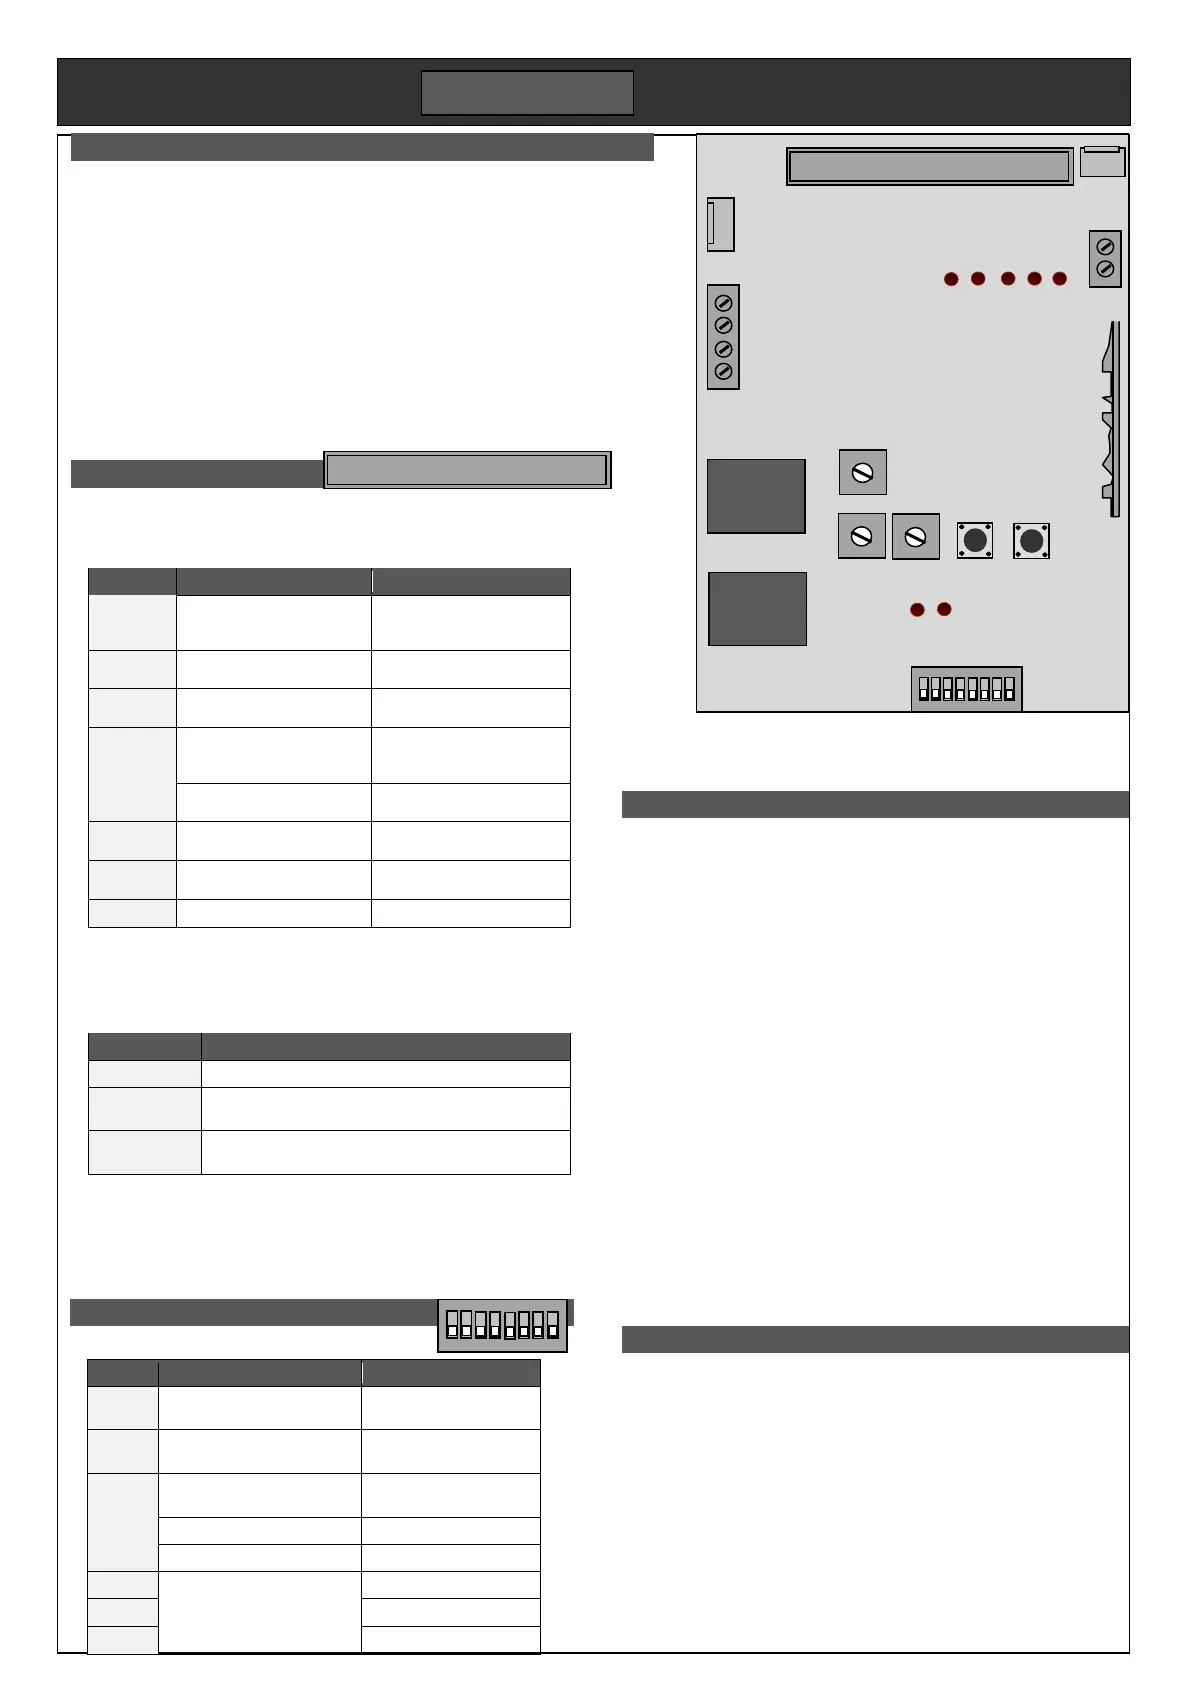
1. Connect Mains supply to L & N terminals on power board.
2. Connect together terminals IR, Stop & Gnd.
3. Set all DIP switches down. Set LV, RV, Force anti-clockwise
4. Hold down ST button for 5 secs until DL5 lights. Let go.
5. Press ST once. Gate opens and stops at left limit.
The gate will now open and close on the remote control. A test setup can be
done on the bench for familiarity. Limits will need to be reset.
 Loading...