EasyManua.ls Logo

Foscam R4M - User Manual

Foscam R4M
16 pages
Print Icon
To Next Page IconTo Next Page
Loading...
B. Physical Description
Reset
Micro SD
Card Slot
Microphone
LAN
Power
Network light
Power light
Speaker
Security Tips
V2.1
305503000458
IP Camera
Quick Setup Guide
Mounting Bracket
Power Adapter
WiFi Antenna
Quick Setup Guide
Quick Setup Guide
Infrared LED
Lens
Antenna
Warning:
Ethernet Cable
To view this guide in other languages (e.g. Español, Français,
Deutsch, Nederlands), and for detailed manuals, tools, etc., please
visit foscam.com/downloads.
Setting Up Your Foscam
Security Camera
Package Contents
1. Getting Started
Please change the camera's password regularly, using a
combination of numbers, letters and special characters.
We recommend that you regularly update your camera with the
latest available software and rmware to ensure the best
experience with your camera.
The cords on this product are a potential strangulation hazard. For child
safety, please keep these cords out of the reach of children.
3. Setting Up Your Camera:
Connection via the Foscam App
(Recommended)
To ensure a smoother video experience on your smart phone, it is
recommended that your smart phone meet the following
specications:
iOS: version 8.1 or higher.
Android: 4.1 or higher, using a device with a Graphics Processing
Unit (GPU).
Before You Get Started
Scan the QR code below to download and install the Foscam APP.
Note: For the best experience, please update the APP to the latest
version!
WiFi connection
2. Plug the power adapter into the camera, and please wait for a
few seconds until hearing the Ready for WiFi conguration.
Conrm
WiFi connection
WiFi
3. Make sure that your smart phone is connected to your WiFi
router.
Foscam_1
Foscam_2
xxxxx_2.4G
xxxxx_5G
Tips: If you didnt hear the voice prompt, press and hold reset for
about 10 seconds to reset the camera.
Tips: R2M and R2C cameras only support 2.4GHz WiFi network,
you
need to connect to the 2.4GHz network if your WiFi router is
dual-band. R4M and R4S cameras supports dual-band 2.4GHz and
5GHz WiFi networks, so you can choose the channel with the
stronger signal to use. For example, you can select the
corresponding channel according to the camera model, and choose
your SSID: XXXXX_2.4G or XXXXX_5G.
1. Please tighten the antenna clockwise and make sure it is in a
vertical position.
Tighten
clockwise
3
5. After logging into Foscam APP, select Tap to add a camera” or
"+" icon on the upper right corner, then select "Scan the QR
code" and scan the QR code that labeled at the bottom of your
camera (see illustrations on next page).
4. Open the foscam APP and please sign up for a Foscam account, or
sign in if you have one already.
Scan the QR code,
located at the
bottom of your
camera
Tap + icon
Select ”Scan the code
Tap to add a camera
Add Device
<
Scan the QR code
Search in LAN
Manually add
Scan QR Code
<
Model: XXX
MAC ID:000000000000
Username(default):admin
Password(default):(blank)
DDNS:XXXXXX.
myfoscam.org
FCC ID:XXXXX
IC:12558A-XX
S/N:FIAI1403000001
UID:XXXXXXXXXXX
FHD Wireless IP Camera
6. In Choose Setup Method, select WiFi connection and enter
your WiFi's password and tap "Conrm", afterwards tap the
Congure WiFi connection button.
Choose setup method
Wired Connection
WiFi connection
Ready for Wi-Fi
configuration
Select ”WiFi connection
WiFi connection
The device will added by scanning the QR
code and sound waves.
Foscam_5.0G
<
2.4GHz / 5.0Hz
WiFi Password
Conrm
Enter your WiFi's password
and tap "Conrm"
7. Please scan the QR code on the phone screen with the camera,
then you will hear a voice prompt say ”WiFi connecting. Select
the checkbox and tap ”Next”.
Place the QR code directly
in front of the camera
Tick the checkbox
and tap “Next”
Tips: Please place the QR code on the phone screen about 10 to
15cm (3.94 to 5.9in) away, and if you encounter diculties you can
try to move the screen slowly around 10 – 15cm (3.94 - 5.9in).
For WiFi configuration, please point the
QR code to the camera directly.
WiFi connection
<
I have heard the voice prompt
“WiFi connecting”
Next
10~15cm
3.94~5.9in
Reset
Question and Answer IconNeed help?

Do you have a question about the Foscam R4M and is the answer not in the manual?

Summary

Getting Started with Your Foscam Camera

Package Contents Overview

Lists all items included in the camera's packaging for initial setup.

Security Best Practices

Recommends regular password changes and firmware updates for optimal security.

Camera Physical Description

Component Identification

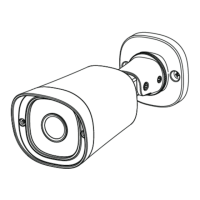
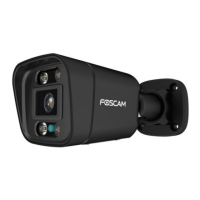
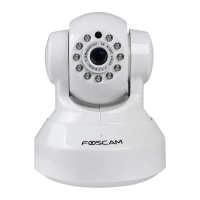
Details the physical parts and ports of the Foscam security camera.

Important Safety Warning

Alerts users to potential strangulation hazards from product cords for child safety.

Setting Up Your Camera via Foscam App

App Download and Installation

Instructions on how to get and install the Foscam mobile application.

WiFi Connection Process

Step-by-step guide to connect the camera to a WiFi network using the app.

Finalizing Camera Setup

Covers camera naming, login credentials, and successful connection confirmation.

Alternative Access Methods

Foscam VMS for PC Management

Introduces Foscam VMS for managing multiple cameras on a computer.

Foscam Cloud Service Access

Details how to access your camera remotely via the Foscam Cloud website.

Hardware Installation

Wall Mounting Guide

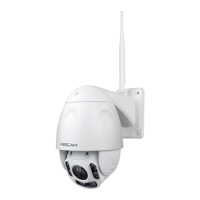
Instructions on how to securely mount the camera using the provided bracket.

Important Notices and Safety

Account & Password Management

Covers camera credentials, cloud accounts, and reset procedures.

Storage Media Options

Explains supported storage formats like cloud, NVR, and Micro SD cards.

Firmware Upgrades and Safety Tips

Guidance on updating firmware and general product safety precautions.

Technical Information

Product Performance Specifications

Lists key technical details like WLAN frequency and power supply.

Technical Support and Contact

Provides information on how to get help and contact support.

Overview

This document serves as a Quick Setup Guide for a Foscam security camera, detailing its features, setup process, and maintenance tips. The camera is designed for home security, offering remote monitoring and various connectivity options to ensure comprehensive surveillance.

Function Description

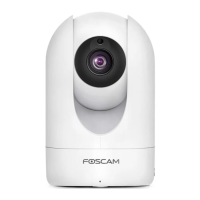
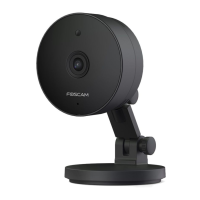
The Foscam security camera is an IP camera equipped with a lens and infrared LEDs for clear video capture, even in low-light conditions. It includes a built-in speaker and microphone, enabling two-way audio communication, which is useful for interacting with individuals near the camera or deterring intruders. A network light indicates its connection status, and a reset button is provided for troubleshooting or restoring default settings. The camera supports both wired (Ethernet cable) and wireless (WiFi antenna) connections, offering flexibility in placement and network integration. For local storage, it features a Micro SD card slot, allowing for direct recording onto a memory card. The device is powered by a DC 5V power adapter.

Usage Features

The primary method for setting up and using the Foscam camera is through the Foscam App, available for both iOS (version 8.1 or higher) and Android (version 4.1 or higher, with a Graphics Processing Unit). Users are guided to download the app by scanning a QR code.

For WiFi connection, the process involves:

  1. Antenna Installation: Tightening the WiFi antenna clockwise and ensuring it's in a vertical position.
  2. Power On: Plugging in the power adapter and waiting for the "Ready for WiFi configuration" voice prompt. If the prompt isn't heard, the camera can be reset by holding the reset button for about 10 seconds.
  3. Smartphone Connection: Ensuring the smartphone is connected to the desired WiFi router.
  4. App Setup: Opening the Foscam App, signing up or logging in, and then adding the camera by scanning the QR code located at the bottom of the device.
  5. WiFi Configuration: Selecting "WiFi connection" in the app, entering the WiFi password, and tapping "Confirm" to configure the connection.
  6. QR Code Scan: Scanning a QR code displayed on the phone screen with the camera. The camera will then announce "WiFi connecting." Users should place the phone screen 10-15cm (3.94-5.9in) from the camera lens for optimal scanning.
  7. Connection Confirmation: Waiting for the "Wireless connection succeeded" notification, which indicates a successful WiFi connection.
  8. Camera Naming: Setting a name for the camera within the app.
  9. Security Setup: After successful connection, users are prompted to set a new username and password for the camera to enhance security before viewing live video.

The camera supports different WiFi frequencies depending on the model. R2M and R2C models support 2.4GHz networks, while R4M and R4S models support dual-band 2.4GHz and 5GHz networks, allowing users to choose the channel with the stronger signal.

Beyond the mobile app, the camera can also be accessed via Foscam VMS, a PC tool compatible with Windows and Mac. Foscam VMS allows users to manage multiple cameras (up to 36 simultaneously) without requiring plug-ins. To add a camera via Foscam VMS, users need to run the software, create a local administrator account, log in, and then use the "+" icon to follow the setup wizard.

Additionally, the camera integrates with Foscam Cloud Service, accessible via www.myfoscam.com. This service offers remote access, management of WiFi security cameras, access to the latest features, and cloud storage. Users who have registered an account in the Foscam App can use the same login credentials for Foscam Cloud.

For hardware installation, the camera comes with a mounting bracket. Users are instructed to screw the mount onto a wall using the provided screws. The thumb screws on the mount can be loosened to adjust the camera's position, and then tightened securely once the desired angle is achieved.

Maintenance Features

Several maintenance and security features are emphasized in the guide:

  • Password Management: Users are strongly advised to regularly change the camera's password, using a combination of numbers, letters, and special characters, to significantly improve security.
  • Firmware Updates: Regular updates of the camera's software and firmware are recommended to ensure the best experience and access to the latest features. Firmware can be updated through the Foscam App using the "One-Key-Online Upgrade" feature (Settings > Firmware Upgrade) or by downloading the latest version from the official Foscam website.
  • Reset Functionality: If the camera's username or password is forgotten, or if the camera fails to add during setup, the reset button can be pressed and held for more than 10 seconds while the camera is powered on. This will reboot the camera and restore default settings, allowing for reconnection.
  • Storage Options: The camera supports various storage formats, including cloud storage, Network Video Recorder (NVR), and Micro SD card (FAT-32 format only). For recording and playing back large amounts of video, using a Foscam NVR device is recommended.
  • Physical Installation: It is crucial to install the camera and bracket securely using the provided screws to prevent accidents.
  • Environmental Conditions: The product should be used within the specified temperature range, as extreme temperatures can cause product failure. To prevent fire or electric shock, the camera should be kept in a cool, dry place.
  • Child Safety: The cords associated with the product are a potential strangulation hazard, so they should be kept out of reach of children. The product itself is not a toy, and children should use it under adult supervision.
  • Network Security: Users are encouraged to change the default port to a greater range to enhance connection safety. Detailed instructions for this can be found in the user manual on the Foscam website.
  • Activity Monitoring: Regularly checking the logs of Foscam cameras is advised, as these logs provide information on which IP addresses are accessing the camera, aiding in security monitoring.

The guide also notes that due to product upgrades, there might be slight inconsistencies between the guide and the official website information, and the website should be considered the current standard.

Foscam R4M Specifications

General IconGeneral
LED typeIR
Night vision distance10 m
Number of illumination LEDs13
TypeIP security camera
CertificationCE, FCC
Placement supportedIndoor
Connectivity technologyWireless
Audio system2-way
Pan range0 - 350 °
Tilt angle range0 - 100 °
Minimum illumination0 lx
Sensor typeCMOS
Number of sensors1
Optical sensor size1/3 \
Fixed focal length4 mm
Maximum aperture number2.1
Bluetooth-
Wi-Fi standards802.11b, 802.11g, Wi-Fi 4 (802.11n)
Supported network protocolsWPA, WPA2
Compatible memory cardsMicroSD (TransFlash)
Maximum memory card size128 GB
Form factorCube
Mounting typeDesk
Product colorWhite
Total megapixels4 MP
Maximum resolution2560 x 1440 pixels
Video formats supportedH.264
Mobile operating systems supportedAndroid, iOS
DC output current2 A
DC output voltage5
Power source typeDC
Power consumption (typical)6 W
Operating temperature (T-T)-10 - 55 °C
Operating relative humidity (H-H)20 - 85 %
Sustainability certificatesRoHS
Harmonized System (HS) code85258900
Weight and Dimensions IconWeight and Dimensions
Width74 mm
Height119 mm

Related product manuals