English
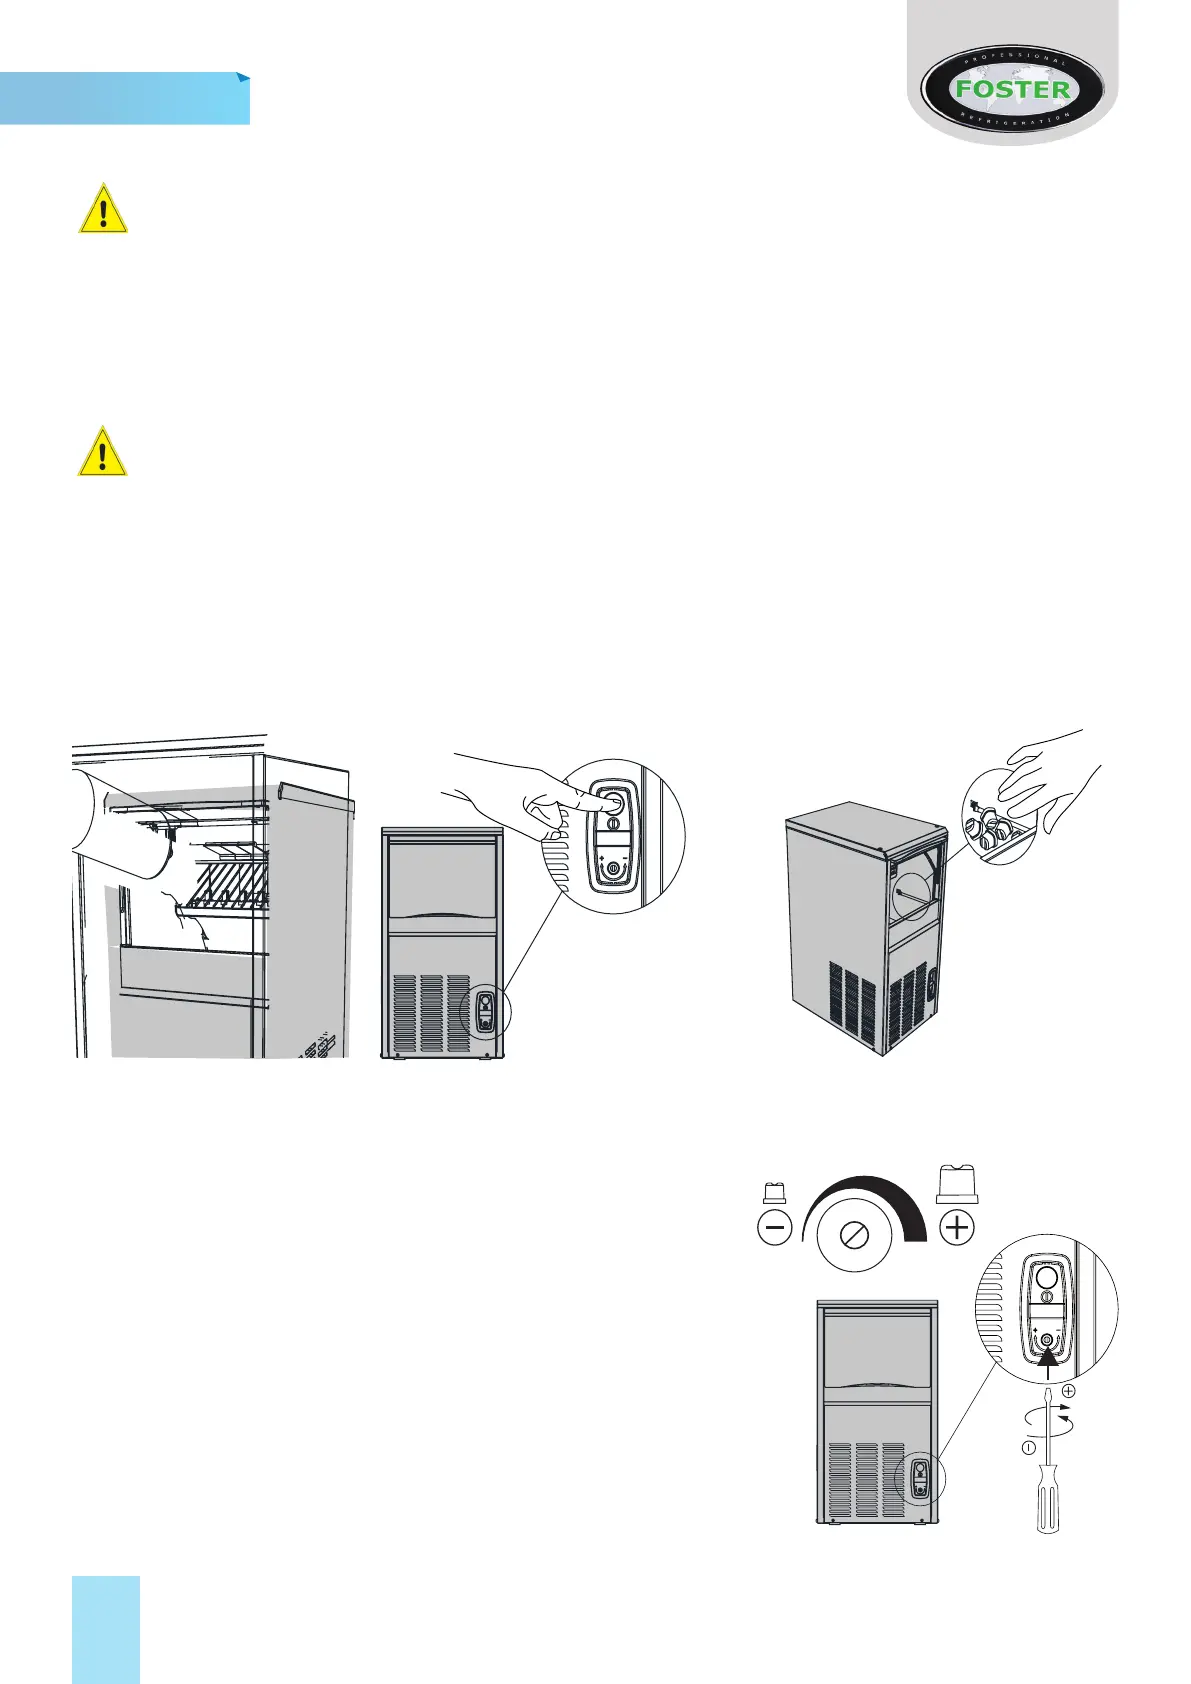
Warning: When switching on for the rst me or aer a prolonged period without use or aer
cleaning, the tray in the evaporator area must be lled with water (Fig. 2). In order to carry out this
operaon , li the door , slide back the curtainand pour clean water into the evaporator tray.
For subsequent cycles this will not be necessart.
Check the connecons to mains water and electricity, open the water supply tap. To start the machine,
press the illuminated switch (Fig. 3). It is recommended to not use the rst ve cycles of ice.
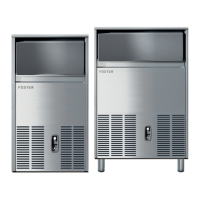
The ice maker is equipped with a thermostat inside the ice cabinet (Fig. 4), which stops the
machine and the producon of ice when the sensor comes into contact with the ice accumulated
inside the cabinet. Never switch o the water supply when the machine is on, do not obstruct the
air intake ducts.
Note: Aer removing ice, free the control bulb from any ice residue to ensure that ice making restarts
swily (Fig. 4).
5
2
3
4
Ice Weigth
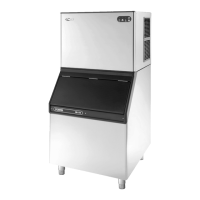
Cube adjustment
Cube dimensions can vary depending on varying condions.
To adjust the size of the cube, rotate the adjustement screw (g.5)
clockwise to increase the sizeant an-clockwise to decrease the size.
5