605-01-278 7
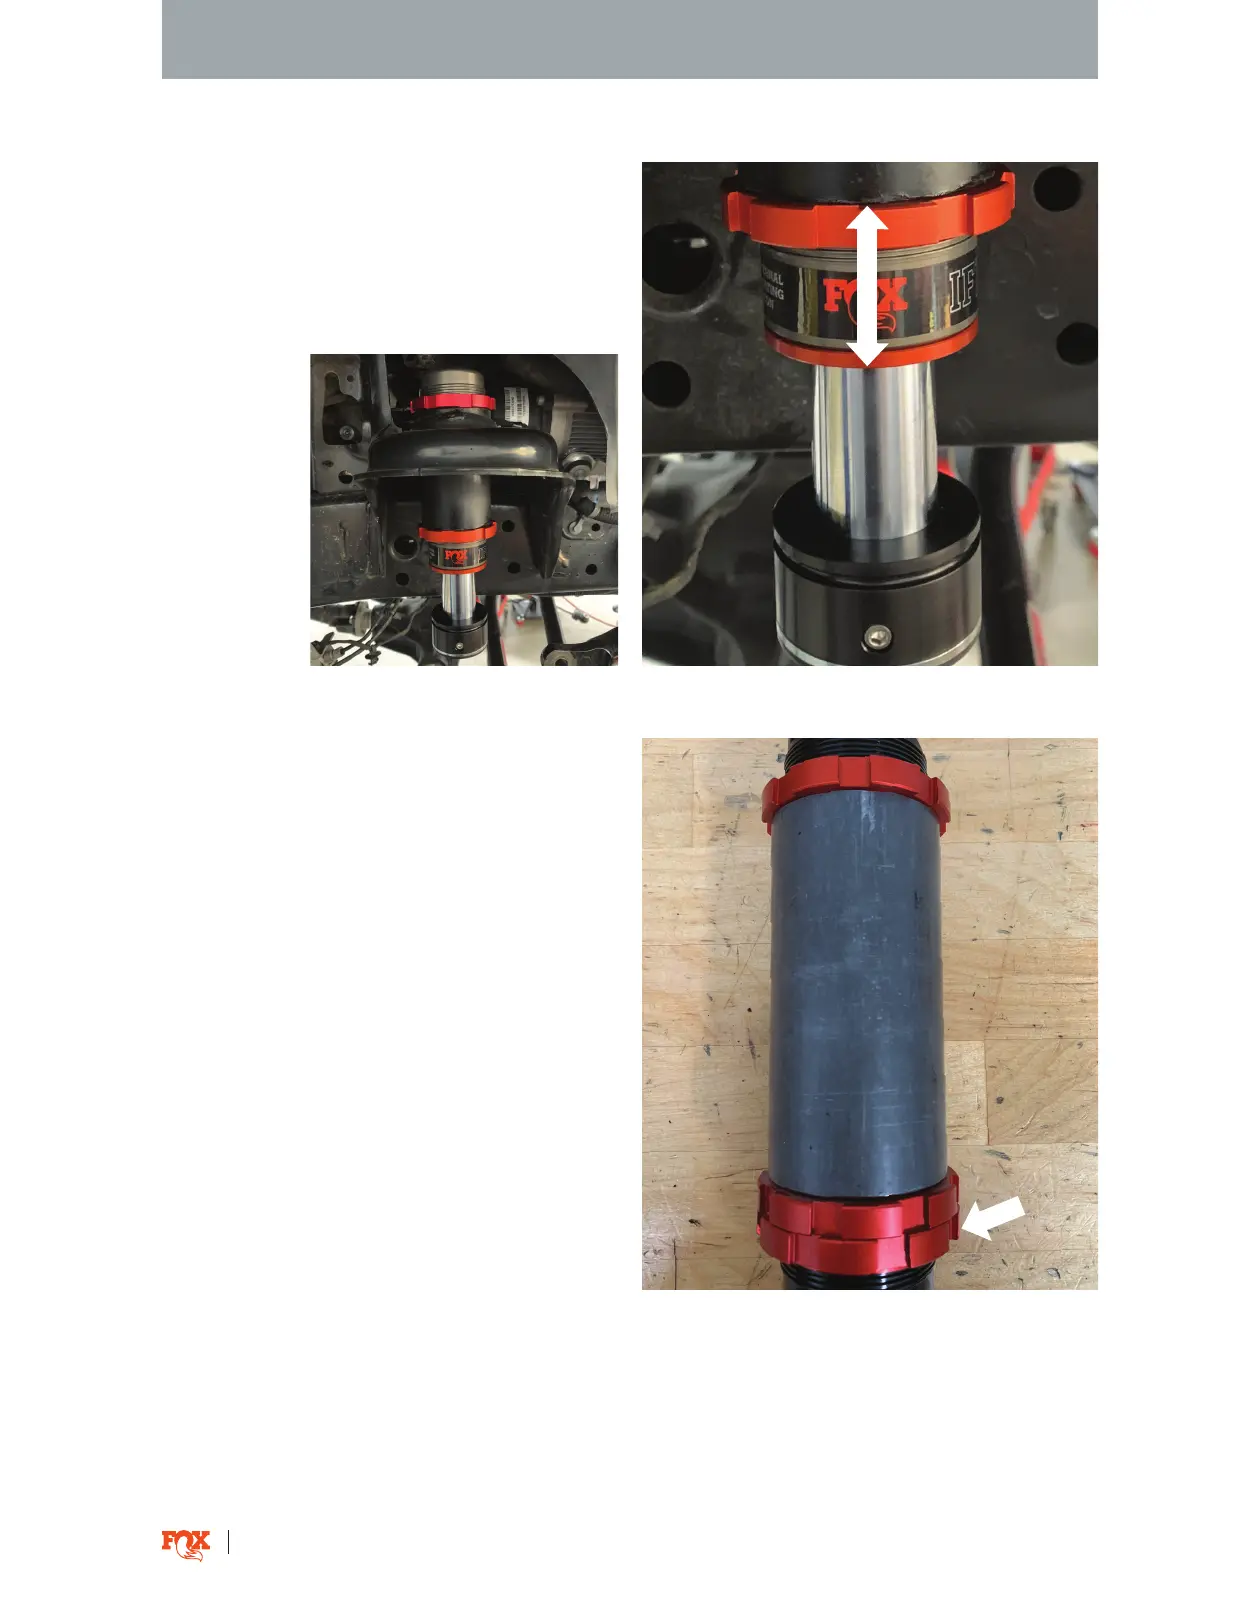
11. Use the 3 supplied lock rings to install the bump
stop. The orange bump stop bearing cap must
protrude at least 1.75” from the cut line. Ensure the
lip on the lock ring goes into the OEM bump stop
tube (Fig. 6).
12. Apply medium-strength thread-lock to the
lock ring. Utilize all three lock rings per bump
stop. Tighten both the upper and lower lock
rings with the supplied spanner wrench. Use
the flat side of the third lock ring as a jam nut
against the lower lock ring (Fig. 5).
13. Repeat steps 1 through 12 on both sides of
the vehicle.
14. Set up and adjust the bump stops so the full
bump position does not bottom out on the shock,
or suspension components other than the bump
stop and bump tube. Depending on the application,
bump stop spacers may be required.
14. If bump stop spacers are used, the spacer must
be flat without any protruding hardware or large
recesses than could potentially damage the rubber
bump stop cap.
15. Reinstall coil springs and other previously
removed suspension components. Torque to OEM
specification.
16. Reinstall the wheels and torque to OEM
specification. Reconnect the battery.
Fig. 5: Install the lock rings. Fig. 6: The bearing cap must protrude 1.75”.
Fig. 7: The third lock ring acts as a jam nut.
CHECK AND FINAL DETAILS
1.75”
 Loading...