Page | 23
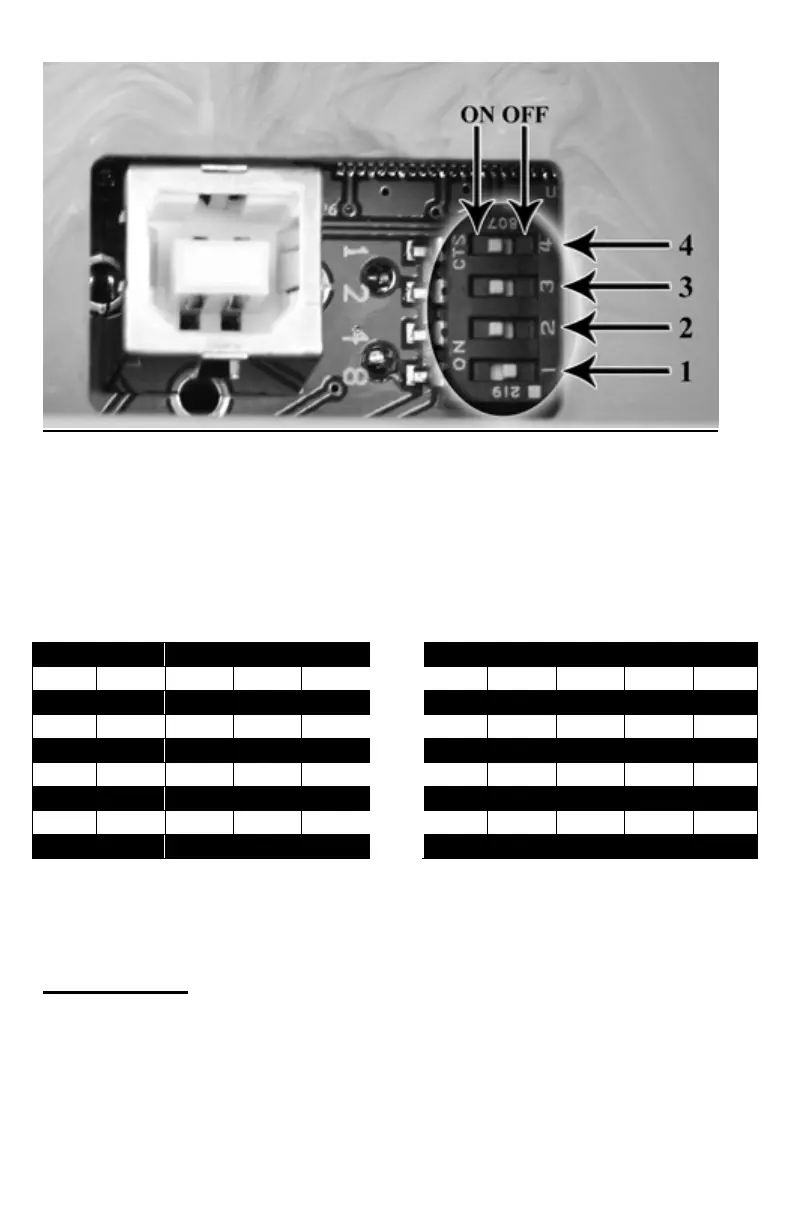
The above image is looking directly down onto the switch from the battery
compartment. The two possible switch positions for each of the four switches
are noted on the top as ON and OFF. The ON position is selected by moving
the switch to the left (towards the USB port). The OFF position is selected by
moving the switch to the right. Each of the four switches is marked 1 – 4. When
referring to matrix below, be sure that you modify the switches starting with 1
then continuing on through number 4.
CH 1 2 3 4 CH 1 2 3 4
0 OFF OFF OFF OFF 8 OFF OFF OFF ON
1 ON OFF OFF OFF 9 ON OFF OFF ON
2 OFF ON OFF OFF 10 OFF ON OFF ON
3 ON ON OFF OFF 11 ON ON OFF ON
4 OFF OFF ON OFF 12 OFF OFF ON ON
5 ON OFF ON OFF 13 ON OFF ON ON
6 OFF ON ON OFF 14 OFF ON ON ON
7 ON ON ON OFF 15 ON ON ON ON
NOTE: Unlike the TX-200 transmitter, the TX-505 will not be able to control
FOXPRO units such as the FX3, FX5, Scorpion, etc.
6.14 FOXBANG
TURNING FOXBANG ON OR OFF
1. Access the Main Menu on your TX-505 (while powered on, press and
hold the rotary selector knob down for 3-5 seconds to bring up the
menu). Use the selector knob to highlight the FOXBANG/FOXGRIP