8
REPLACING THE OVEN LAMP
WARNING: To prevent electric shock, make sure
the appliance is turned o before replacing the
lamp.
• Leave the oven gap and heating elements
to cool down.
• Cut o the power connection.
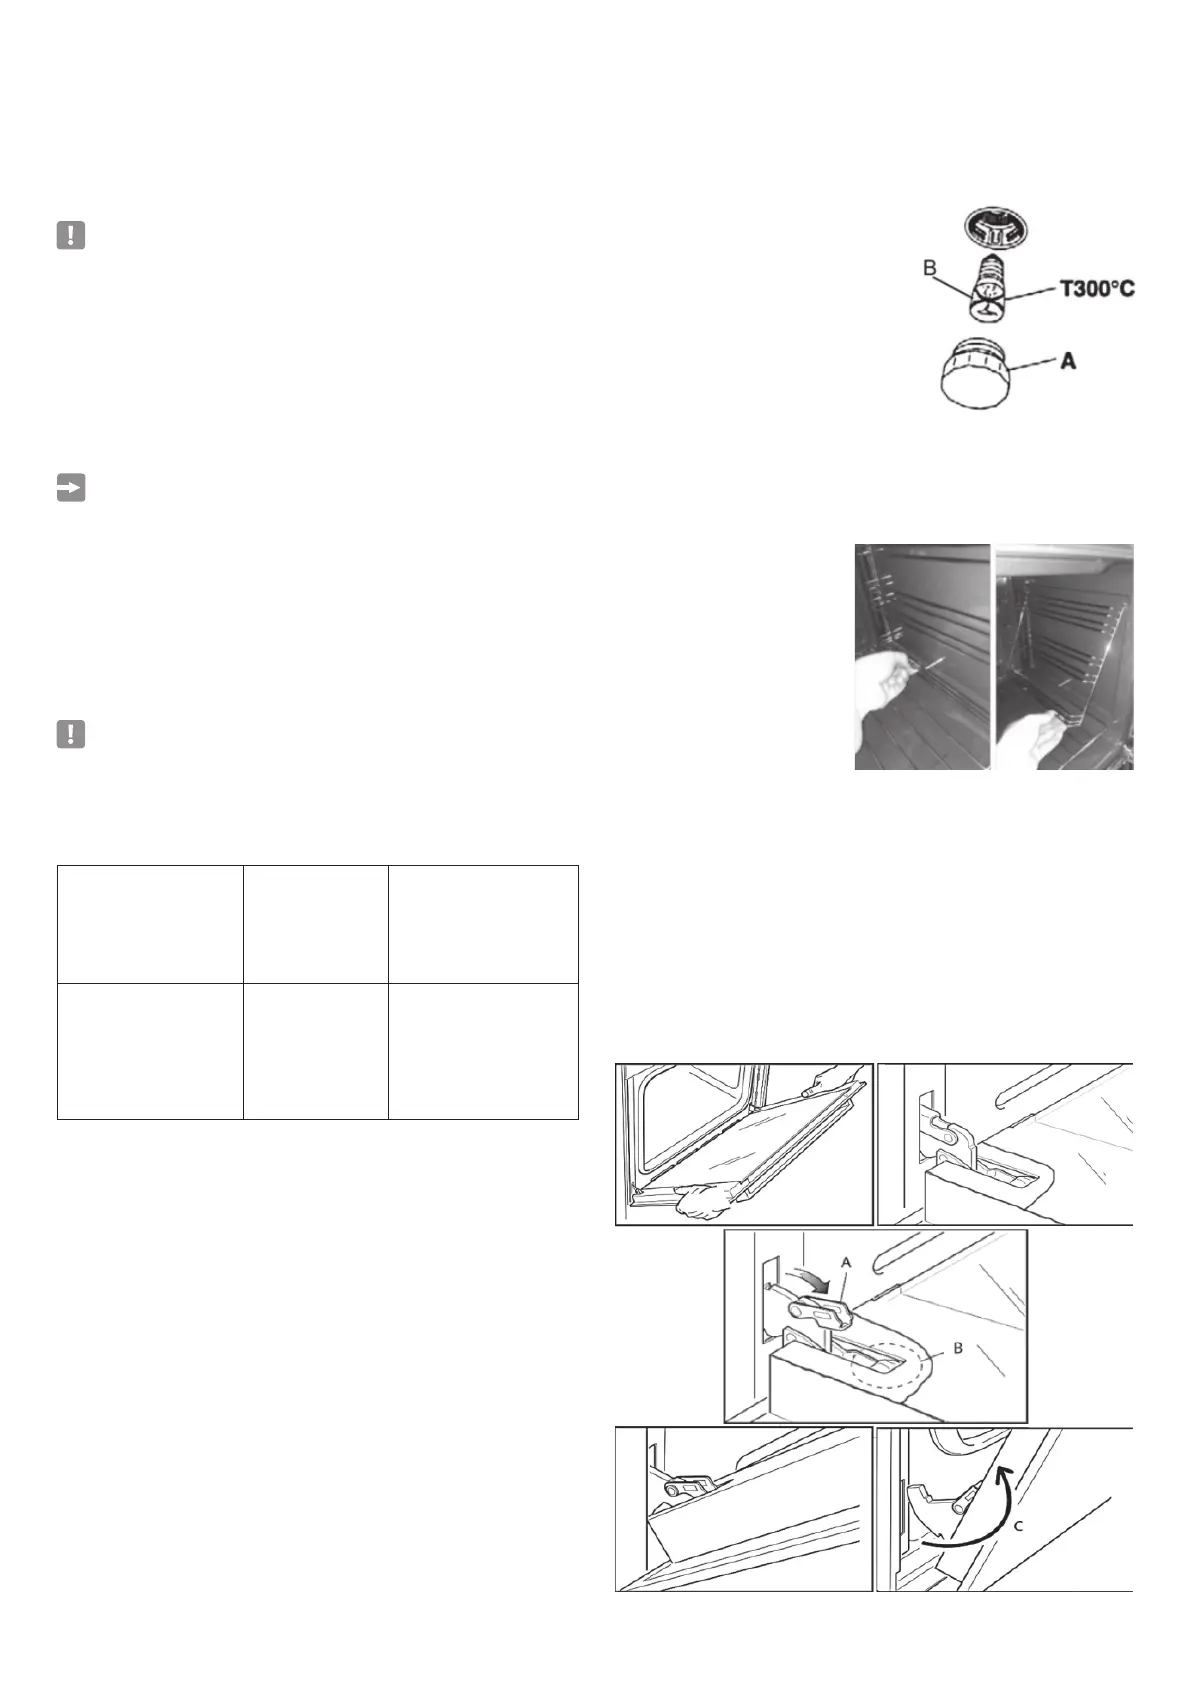
• Remove the protective cover «A» (Figure
10).
• Remove the bulb «B» and replace with
a bulb suitable for high temperatures
(300°C) that is 230 V or 220-240 V, E14
speci cations (Check the Watt power on
the bulb).
• Replace the protective cover «A».
INSTALLATION AND REMOVAL OF SIDE RAIL FRAMES
• Place the side rail frames into
the holes on the side walls
inside the oven (Figure 11).
• Place the racks as shown.
• Follow the reverse order to
remove.
REMOVING THE OVEN DOOR
Be careful, oven door is heavy. When in doubt, do not try to remove the door.
Oven door can be removed as follows:
• Open the door to the end (Figure 13)
• Completely open the A arm on the left and right hinges (Figure 14).
• Hold the door as shown in Figure 12.
• Close the door slowly (Figure 15) until the left and right hinge arms A lock
on the B part of the door (Figure 14).
• Follow Ok C and remove the hinge hooks from their places (Figure 16).
• Place the door on a soft surface.
MAINTENANCE
MAINTENANCE
We recommend that you clean the appliance when it is cold, especially the enamel
parts. Avoid using alkaline or acidic materials (lemon juice, vinegar, etc.) on the
surfaces. Do not use chlorine or acid-based cleaning agents.
WARNING
When installed correctly, your product meets all the safety conditions
foreseen for this product category. But special care should be given to
the rear and bottom sides of the appliance, since it can have sharp or hard
corners that can cause injuries and these areas should not be touched.
• INSIDE THE OVEN
The oven must always be cleaned when cold after use. Clean the gap with a mild
detergent solution and warm water.
Appropriate chemicals can be used after consulting the recommendations of the
manufacturer and trying it on a small part of the gap. Abrasive cleaning agents or
abrasive clothes must not be used on the surfaces of the gap.
NOTE: The manufacturer of this appliance does not take responsibility for
damages caused by chemicals or abrasive cleaning.
• ENAMEL PARTS
All enamel parts are cleaned only with sponge and soap water, or otherwise non-
abrasive products.
Drying with a micro ber or soft cloth is preferred.
• STAINLESS STEEL, ALUMINUM, PAINTED PARTS AND SILKSCREEN
SURFACES
Clean using an appropriate product. Always dry thoroughly.
IMPORTANT: These parts must be cleaned very carefully to prevent
scratches and wear. Use a soft cloth and acid-free soap.
• GLASS CONTROL PANEL (Only in some models)
Clean using an appropriate product. Always dry thoroughly.
Do not use hard abrasive cleaning agents or sharp-edged metal scratchers to clean
the control panel as they may scratch the surface and cause the glass to break.
IMPORTANT:
Cut o the appliance’s
power before you start
cleaning.
CAUTION:
Wait for the oven to
cool down and take
care not to touch the
hot heating elements
inside the oven gap.
WARNING:
Do not use abrasive
materials or acidic
detergents as they will
scratch the surface without
repair.
IMPORTANT:
Do not use steam cleaning
appliances as the humidity
can get into the oven and
make the appliance
unreliable.
CAUTION:
Do not store foreign
materials inside the
oven.
WARNING:
Do not use hard abrasive
materials or sharp-edged
metal scratchers as they will
scratch the surface beyond
repair and may cause the
glass to break.
Fig. 10
Fig. 11
Fig. 12
Fig. 15
Fig. 13
Fig. 16
Fig. 14
 Loading...