4. Carefully return the washer to an
upright position.
5. Carefully move the washer to within
4 feet (122cm) of the final location.
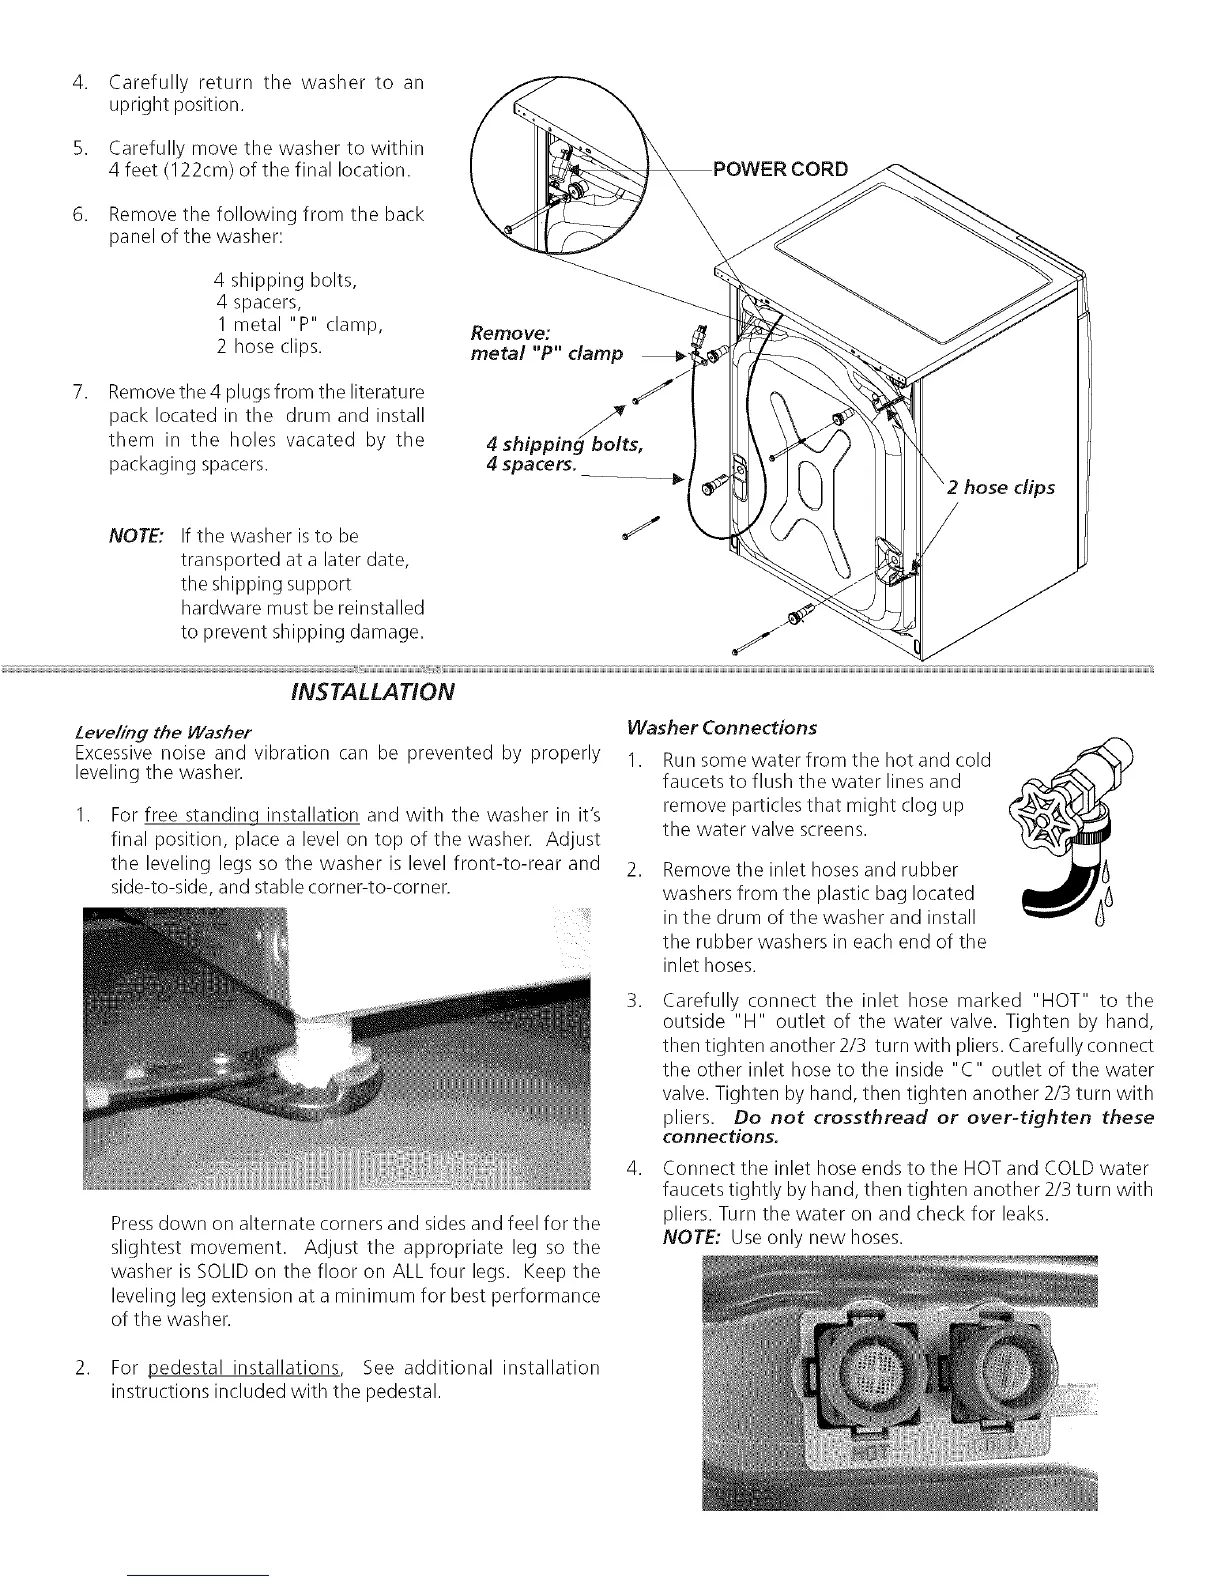
6. Remove the following from the back
panel of the washer:
4 shipping bolts,
4 spacers,
I metal "P" clamp,
2 hose clips.
7. Removethe 4 plugs from the literature
pack located in the drum and install
them in the holes vacated by the
packaging spacers.
NOTE: If the washer is to be
transported at a later date,
the shipping support
hardware must be reinstalled
Remove:
metal "P" clamp
4 shipping_bbolts,
4 spacers.
to prevent shipping damage.
INSTALLATION
Leveling the Washer
Excessivenoise and vibration can be prevented by properly
leveling the washen
For free standinq installation and with the washer in it's
final position, place a level on top of the washer. Adjust
the leveling legs so the washer is level front-to-rear and
side-to-side, and stable comer-to-comer.
Pressdown on alternate corners and sides and feel for the
slightest movement. Adjust the appropriate leg so the
washer is SOLID on the floor on ALL four legs. Keep the
leveling leg extension at a minimum for best performance
of the washer.
.
Washer Connections
I. Run some water from the hot and cold
faucets to flush the water lines and
remove particles that might clog up
the water valve screens.
2. Remove the inlet hoses and rubber
washers from the plastic bag located
in the drum of the washer and install
the rubber washers in each end of the
inlet hoses.
3. Carefully connect the inlet hose marked "HOT" to the
outside "H" outlet of the water valve. Tighten by hand,
then tighten another 2/3 turn with pliers. Carefully connect
the other inlet hose to the inside "C" outlet of the water
valve. Tighten by hand, then tighten another 2/3 turn with
pliers. Do not crossthread or over-tighten these
connections.
4. Connect the inlet hose ends to the HOT and COLD water
faucets tightly by hand, then tighten another 2/3 turn with
pliers. Turn the water on and check for leaks.
NOTE: Use only new hoses.
2. For pedestal installations, See additional installation
instructions included with the pedestal.