5
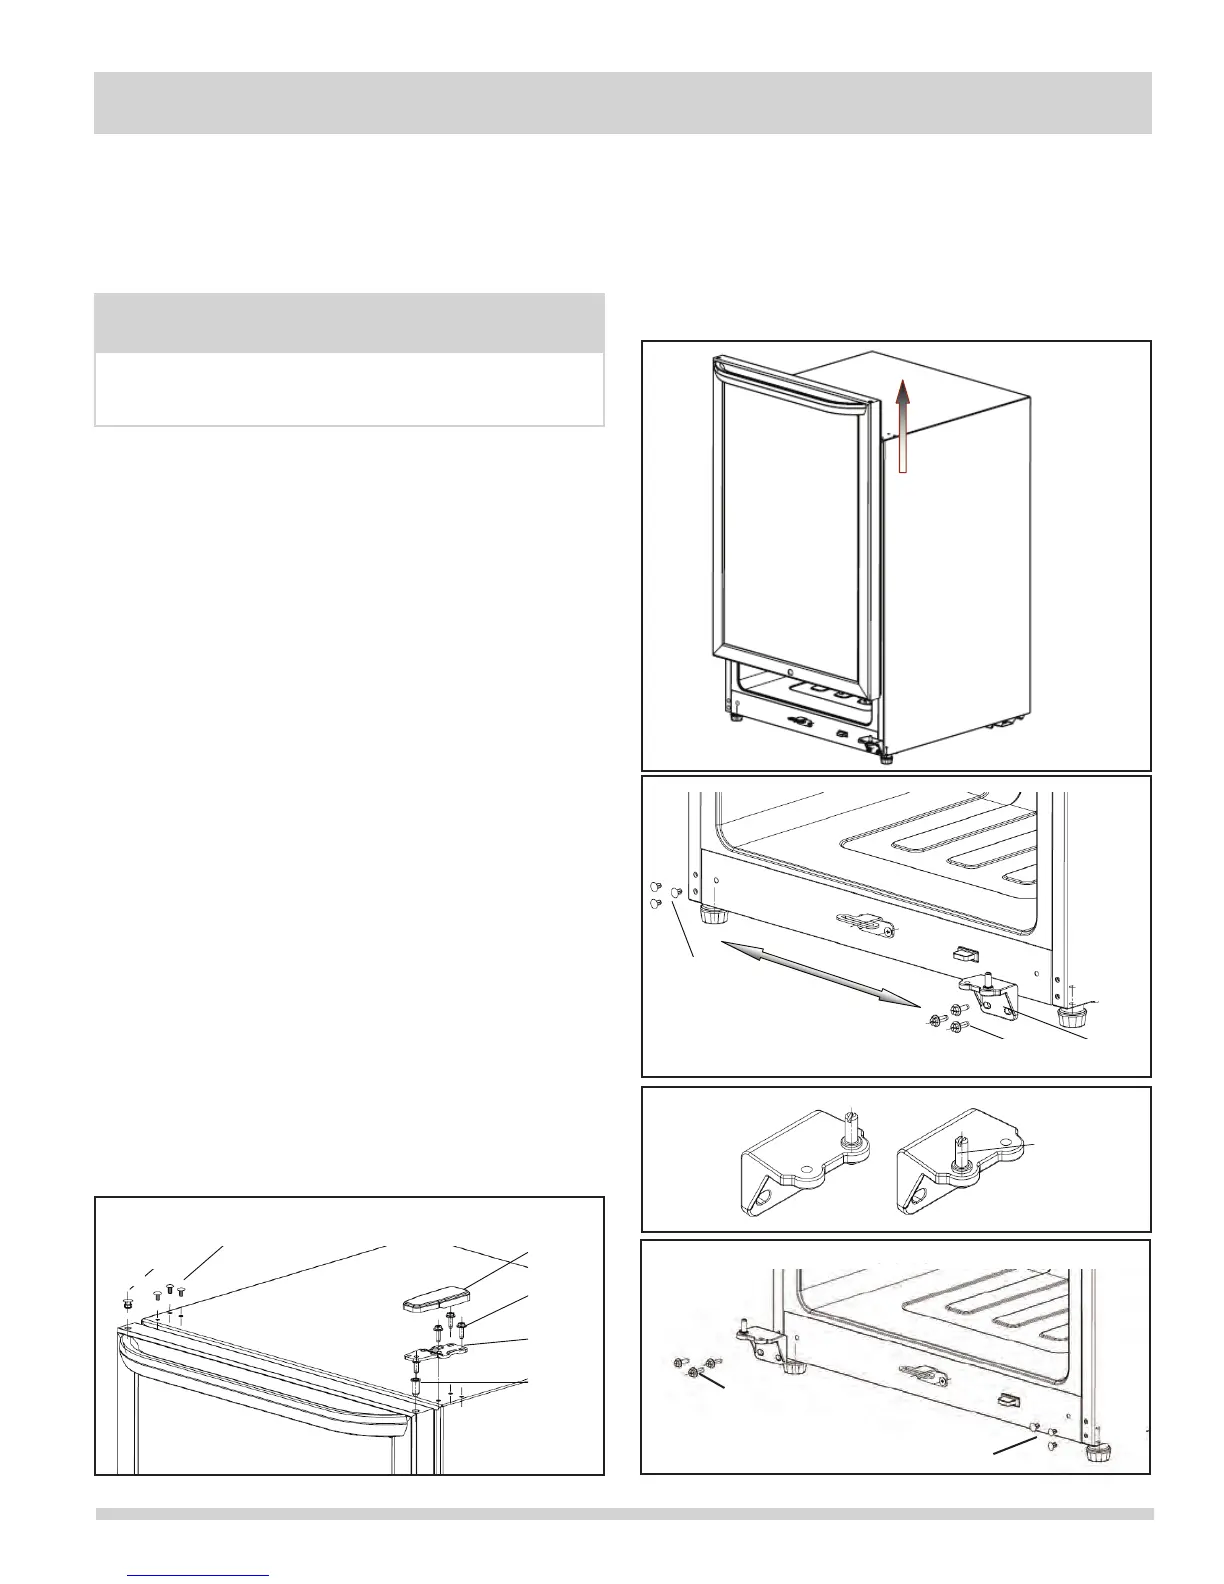
Step 11:Loosen the bolt� and bottom hinge�ˈthen replace the parts on the
left and right sideˈthen assemble the parts,see chart 6.
ĸ
ŀ
ĺ
Chart 5
Chart 6
Step 12:Revolve the hinge axis on the bottom of the door to the left hole,see
chart 7.
ŋ
Chart 7
Step 13:Assemble the door on the bottom hinge�ˈthen reset the door bolt�
- 9 -
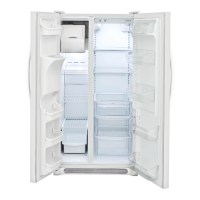
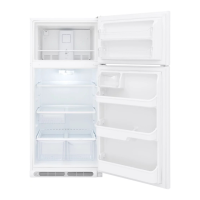
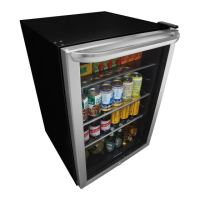
� Handle
ĸ Wooden Shelf Made of Beech
Ĺ Control Panel
� Glass Door
� Control Switch of Lamp
� Adjustment Leg
Door Reversal Instructions:
You can reverse the door swing if you change the position of the hinge(�) ,pls
follow the steps below:
Step 1:Close the door and use the knife carefully to remove the parts�ǃ�(see
chart 1)
Step 2:Remove the hinge coverĹ(see chart 1)
Step 3:Remove the screws by cross-screwdriverĺ(see chart 1)
Step 4:Remove the top hingeĻ(see chart 1)
Step 5:Remove the bolt by screwdriverļ(see chart 1)
ĸ
ķ
Ĺ
ĺ
Ļ
ļ
Chart 1
Step 6:Open the door and lift it up carefully then remove it,see chart 2.
- 7 -
Step 11:Loosen the bolt� and bottom hinge�ˈthen replace the parts on the
left and right sideˈthen assemble the parts,see chart 6.
ĸ
ŀ
ĺ
Chart 5
Chart 6
Step 12:Revolve the hinge axis on the bottom of the door to the left hole,see
chart 7.
ŋ
Chart 7
Step 13:Assemble the door on the bottom hinge�ˈthen reset the door bolt�
- 9 -
Inversion de la porte
La porte en verre peut s’ouvrir de gauche à droite et vice
versa. Si vous désirez modiez la direction dans laquelle
la porte s’ouvre, veuillez suivre les directives suivantes.
ReMaRQue
Veuillez conserver les pièces démontées an de pouvoir
réinstaller la porte.
Retirez le couvre-charnière. Retirez les trois vis qui
1.
retiennent la charnière supérieure (côté droit) au
haut de la caisse. Voir la Figure 1.
Retirez délicatement la charnière supérieure (voir la
2.
Figure 1), puis soulevez la porte pour la sortir de la
charnière inférieure et déposez-la sur une surface
rembourrée pour éviter de la rayer. Voir la Figure 2.
Retirez les trois bouchons cache-trous du coin
3.
supérieur gauche de la caisse et transférez-les dans
les trous du côté opposé. Appuyez fermement sur les
bouchons pour bien les enfoncer dans les trous. Voir
la Figure 1.
Retirez les trois vis qui retiennent la charnière
4.
inférieure dans le bas de la caisse. Retirez les trois
bouchons cache-trous du coin inférieur gauche pour
les transférer dans les trous laissés à l’endroit où vous
venez de retirer la charnière inférieure. Voir la Figure 3.
Dévissez les chevilles des deux charnières et
5.
transférez-les dans les trous prévus à cette n du
côté opposé. Voir la Figure 4. Réinstallez la charnière
inférieure sur le coin gauche de la caisse en vous
servant des trois vis retirées à l’étape 4.
Sur le bord inférieur de la porte, transférez la butée
6.
et la bague de la porte dans les trous situés sur le
côté opposé. Voir la Figure 6.
Sur le bord supérieur de la porte, transférez les
7.
bouchons cache-trous et la bague dans les trous
situés sur le côté opposé. Voir la Figure 7.
Vis
Couvre-charnière
supérieur
Bagne
Charnière
Bouchons cache-trous
Fig. 4
Déplacez la
cheville vers
le trou opposé
(charnières
supérieure et
inférieure)
Fig. 3
Bouchons
cache-trous
Vis
Charnière
Fig. 5
Bouchons cache-trous
Vis
Fig. 1
Placez le coin inférieur gauche de la porte sur la 8.
charnière inférieure, puis installez la charnière
supérieure de la caisse. Assurez-vous que la porte soit
de niveau et qu’elle se ferme hermétiquement sur la
caisse, puis serrez les trois vis. Voir la Figure 7.
Replacez le couvre-charnière sur la charnière en
appuyant fermement pour l’enclencher.
Chart 2
Step 7:Remove the bolt on the bottom of the door by screwdriver�(see chart
3)
Step 8:Remove the screw� and the block �,then set them on the left side.(see
chart 3)
ľ
ļ
Ľ
Chart 3
Step 9:Change the hinge axis� from the right hole to left hole(see chart 4)
Ŀ
Chart 4
Step 10:Use knife to remove the parts�,see chart 5.
- 8 -
Fig. 2
Step 11:Loosen the bolt� and bottom hinge�ˈthen replace the parts on the
left and right sideˈthen assemble the parts,see chart 6.
ĸ
ŀ
ĺ
Chart 5
Chart 6
Step 12:Revolve the hinge axis on the bottom of the door to the left hole,see
chart 7.
ŋ
Chart 7
Step 13:Assemble the door on the bottom hinge�ˈthen reset the door bolt�
- 9 -
INStaLLatIoN