EasyManua.ls Logo

Frigidaire FRA103KT1 User Manual

Frigidaire FRA103KT1
8 pages
To Next Page IconTo Next Page
Page #1 background imageLoading...
Page #1 background image
READ BEFORE INSTALLING UNIT
For Slider Casement Air Conditioners
1
Installation Instructions
To avoid risk of personal injury, property damage, or product damage due to the weight of this device and sharp
edges that may be exposed:
Air conditioners covered in this manual pose an excessive weight hazard. Two or more people are needed to
move and install the unit. To prevent injury or strain, use proper lifting and carrying techniques when moving unit.
Carefully inspect location where air conditioner will be installed. Be sure it will support the weight of the unit over
an extended period of time.
Handle air conditioner with care. Wear protective gloves whenever lifting or carrying the unit. AVOID the sharp
metal fins of front and rear coils.
Make sure air conditioner does not fall during installation.
NOTE:
These instructions describe installation in a typical wood framed window with a wood SLIDE-BY sash, or
installation in a metal CASEMENT window. Modification may be necessary when installing in windows made
differently than those shown in these instructions.
$KLJKZLQGRZDFFHVVRU\NLWLVDYDLODEOHIRUZLQGRZKHLJKWVXSWRƎPP3DUW($:
WARNING:
Electrical ground is required on this appliance.
(OHFWULFDO6KRFNDQG3HUVRQDO,QMXU\+D]DUG
DO NOT ground to a gas line.
If cold water pipe is interrupted by plastic, non-metallic gaskets, or other insulating materials, DO NOT use for
grounding.
Check with a qualified electrician if you are in doubt as to whether the appliance is properly grounded.
DO NOT modify power supply cord plug. If it does not fit outlet, have a proper outlet installed by a qualified
electrician.
DO NOT have a fuse in the neutral or grounding circuit. A fuse in the neutral, or grounding circuit could result in
an electrical shock.
DO NOT use an extension cord with this appliance.
Failure to follow these instructions could result in electrical shock, serious injury, or death.
Meeting Electrical Requirements
OBSERVE ALL LOCAL GOVERNING CODES AND ORDINANCES. DO NOT, UNDER ANY CIRCUMSTANCES,
5(029(7+(32:(56833/<&25'*5281',1*3521*
NOTE:
If codes permit, and a separate grounding wire is used, it is recommended that a qualified electrician determine
that the grounding path is adequate and not interrupted by plastic, non-metallic gaskets, or other insulating
materials.
$

Other manuals for Frigidaire FRA103KT1

Question and Answer IconNeed help?

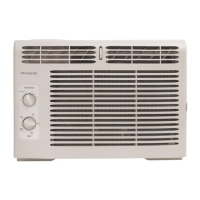
Do you have a question about the Frigidaire FRA103KT1 and is the answer not in the manual?

Frigidaire FRA103KT1 Specifications

General IconGeneral
TypeWindow Air Conditioner
Cooling Capacity10, 000 BTU
Energy Efficiency Ratio (EER)12.0
Room Size Coverage450 sq. ft.
Power Supply115V/60Hz
Fan Speeds3
Operating Frequency60 Hz
Filter TypeWashable
Installation TypeWindow

Summary

Read Before Installing Unit

Cautionary Notes for Installation

Warnings regarding weight, sharp edges, lifting, and ensuring unit stability during installation.

Installation Notes and Accessories

Details on typical installation scenarios and an available accessory kit for high windows.

Meeting Electrical Requirements

Electrical Shock and Personal Injury Hazard

Safety warnings related to electrical shock, grounding, and cord modification.

Grounding Recommendations

Guidelines for proper electrical grounding, including checks with qualified electricians.

Receptacle Wiring Requirements

Electrical Specifications

Electrical Connection and Grounding

Recommended Grounding Method

Detailed steps and safety precautions for grounding the appliance.

Preparing for Installation

Installation Tips for Window Types

Guidance for installing in wood-frame casement and brick/cement constructions.

General Installation Precautions

Warnings about weight, lifting, applicable codes, and handling the unit.

Tools Required for Installation

List of necessary tools for performing the installation.

Screw Usage Note

Instruction to use only specified screws for installation.

Installation Kit Contents

Screw Identification Guide

A visual guide to identify screws by their length for correct installation.

Window Size Requirements

Window Dimension Notes

Clarification on height measurements and potential variations in window jamb applications.

Choosing the Window Location

Installing Unit in a Sliding Window

Attach Support Brace to Platform

Steps for assembling and positioning the support brace and platform.

Measure and Mark Window Jamb

Instructions for measuring and marking the window jamb for platform placement.

Center Platform Assembly

Guidance on centering the platform assembly and drilling pilot holes.

Apply Track Seal

Procedure for applying the track seal to the window track.

Attach Siding-Protection Board

Instructions for securing a siding-protection board to the house.

Sliding Window Installation Steps

Position and Attach Platform Assembly

Securing the platform assembly to the window jamb using appropriate screws.

Adjust Platform for Drainage

Ensuring proper water drainage by adjusting the platform slope.

Level Platform Assembly

Ensuring the platform assembly and window track are level.

Measure and Cut Plastic Window Panel

Measuring window opening height and cutting the plastic window panel.

Attach Side Channels to AC Unit

Securing the side channels to the air conditioner cabinet.

Install Plastic Window Panel and Frame

Assembling the plastic window panel and frame into the side channels.

Apply Side Channel Seal

Applying the side channel seal to the rear of the cabinet side channels.

Place AC Unit in Window Opening

Positioning the air conditioner unit into the prepared window opening.

Removing and Replacing Front Panel

Removing the Front Panel

Step-by-step instructions for safely removing the front panel of the air conditioner.

Sliding Window Final Assembly

Secure Inner Window Sash

Ensuring the inner window sash is snug against the cabinet and side channels.

Install Safety Bracket

Attaching the safety bracket to the unit and platform assembly.

Stuff Window Sash Seal

Inserting the window sash seal for a tighter fit against the glass.

Secure Window Sash with Locking Bracket

Locking the inner window sash to the outer window sash using a bracket.

Replacing the Front Panel

Reconnecting electrical components and reattaching the front panel to the cabinet.

Alternate Window Jamb Applications

Installing the Unit in a Casement Window

Casement Window Installation Notes

Notes on window crank removal, clearance, and stationary sash installation.

Attach Support Brace to Platform (Casement)

Attaching the support brace to the platform for casement window installation.

Casement Window Installation Steps

Drill Pilot Hole in Window Jamb

Drilling a pilot hole in the window jamb for platform attachment.

Apply Track Seal to Window Sill

Applying track seal to the outside edge of the bottom window jamb.

Secure Platform Assembly to Jamb

Fastening the platform assembly to the window jamb with a self-threading screw.

Adjust Platform for Rear Drainage

Adjusting the platform to ensure 3/16" lower rear for water drainage.

Platform Projection Note

Clarification on platform adjustment when a projection below the AC unit is present.

Secure Siding-Protection Board

Securing the siding-protection board to the house siding.

Measure and Cut Plastic Window Panel (Casement)

Measuring window height and cutting the plastic panel for casement installation.

Attach Side Channels to AC Unit (Casement)

Securing side channels to the air conditioner cabinet for casement windows.

Install Plastic Window Panel and Frame (Casement)

Inserting the panel frame and plastic window panel into side channels.

Casement Window Final Assembly

Apply Side Channel Seal (Casement)

Applying side channel seal below the panel frame assembly.

Place AC Unit in Window Opening (Casement)

Positioning the unit in the window opening, aligning panel frame and side channels.

Drill Pilot Holes and Secure Panel Frame

Drilling pilot holes and securing the panel frame to the window jamb.

Secure Cabinet Side Channels to Jambs

Attaching cabinet side channels to window jambs with screws, avoiding seal damage.

Replacing the Front Panel (Casement)

Reconnecting electrical components and reattaching the front panel securely.

Removing the Front Panel (Casement)

Related product manuals