EasyManua.ls Logo

Frigidaire GAM155Q1A - GIBSON 15100BTU 115V 12.5A 10.3 SPD 4 WAY AIR DIRECTION User Manual

Frigidaire GAM155Q1A - GIBSON 15100BTU 115V 12.5A 10.3 SPD 4 WAY AIR DIRECTION
8 pages
To Next Page IconTo Next Page
Page #1 background imageLoading...
Page #1 background image
1
Please read ALL instructions before installing. Two people are
recommended to install this product. If a new electrical outlet
is required, have the outlet installed by a qualified electrician
before installing unit. See#5 in Preliminary Instructions
following.
Do the following before starting to install unit. See illustrations
below.
1. Check window opening size - the mounting parts furnished
with this air conditioner are made to install in a wooden
sill double-hung window. The standard parts are for
window dimensions listed above. Open sash to a minimum
2. Check condition of window - all wood parts of window
must be in good shape and able to firmly hold the needed
screws. If not, make repairs before installing unit.
3. Check your storm windows - if your storm window
frame does not allow the clearance required, correct by
adding a piece of wood as shown in FIG. 2, or by removing
storm window while room air conditioner is being installed.
(continued)
STORM WINDOW FRAME OR
OTHER OBSTRUCTION
BOARD THICKNESS AS
REQUIRED, ALONG
ENTIRE STOOL. FASTEN
WITH TWO NAILS OR
SCREWS.
FIG. 1
STORM WINDOW FRAME OR
OTHER OBSTRUCTION
P/N 220219A032
SAFETY LOCK AND
3/4'' LONG HEX HEAD
SCREW
Installation Instructions
For Heavy Duty (FAS Models) and
Median (FAM Models) Air Conditioners
Preliminary Instructions
of 19''(483mm). (FIG. 1)
Check dimensions of your unit to determine model type:
Heavy duty (FAS) Median (FAM)
Unit Height: 18 5/8” 17 5/8”
Unit Width: 26 ½” 23 ½”
Min. Window Opening: 19” 18 ½”
Min. Window Width: 31” 26 ½”
Max. Window Width: 43” 40 ½”
Question and Answer IconNeed help?

Do you have a question about the Frigidaire GAM155Q1A - GIBSON 15100BTU 115V 12.5A 10.3 SPD 4 WAY AIR DIRECTION and is the answer not in the manual?
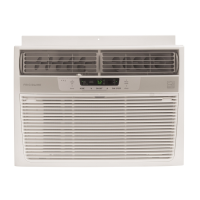
Frigidaire GAM155Q1A - GIBSON 15100BTU 115V 12.5A 10.3 SPD 4 WAY AIR DIRECTION Specifications

General IconGeneral
BrandFrigidaire
ModelGAM155Q1A
Cooling Capacity15100 BTU
Voltage115V
Amperage12.5A
Energy Efficiency Ratio (EER)10.3
Air Direction4 Way

Summary

Preliminary Installation Steps

Check Window Opening and Condition

Verify window dimensions and ensure wood parts are sound for mounting the air conditioner.

Prepare for Air Conditioner Installation

Check electrical service, unpack unit carefully, and be aware of grounding plug requirements.

Tools and Hardware Required

List of necessary tools and hardware included in the plastic bag for the installation process.

Window Mounting Procedure

Remove and Prepare Chassis

Instructions for safely removing the air conditioner chassis from its protective packaging and cabinet.

Install Mounting Brackets

Attach foam gasket, top angle, and side retainers to the cabinet for window mounting.

Assemble Window Filler Panels

Slide window filler panels into the side retainers on the air conditioner cabinet.

Position Cabinet in Window

Place the air conditioner cabinet into the window opening, ensuring it's seated properly on the stool.

Install Support Brackets

Attach support brackets to the window sill and cabinet to provide stability for the unit.

Extend and Secure Filler Panels

Adjust window filler panels to completely fill the opening and tighten locking screws.

Install Window Lock and Seal

Trim sash seal to fit window width and attach the right angle safety lock.

Install Chassis and Front Panel

Slide the air conditioner chassis into the cabinet and reattach the front panel.

Thru-The-Wall Installation

Select Wall Location

Choose a suitable exterior wall location, considering structural loads, utilities, and airflow.

Prepare Wall Opening

Cut or knock out a hole in the wall and build a wooden frame with specific inside dimensions.

Prepare and Install Cabinet

Position the cabinet in the wall opening, secure it, and ensure proper slope for water removal.

Masonry Construction Installation

Steps for installing the unit through masonry walls, including framing, anchoring, and sealing.

Related product manuals