INSTALLATION
Installation requires connection of blower opening to existing air ducting
system or to a dropper duct with a ceiling diffuser. In either instance, building
modication is necessitated. The bottom discharge cooler is always mounted
on the roof of the structure. This will require a roof stand, roof jack, exible
duct and collar to connect to existing ductwork. If installation is being
made by other than a professional HVAC contractor, it is suggested that the
installation be throughly discussed with a professional sales person familiar
with cooler installation and that printed instructions be requested for the
installation equipment and supplies purchased.
DO NOT DRIVE NAILS OR SCREWS INTO BOTTOM OF
COOLER, THIS WILL CAUSE IT TO LEAK WATER AND
WILL VOID THE WARRANTY.
* FOR MOBILE HOME INSTALLATION SEE SEPARATE
INSTRUCTION SHEET IN GRILL KIT BOX.
Whenever the cooler is mounted, the surface must be level. This is necessary
so that the water in the reservoir and in the troughs of the pad frame will be
level when the cooler is operating.
Page 2
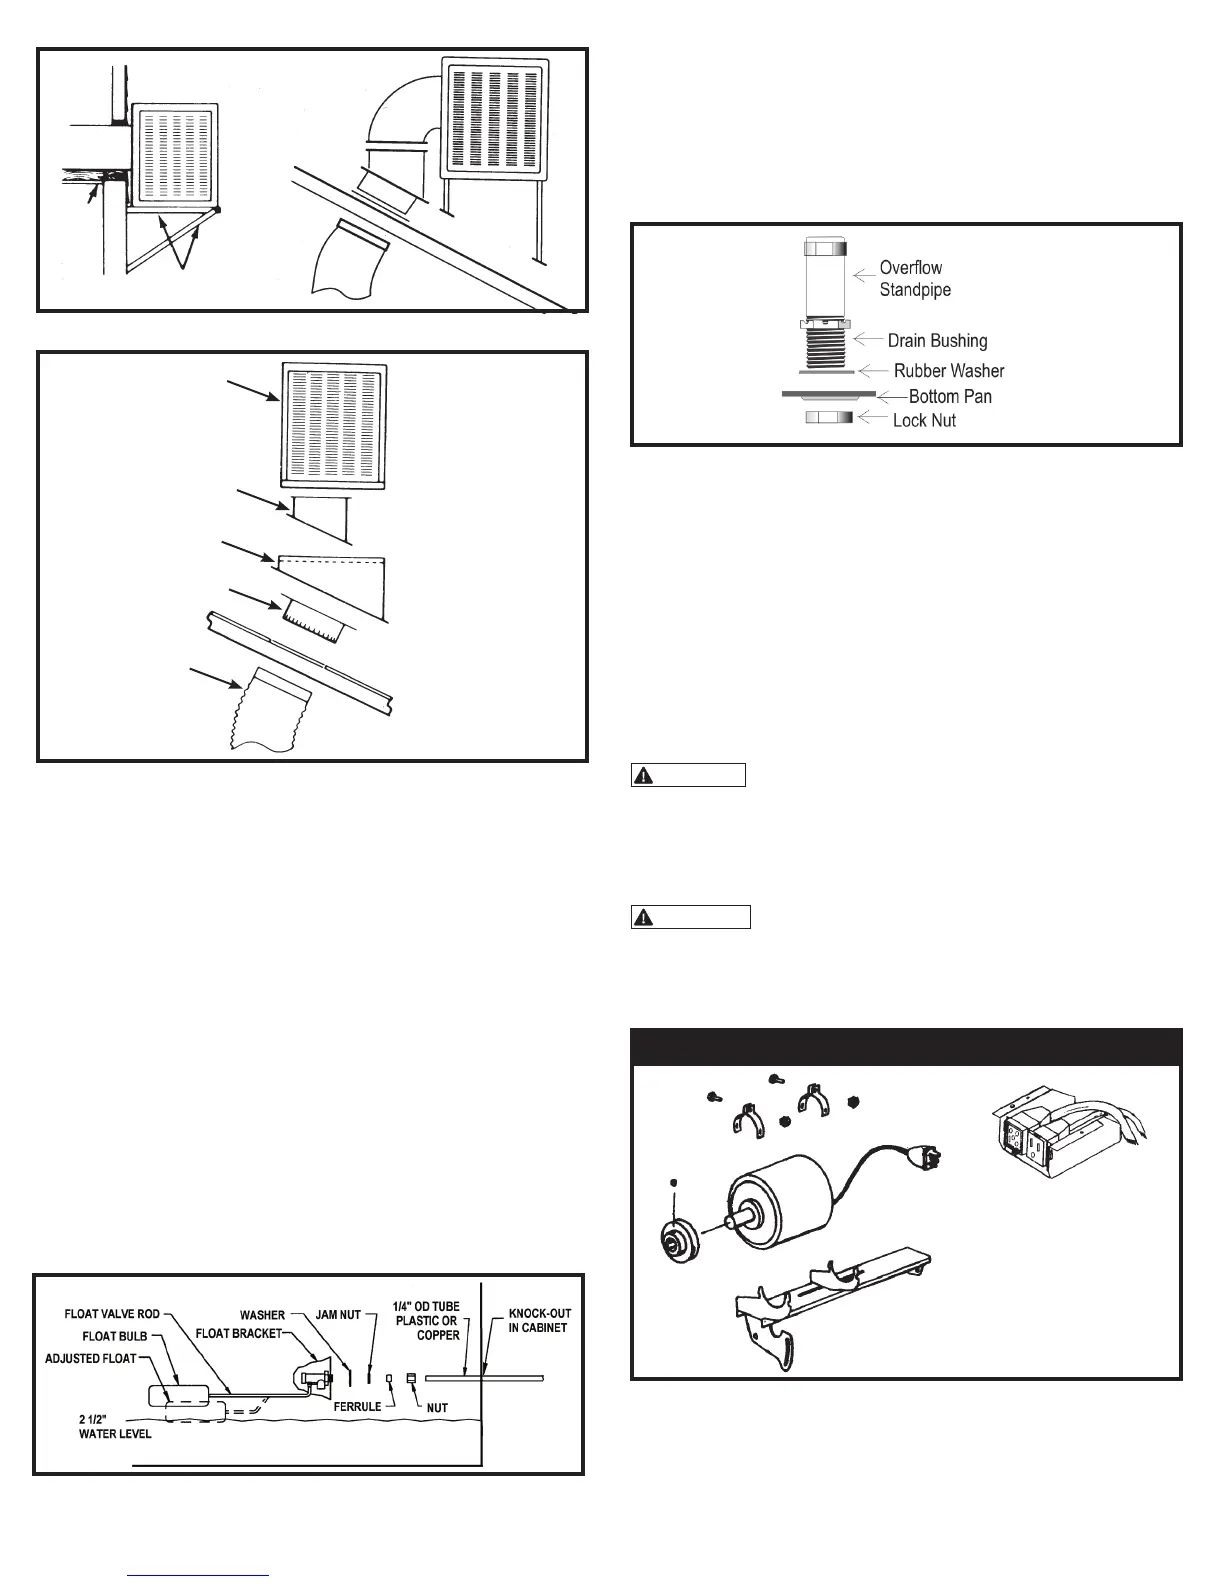
TYPICAL SIDE DISCHARGE
TYPICAL DOWN DISCHARGE
WATER CONNECTION Continued
2. Turn water to cooler on and set oat valve to maintain 2 1/2" water depth.
The oat valve is adusted by bending the oat valve rod.
3. Bleed-off: Bleed off is helpful to prevent scale from building up in the
cooler. A bleed-off adapter tee and tube are furnished with the cooler for
this purpose. Run bleed-off line to a proper drain.
Note: Evaporative coolers should not be connected to
a "soft" water system.
DRAIN BUSHING
Insert drain bushing through the hole in the cooler bottom pan. Attach nut
securely and hand tighten. Do NOT use a wrench.
WALL SWITCH: For one or two speed (120 ro 240 volt) use switch kit
available from your dealer.
ADJUSTABLE MOTOR PULLEY (SHEAVE): This part is set at
the factory for proper motor load and maximum air delivery of a cooler not
connected duct and register system. When cooler is connected to a duct
system the cooler air capacity and motor amperage decrease due to static
pressure (duct resistance). The adjustable motor pulley is used ONLY to
compensate for duct system resistance by returning cooler and motor to
proper load capacity and should not be adjusted except for that purpose.
CAUTION: AMPERAGE OF MOTOR MUST BE CHECKED
TO MAKE CERTAIN IT DOES NOT EXCEED THE MAXIMUM
ALLOWED AS STAMPED ON MOTOR SPECIFICATION PLATE.
Only persons with proper electrical equipment and thorough knowledge of
adjustable pulleys should attempt adjustment of your cooler.
WARNING: IMPROPER PULLEY ADJUSTMENT CAN
OVERLOAD AND BURN OUT MOTOR AND VOID WARRANTY.
ROOF
DUCT
CEILING
WOOD OR ANGLE
IRON SUPPORT
DUCT
COOLER
ROOF JACK
COOLER STAND
*COLLAR (with ange)
*FLEX DUCT
WATER CONNECTION
1. Install oat in hole provided in oat bracket. See parts illustration to route
water line. Connect per above sketch.
MOTOR KITS
INSTALLATION
1. Install the motor in the mounting cradle as shown.
2. Remove the junction box from the cooler.
3. Wire the pump and motor receptacles per the schematic shown below.
4. Place both receptacles in the junction box as shown and re-attach the
junction box to the cooler top.
120 VOLT MOTOR KIT
 Loading...