83
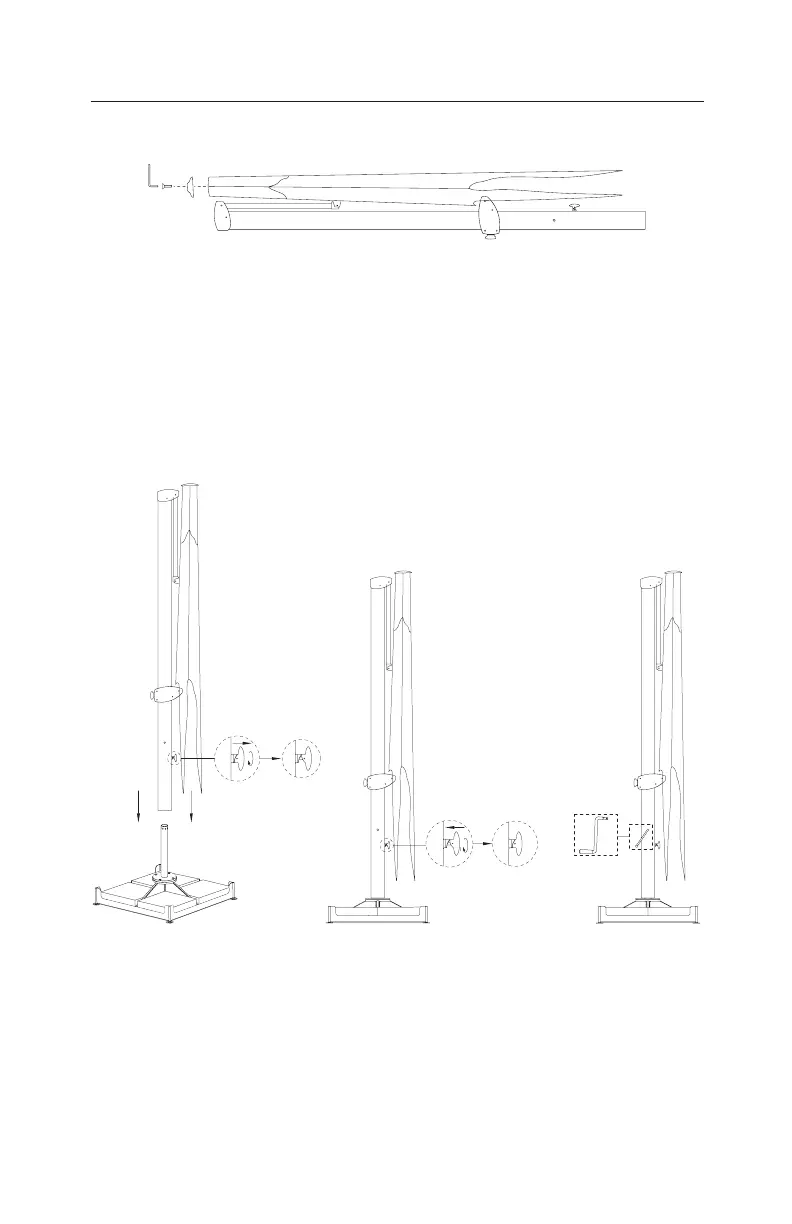
• With the umbrella laying on a soft clean surface, attach nial to top of canopy structure
with supplied nial bolt. Secure with 5mm hexagon wrench (Fig. 6).
(Fig. 7)
(Fig. 8)
(Fig. 9)
IMPORTANT: When closing the umbrella, the canopy must be in a horizontal position, or
damage to umbrella may occur.
• Turn adjustment knob counter clockwise and begin cranking handle counter clockwise
(Fig. 18). Canopy will close and umbrella will slide down main frame simultaneously by
operating the crank handle (Fig. 19). NOTE: Stop turning crank when umbrella is fully
closed. Failing to do so may cause damage to umbrella.
• Turn adjustment knob clockwise to secure umbrella in place (Fig. 20).
• Tie string around canopy to secure canopy.
• Cover umbrella with provided protective cover when not in use.
(Fig. 18)
STEP 2 Assemble Frame STEP 7 Closing Umbrella
(Fig. 19) (Fig. 20)
• Using a two-person team, carefully lift umbrella and insert bottom of main frame onto
internal stem. NOTE: Umbrella will stop when 2cm away from internal stem plate if
rotation knob is locked. Pull and quarter turn rotation knob to unlock. Umbrella will
continue to slide down internal stem. (Fig. 7)
• Turn rotation knob clockwise to lock into place (Fig. 8).
• Insert crank handle fully into socket located on main frame (Fig. 9). Crank handle will
snap into place.
(Fig. 6)
 Loading...