Fig.2
Fig.3
Fig.4
www.fubag.ru
Omperator's anual
--5
- If the headband is riding too high or too low on your head adjust
the strap which passes over the top of your head. To do this
release the end of the band by pushing the locking pip out of the
hole in the band.
and push the locking pip through the
nearest hole (See adjustment "W" in fig.1).
- Test the fit of the headband by lifting up and closing down the
helmet a few times. f the headband moves re-adjust
it until it is stable.
2
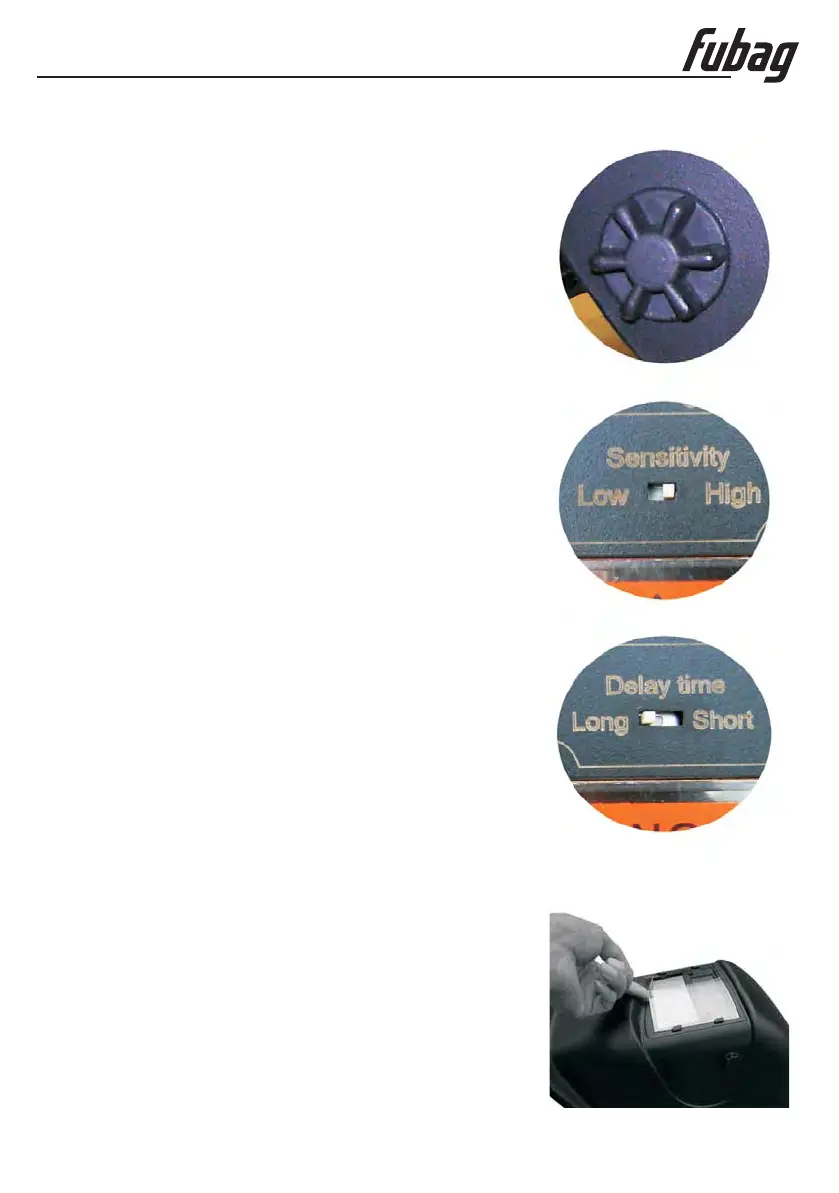
The sensitivity can be set to "high" or "low" using the the
back of the shade cartridge (See fig.3).
You are now ready to use the helmet The shading may be
adjusted during by re-setting control.
When welding the viewing window automatically changes
from dark back to light but with a pre-set delay to compensate for
any bright afterglow on the workpiece. he delay
time/response can be set to “ ” (0 secs) or “ ”( secs)
using the on the back of the shade cartridge, (See fig. ).
if it is damaged (cracked, scratched, soiled or pitted) Remove
the front cover lens by pulling up the central part of the lens. Place
the new cover lens in the correct position. Check and make sure
that the frame is securely installed.
f it is damaged (cracked, scratched, soiled or pitted)
Clean helmet by wiping with a soft cloth. Clean cartridge sur-
faces regularly. Do not use strong cleaning solutions. Clean
sensors and solar cells with methylated spirit and a clean cloth
and wipe dry with a lint-free cloth.
Don't immerse the lens in water or any other liquid. Never use
abrasives, solvents or oil based cleaners.
Don't remove the auto-darkening filter from the helmet. Never try
to open the filter.
Adjust the width of the band by sliding two ends
further or closer apart
I when tilted,
Please see Fig. .
by switch
.
the operation
is over
If needed t
short ,25 long 0,6
by switch 4
.
I.
it
2 Adjusting view angle position
3 electing sensitivity
4 electing delay time
eplacing the front cover lens
eplacing the inside cover lens
leaning
.
.S
.S
R
R
C
7. Maintenance