Allows you to send a print data temporarily to the printer with
Allows you to send a print data temporarily to the printer with
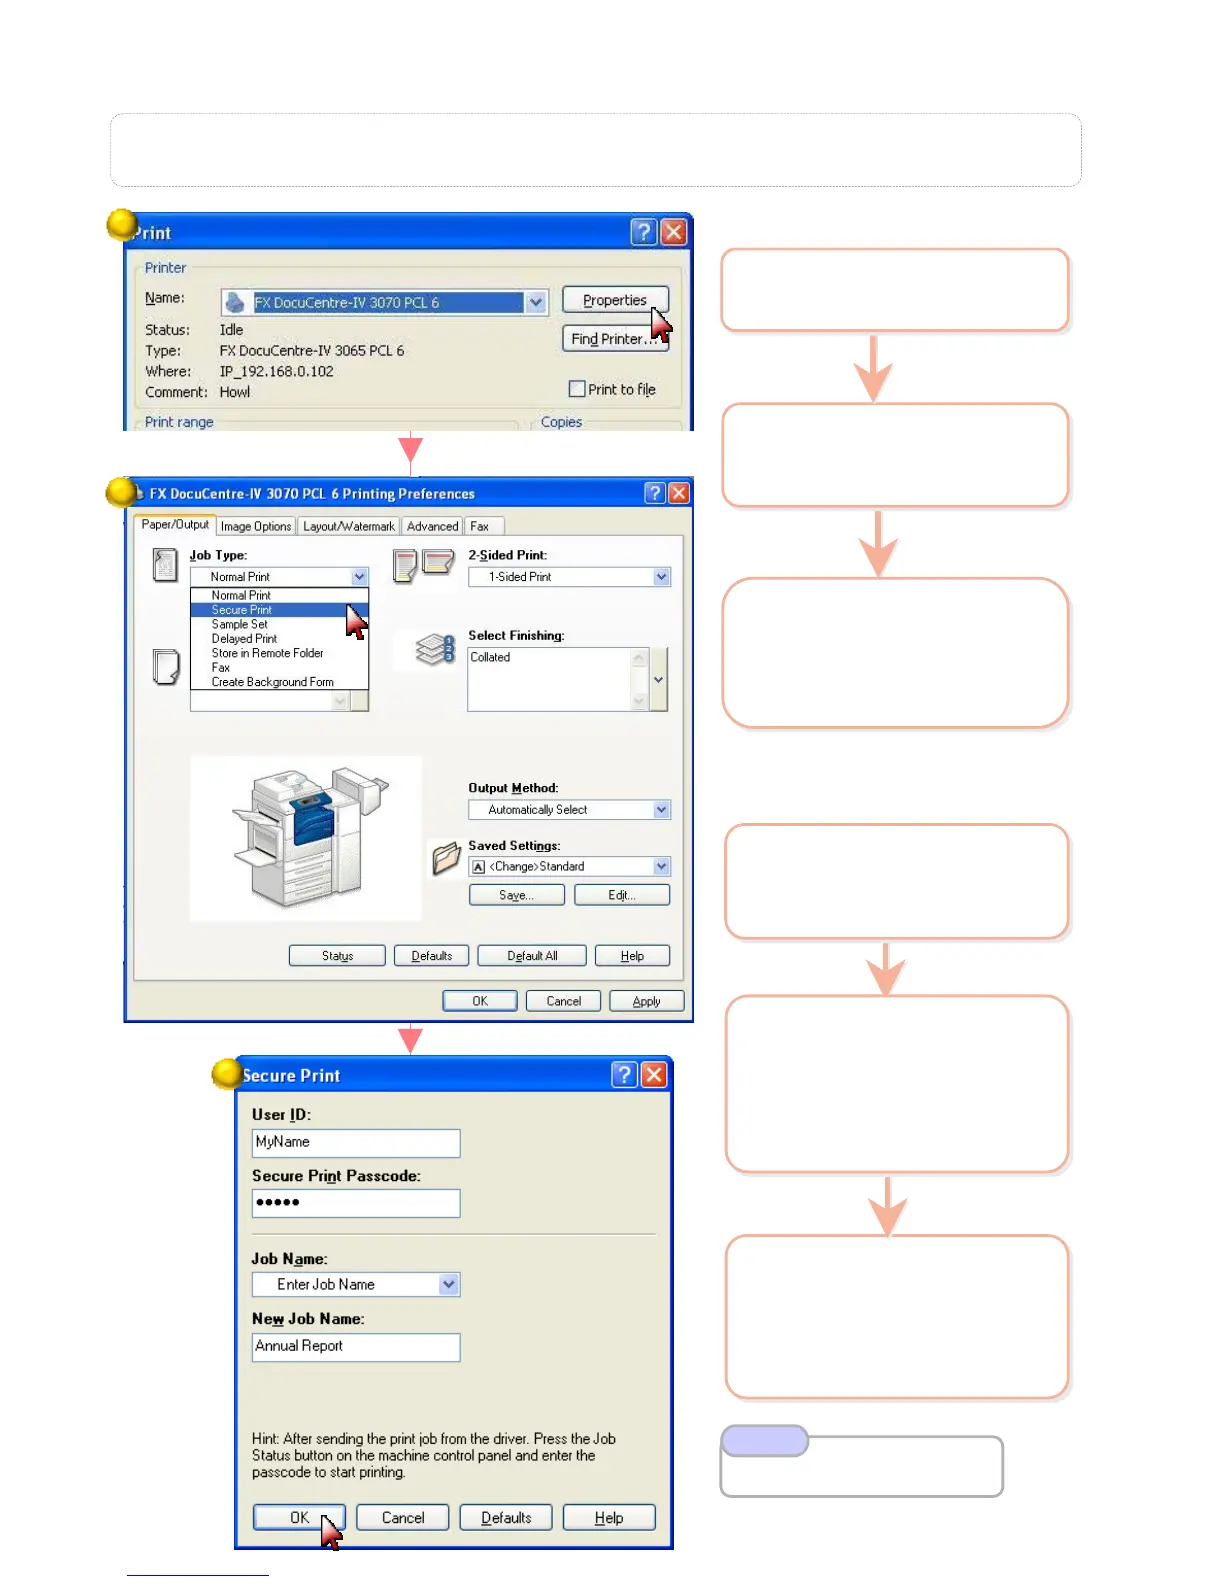
a passcode enabled,
a passcode enabled,
and print upon entering the passcode. (suitable for printing con
and print upon entering the passcode. (suitable for printing con
fidential documents)
fidential documents)
P2: Secure Print
2 On the [Paper/Output] >
select [Job Type] :
Secure Print
2 On the [Paper/Output] >
select [Job Type] :
Secure Print
3 Click on [Setup] - Enter
User ID & Passcode
Click OK on all open
windows to submit job
3 Click on [Setup] - Enter
User ID & Passcode
Click OK on all open
windows to submit job
1 Select Printer & click
[Properties]
1 Select Printer & click
[Properties]
3 Select file > Press
[Print]. A message
displayed > Select your
preference. The job will
be printed.
3 Select file > Press
[Print]. A message
displayed > Select your
preference. The job will
be printed.
2 Select [Secure Print] >
Select User ID > Press
[Job List] button.
Enter Passcode
Press Confirm
2 Select [Secure Print] >
Select User ID > Press
[Job List] button.
Enter Passcode
Press Confirm
Refer User Guide
Retrieve Print P. 345
Note
30
30
To send a Secure Print:
To send a Secure Print:
To retrieve a Secure Print:
To retrieve a Secure Print:
1 From machine > Press
[Job Status] > [Secure
Print Jobs & More]
1 From machine > Press
[Job Status] > [Secure
Print Jobs & More]
1
3
2
 Loading...