Do you have a question about the Fuji Xerox ApeosPort-V 4070 and is the answer not in the manual?
| Brand | Fuji Xerox |
|---|---|
| Model | ApeosPort-V 4070 |
| Category | All in One Printer |
| Language | English |
Thank you for selecting the ApeosPort-V 5070/4070, DocuCentre-V 5070/4070. This guide describes how to operate the machine and precautions.
The following guides are provided with the machine: User Guide, Administrator Guide, Quick Reference Guide, Security Function Supplementary Guide, Manual (HTML), Print Driver Help, CentreWare Internet Services Help.
This guide is intended for first time users and describes basic operations for Copy, Print, Scan, and Fax services.
Before using this product, read "Safety Notes" carefully for safety use. Follow warning instructions marked on or supplied with this product.
This product shall be operated by the power source as indicated on the product's data plate. Connect this product to a protective earth circuit.
Do not locate this product where people might step on or trip over the power cord. Never locate in the following places: near heat sources, flammable materials, etc.
Do not carry out maintenance procedures not described in the documentation. Never remove covers or protectors.
CAUTION: Any operations or adjustments not stated in the operation manual may cause hazardous light exposure.
Store all consumables in accordance with the instructions given on its package or container. Never use a vacuum cleaner for spilled toner.
This product contains Radio Frequency Identification system device (RFID) and is certified in compliance with applicable local laws.
For environmental protection and efficient use of resources, Fuji Xerox reuses returned toner cartridges and drum cartridges.
This section describes information about licenses. Be sure to read through it.
This product includes software licensed under GNU LESSER GENERAL PUBLIC License Version 2.1 and other licenses.
Contains information about DES, FreeType 2, HarfBuzz, JavaScriptCore, WebCore, Easing Equations, etc.
Copying or printing certain documents may be illegal in your country. Penalties of fines or imprisonment may be imposed on those found guilty.
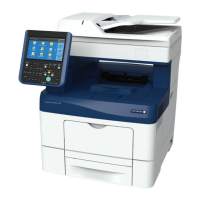
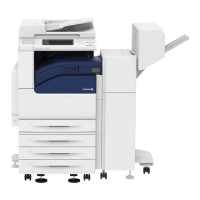
The following describes machine components and their functions. Includes diagrams of various models and their parts.
The machine is provided with the push-button power switch and the main power switch.
The machine is provided with a ground fault interrupter. It cuts off power circuit to prevent leakage or fire.
The machine is equipped with the Power Saver mode that saves electricity by reducing power consumption.
The following describes the names and functions of components on the control panel.
This section describes the fields and buttons on the Services Home screen, which is displayed by pressing the <Services Home> button.
On the touch screen of the machine, you can switch pages and scroll a list by the following operations.
During operations, a screen for entering text sometimes appears. The following describes how to enter text.
Setting the tray attachment on the finisher tray may help you deliver and stack A4 and B5 sheets without staples more neatly.
This section describes the basic copy procedures. The following shows the reference section for each procedure.
This section describes available operations during copying. The following shows the reference section for each operation.
This section describes the features you can select on the [Simple Copy] screen. It allows you to use basic features to easily copy documents.
This section describes the features you can select on the [Copy] screen. The following shows the reference section for each feature.
The section describes the features you can select on the [Image Quality] screen. The following shows the reference section for each feature.
This section describes the features you can select on the [Layout Adjustment] screen. The following shows the reference section for each feature.
This section describes the features you can select on the [Output Format] screen. The following shows the reference section for each feature.
This section describes the features you can select on the [Job Assembly] screen. The following shows the reference section for each feature.
This section describes the basic fax procedures. The following shows the reference section for each procedure.
This section describes the available operations during faxing. The following shows the reference section for each operation.
Unlike general fax communications using public phone lines, Internet Fax uses corporate intranets and the Internet to send or receive scanned documents as e-mail attachments.
IP Fax (SIP) refers to the process of sending and receiving faxes using an IP Network in a corporate intranets.
If your machine supports the Scan service, installing the Server Fax Kit (optional) allows you to use the Fax service of a Server Fax server.
This section describes the features you can select on the [Simple Fax] screen. It allows you to use only basic features to easily send faxes.
This section describes the features you can select on the [Fax/Internet Fax] screen. The following shows the reference section for each feature.
This section describes the features you can select on the [Layout Adjustment] screen. The following shows the reference section for each feature.
This section describes the features you can select on the [Fax/Internet Fax Options] screen. The following shows the reference section for each feature.
This section describes the features you can select on the [More Options] screen. The following shows the reference section for each feature.
This section describes how to set Broadcast Send and Relay Broadcast.
Two modes are available for receiving faxes: Auto Receive and Manual Receive.
For information on subscriptions and advanced operating procedures, contact the corresponding facsimile information service.
This section describes the basic scanning procedure. The following shows the reference section for each procedure.
The following describes the operations available during scanning. The following shows the reference section for each operation.
This section describes the features you can select on the [E-mail] screen. The E-mail service allows you to scan a document and send the scanned data as an e-mail attachment.
This section describes the procedure to select features on the [Network Scanning] screen. You can scan documents after specifying a file.
This section describes the procedure to select features on the [Scan to PC] screen. The Scan to PC service allows you to scan documents and send the scanned data to a network computer.
This section describes the procedure to select features on the [Store to Folder] screen. You can scan documents and save the scanned data in a folder of the machine.
This section describes the procedure to select features on the [Store to USB] screen. The Store to USB service allows you to scan documents and save the scanned data to a USB memory device.
Authenticate on the machine and scan a document, and the machine will store the scanned data and sends an e-mail to your registered address.
This section describes the procedure to select features on the [Store to WSD] screen. The Store to WSD service allows you to scan documents set on the machine from a network computer.
This section describes the features you can select on the [Advanced Settings] screen. The following shows the reference section for each feature.
This section describes the features you can select on the [Layout Adjustment] screen. The following shows the reference section for each feature.
This section describes the features you can select on the [E-mail Options]/[Filing Options] screen. The following shows the reference section for each feature.
This section describes the basic procedure to operate files in folders. You can store print files, scan files, and fax files in folders.
Access to some folders may be restricted, depending on the settings of the Authentication feature.
You can check or operate files stored in a folder. Note: When selecting print files, [Job Flow Settings] cannot be selected.
You can preview the selected file to check its details. Note: Monochrome images with high gradation levels may appear bluish.
You can print selected files in a folder. Note: When multiple files are selected, [Batch Print] allows you to print the selected files as a single file.
Job Flow is a feature that allows you to register transfer settings of scan data, such as a transfer method and destination, to simplify data-transfer tasks.
Job flow sheets are categorized into two types according to the target. One type targets scanned documents, and the other targets files stored in folders.
This section describes how to select or edit a job flow sheet created on a network computer with Device Setup Tool.
The Stored Programming service allows you to store settings that you expect to use frequently and call them with a single button operation.
You can register and delete stored programs on the [Stored Programming] screen.
The following describes how to call a stored program. When you call a specified stored program, the last screen shown appears.
You can call a stored program for Build Job on the [Copy] screen displayed while Build Job is running.
Web Applications is a service that allows you to access to web applications via a network using the browser on the machine.
The following describes how to access web applications. You need to register an access destination in advance.
You can register frequently used web applications on the Services Home screen as buttons. The following describes how to access the applications by selecting the buttons.
The installation of the USB Memory Kit (optional) allows the machine to retrieve and print document files (PDF, TIFF, XML Paper Specification (XPS), XDW (XBD), and JPEG (JFIF)).
This section describes how to insert the USB memory device into the USB memory slot.
You can select files using any of the following three methods: Selecting all files, Selecting the desired files on the [Select From List] screen.
You can set the printing options on the [Media Print - Text] and [Advanced Settings] tabs.
The Job Status feature allows you to check current, pending, and completed jobs. You can also cancel printing and print jobs.
This section describes how to check current or pending jobs. On the status screen, you can cancel or preferentially execute jobs.
This section describes how to check completed jobs. You can check whether a job has been completed successfully.
This section describes how to print or delete jobs stored with the Secure Print or Sample Set feature, or stored with the [Receive Control] setting.
After the last user operation on the control panel, a job is waiting to be printed until the period of time specified in [Auto Print] elapses.
This section describes how to handle error terminations.
This section describes an overview of features you can perform from a computer.
This section describes how to print with the machine by operating on a computer.
You can send e-mail with documents attached from a computer to the machine. The received e-mail is automatically printed.
This section describes how to send a fax using the Direct Fax feature.
This section describes how to import files from a machine's folder to your computer. The following four methods are available.
CentreWare Internet Services requires a TCP/IP environment, and enables you to view the status of the machine and its jobs, as well as change settings.
This chapter contains a glossary of terms used in this guide.