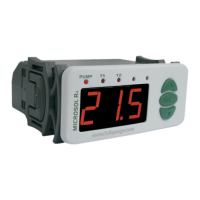
- Pump on due to antifreeze function.
am
ECLO
am
ICE
- Pump on due to scan function.
am
ECLO
am
SCAN
- Pump off due to vacuum tube protection.
am
ECLO
am
PTV
Product installation must be carried out by
a qualified technical professional.
YES
NO
The controller MUST be installed:
- In an indoor and dry environment;
- Away from electromagnetic fields;
- In a ventilated place, free from flammable
liquids and gases;
- Protected by a circuit breaker of the
appropriate specification for the installed
load.
The controller MUST NOT
be installed:
- In a humid environment;
- Exposed to the sun or rain;
- In saunas, engine rooms or
bathrooms.
Failure to comply with the warnings will cause loss of warranty,
material and/or physical damage.
12. INSTALLATION
12.1 ELECTRICAL CONNECTIONS
ATTENTION! Before removing the protective cover,
disconnect the mains from the controller.
T1 - SENSOR T1 (WHITE CABLE)
T2 - SENSOR T2 (RESERVOIR)
T3 - SENSOR T3 (SUPPORT)
D4 - DIGITAL INPUT OR T4 SENSOR
According to chapters of the NBR 5410 standard:
1: Install surge protectors in the supply.
2: Sensor and serial communication cables can be together, but not in the same conduit
through which electrical power and load activation pass.
3: Install transient suppressors (RC filter) in parallel with the loads, in order to increase the
life of the relays.
Connection diagram of suppressors
in contactors
Suppressor
A1
A2
A1 and A2 are the contactor
coil terminals.
Connection diagram of suppressors in
direct drive loads
Loads
Suppressor
For direct activation, take into account
the specified maximum current.
Full Gauge Controls offers suppressors for sale
12.2 IMPORTANT
ATTENTION! The sum of the loads must not
exceed 24A.
Note: The sensor cable length can be extended by the user up to 200 meters using PP 2 x
24 AWG cable.
230 Vac
PWM
OUT
IN
C
OUT
C
0 - 10V
T1 T2 T3 D4
AUX 1 AUX 2
PUMP
0
PWM
0-10V
or
- Auxiliary 1 alarm on.
am
A1AL
- Auxiliary 2 alarm on.
am
ECLO
am
A2AL
- External alarm on.
am
ECLO
am
EEAL
11.2 CONTROL
- T1 overheating.
am
HT1
- T2 overheating.
am
ECLO
am
HT2
To find the position of the first hole, mark 4 points on
the wall using the indications on the product as a
reference.
For a better finish, install wire channels (20x10mm).
5
4
Make the electrical connections
of the controller
The power supply and load
activation connections are
protected by mechanical
barriers.
For the use of eyelet-
type terminals, the
barriers can be
removed using cutting
pliers.
12.3 OVERLAY INSTALLATION
1
Remove the protective cover from the connections
on the bottom of the controller.
2
Detach the openings at the bottom necessary for
the cables to pass through.
Fix the controller to the wall using screws and
wall plugs.
3
115 Vac
or
Note: The sensor with
or white cable must be
installed in the solar
collector, as it supports
the temperature of
200ºC.
IMPORTANT: Check
power according to the
product model.
6
Position the electrical connection protection cover
and secure it with the screw (included in
the package).
 Loading...