EasyManua.ls Logo

Funlux ZP-NE14-S - User Manual

Funlux ZP-NE14-S
61 pages
Print Icon
To Next Page IconTo Next Page
Loading...
1

Questions and Answers

  • J
    Joseph StephensonAug 14, 2025
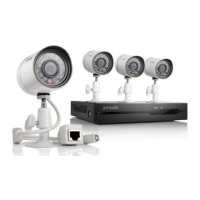
    How to fix Funlux Network Hardware when the system won't turn on?
    • J
      Jeffrey ConleyAug 14, 2025
      If your Funlux Network Hardware system won't turn on, first ensure the power brick is properly connected to the wall plug. Unplug it and replug it until it fits snugly. Also, verify that your power adapter is correctly plugged into both the power outlet and your NVR system. If the system still doesn't receive power, check the NVR front panel for the POWER LED indicator. If it's on, your monitor might be off or not properly connected to the NVR. If connected through a surge protector, ensure the surge protector is on. Finally, test the power outlet with another device to confirm it's working.
  • B
    Brian Morrison Jr.Aug 17, 2025
    What to do if Funlux Network Hardware cameras will not properly connect to the NVR?
    • M
      Michelle CooperAug 17, 2025
      If your Funlux Network Hardware cameras aren't connecting to the NVR, first check that your IP cameras are properly connected. Verify the connections at the IP camera's Ethernet port and the NVR's camera ports. To check if the camera is on, place your hand next to the camera's lens. If you hear a clicking sound, the camera is switching to night-time viewing, indicating it's on. The NVR may be detecting offline IP cameras.
  • W
    Warren WhiteAug 21, 2025
    Why is the hard drive not detected by my Funlux Network Hardware system?
    • K
      Keith HallAug 21, 2025
      If the hard drive is not detected by your Funlux Network Hardware system, remove the cover and check that the SATA power and data cables are properly connected to both the logic board and the hard drive. Also, ensure that your hard drive is compatible with the system.
  • K
    Kristen NorrisAug 25, 2025
    How to troubleshoot a Funlux Network Hardware mouse that is not working?
    • M
      michaela54Aug 26, 2025
      If the mouse is not working with your Funlux Network Hardware, first check the back panel of your NVR to ensure that the mouse is connected to the correct USB port. If it's connected but still not recognized, disconnect and reconnect the mouse, then reboot the system using the power switch on the back panel.
  • L
    Luis BrooksAug 28, 2025
    What to do if my Funlux Network Hardware NVR is detecting offline IP cameras?
    • M
      Meghan SpencerAug 28, 2025
      To resolve the issue of your Funlux Network Hardware NVR detecting offline IP cameras: 1. Access the [Device Management] page and unmark the "Search and Add All Devices Automatically" option. 2. Under the "Channel" column, select the channel of the camera that is not properly connected, then press the "Delete Device" button on the bottom right. 3. Select the "Auto Add" option and wait 3-5 minutes. If the proper cameras still aren't setup, please repeat steps 1-2 and proceed to step 4. 4. Press the "Search for Device" function and a list will appear. Select the device with the corresponding MAC address that is shown on your IP camera. Alternatively, you can directly add the camera by selecting "Add Device Manually" and inputting the MAC address manually.
  • R
    Robert BarrySep 1, 2025
    Why is my Funlux Network Hardware showing the wrong live feed on my NVR?
    • T
      traviskimberlySep 1, 2025
      If your Funlux Network Hardware NVR is showing a live feed that doesn't match your camera, the NVR might be adding other IP cameras on your network. To fix this: 1. Access the [Device Management] page and unmark the "Search and Add All Devices Automatically" option. 2. Under the "Channel" column, select the channel of the undesired camera feed and then press "Delete Device" to remove the device from the system. 3. Press the "Search for Device" function and a list will appear. Select the device with the corresponding MAC address shown on your IP camera. Alternatively, add the camera directly by selecting "Add Device Manually" and inputting the MAC address.
  • S
    Steven WolfeSep 5, 2025
    What to do if Funlux Network Hardware remote control is not detected by the system?
    • J
      Jacob WeissSep 5, 2025
      If the remote control is not detected by your Funlux Network Hardware system, first install two new AAA alkaline batteries into the remote control. Also, ensure that the front panel of your NVR is not obstructed by any objects. Place your NVR in an open area and point your remote at the NVR during use.
  • R
    Rhonda MorganSep 8, 2025
    How to fix Funlux Network Hardware when HDD is full and the unit is not recording?
    • L
      leslie33Sep 8, 2025
      If the HDD is full and your Funlux Network Hardware unit isn't recording, it may be set to stop recording when the HDD is full. To resolve this: 1. Access the [General Settings] menu and open the [Disk Drive Info] page. 2. Open the drop-down menu at the top next to "Hard Disk Drive Full", select "Overwrite" and press save.

Summary

Before Using This Product

Understanding the Manual

Explains manual organization and conventions for setup and reference.

Safety Precautions

Important safety instructions for operating and setting up the NVR.

Minimum Requirements

Lists the minimum hardware and network requirements for full NVR functionality.

Product Introduction

Product Overview

Introduces the Funlux NVR system, its features, and benefits.

Technical Specifications

Details technical specifications for the NVR and IP camera models.

Package Contents

Lists all items included in the NVR system package.

Getting Familiar with Your NVR

Overview of the NVR's main functions and features.

Front Panel

Describes the components and indicators on the front of the NVR unit.

Rear Panel

Details the ports and connections available on the rear of the NVR.

First-Time Setup

NVR Installation

Guide for installing the NVR hardware, including HDD installation.

Connecting Your NVR

Step-by-step instructions for connecting the NVR to power, display, and network.

Connecting an External Alarm

Instructions for connecting external alarm devices to the NVR.

Camera Installation

Guide for connecting the IP cameras to the NVR.

Mounting the Camera

Instructions for physically mounting the IP cameras on a wall.

NVR First-Time Startup

Guide to initiating the NVR setup wizard and initial configuration.

Startup Guide Explained

Details the steps and options within the NVR's startup wizard.

Home Screen Introduction

Introduces the NVR's main interface and default display.

Main Menu

Accesses the NVR's full feature set via the quick menu.

New Notification

Explains where and how notifications appear on the NVR.

Single View

Allows viewing a single camera feed in full-screen.

Quad View

Toggles the display to show four camera feeds simultaneously.

Playback

Accesses recorded surveillance footage for review.

Logout; Shutdown

Options for logging out the user or shutting down the NVR.

Using the NVR

Main Menu Detailed

Explains how to navigate and use the NVR's main menu features.

General Settings

Manages accounts, date/time, display, logs, firmware, and factory reset.

Account Management

Manages user accounts and permissions for the NVR.

Date & Language

Configures system date, time, and display language.

Display Settings

Customizes content displayed on the NVR home screen.

System Log

Reviews system events, notifications, and alerts.

Disk Drive Info

Displays HDD information, allows formatting, and shows capacity.

System Settings

Configures basic settings, resolution, and firmware upgrades.

Help & FAQ

Provides links to support resources and FAQs.

Device Management

Manages IP cameras connected to the NVR.

Adding a Device

Details methods for adding IP cameras to the NVR.

Video Stream Settings

Adjusts video quality, frame rate, and resolution for streams.

Network Transmission Stream

Configures video streaming for remote viewing.

Video Mask

Allows masking/hiding specific areas in camera feeds.

Network Settings

Configures network parameters like IP address and ports.

DDNS

Configures Dynamic DNS for remote access.

UPNP

Enables Universal Plug and Play for network connectivity.

Event Management

Configures recording modes and critical event settings.

Motion Detection

Sets up and configures motion detection features and schedules.

External Alarm

Configures external alarm inputs and outputs.

Camera Controls

Accesses and adjusts camera settings like image and zoom.

Image Setting

Adjusts image parameters such as brightness, contrast, and orientation.

Zoom

Enables zoom functionality for camera feeds.

Playback

Reviews and browses recorded surveillance footage.

Backup

Instructions for backing up recorded video files to a USB drive.

Remote-viewing Setup

Guides through setting up remote access to the NVR via mobile app.

Updating Your NVR

Instructions for updating the NVR firmware using a USB drive.

Support

Troubleshooting

Provides solutions for common NVR problems and issues.

Warranty

Outlines the warranty policy and terms for Funlux products.

Funlux Support

Provides contact information for online resources and technical support.

Funlux ZP-NE14-S Specifications

General IconGeneral
ModelZP-NE14-S
ManufacturerFunlux
WirelessYes
Frequency2.4 GHz
App ControlYes
Remote ControlYes
Timer FunctionYes
Schedule FunctionYes
Energy MonitoringNo
Wireless StandardIEEE802.11b/g/n

Related product manuals