5
Installation
What’s in the Box
Make sure all the following items are
included in the packaging. If any item
is damaged or missing, contact your
dealer.
RV Range Hood:
● 12V RV Range Hood
● Mounting Screws (4 pieces)
● Instruction Manual
● Warranty Card
Exterior Wall Vent (Sold Separately)
● Exterior Wall Vent
● Mounting Screws (6 pieces)
● Instruction Manual
● Warranty Card
Range Hood Installation
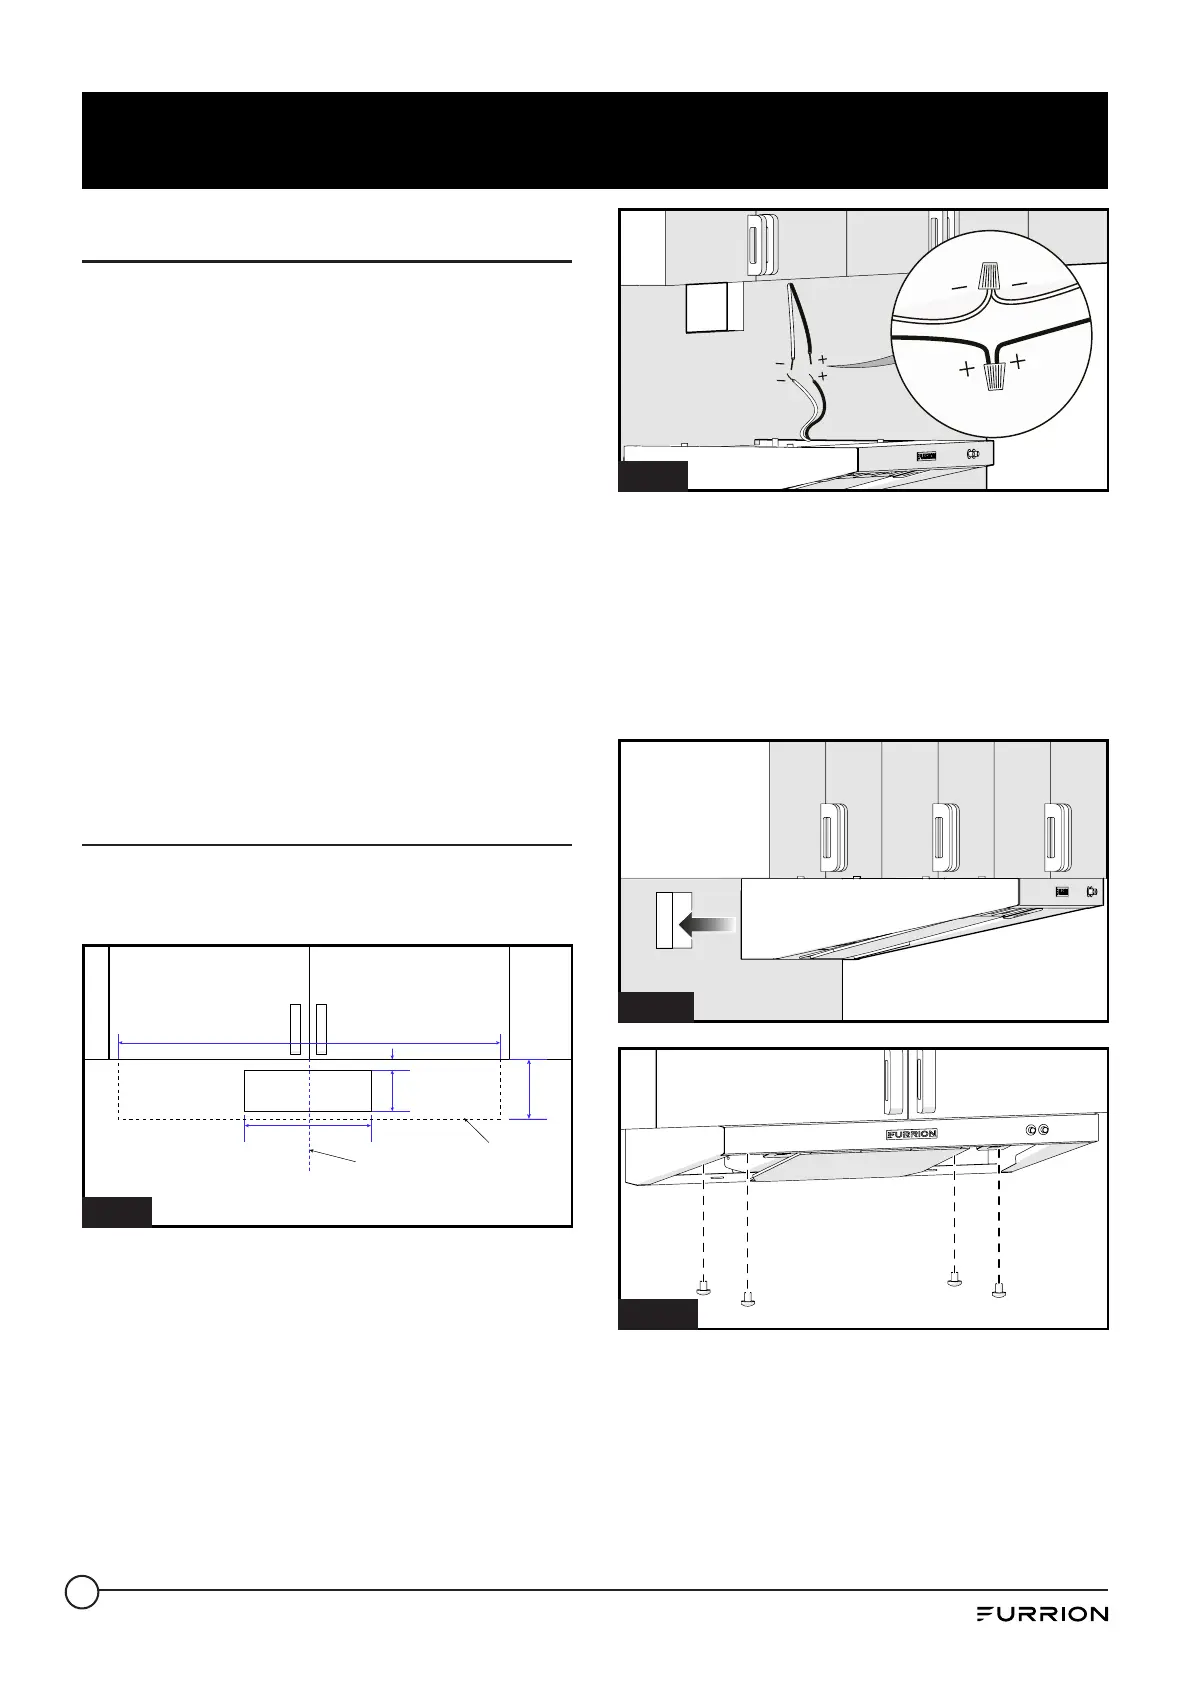
1. Mark centerline of range on wall and
underside of cabinet. (Fig. 8)
Fig. 8
2. Mark and cutout a through-hole on
the wall according to the dimensions
outlined in Fig. 8.
3. Connect the range hood wires to a
12V power source from the bottom of
the cabinet. Connect white to white,
black to black. (Fig. 9)
NOTE: Make all electrical supply
connections in accordance with local
and/or applicable codes.
Fig. 9
4. Insert vent collar at back of the range
hood into the cutout area and fix the
range hood onto the top cabinet with
four screws provided.
(Fig. 10 and Fig. 11)
NOTE: DO NOT over tighten the
screws.
Fig. 10
Fig. 11
5. Verify that the blower housing and
ductwork are free of debris and fan
blades spins freely.
6. Replace the grill cover to the range
hood and press the release tabs
until you hear a click. (Fig. 12) The
grill cover is securely attached to the
 Loading...