Coupling Alignment Gage Operation Manual
Copyright © 2016 Gagemaker. All rights reserved
5
6. Place the coupling on a table or surface and
position it on its side.
NOTE: The table or surface needs to have
enough room for the coupling to roll one complete
revolution.
IMPORTANT: Proper Personal Protective
Equipment (PPE) such as steel toed boots should
be worn during the inspection of the coupling to
prevent injuries from falling objects.
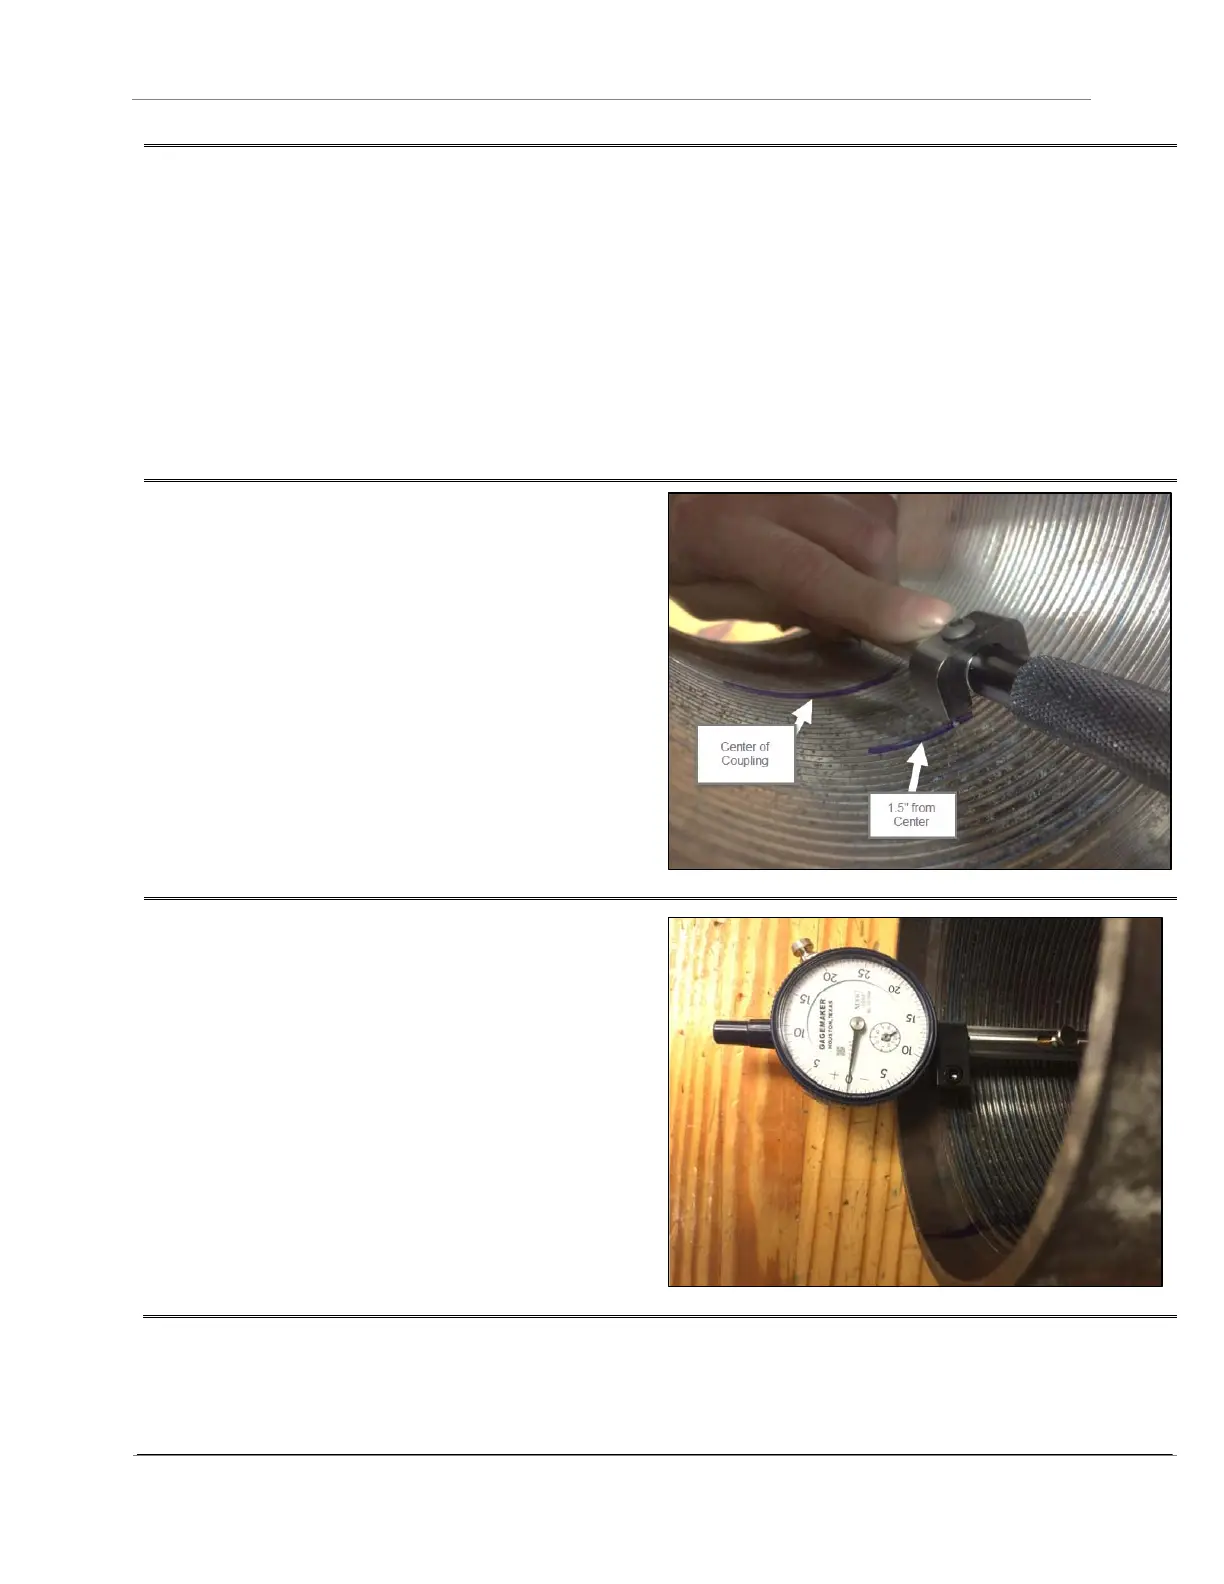
7. Position the CA-9001 by placing the two fixed
contact points into the thread groove marked
in Step 5 (1.500 in. from center). Ensure that
all of the contact points are seated in the
proper thread grooves.
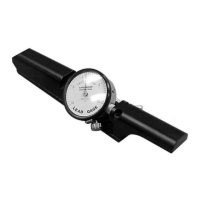
8. Zero the gage by adjusting the bezel.