R
R
G
G
-
-
7
7
0
0
0
0
0
0
T
T
h
h
r
r
e
e
a
a
d
d
D
D
i
i
a
a
m
m
e
e
t
t
e
e
r
r
G
G
a
a
g
g
e
e
O
O
p
p
e
e
r
r
a
a
t
t
i
i
o
o
n
n
M
M
a
a
n
n
u
u
a
a
l
l
Zeroing the RG-7000 Gage Using Gage Blocks
Materials Needed:
• RG-7000 gage
• 5/32” hex wrench (supplied with gage)
• Gage block(s)
To ensure consistent and accurate readings, the RG-7000 gage should be zeroed on a gage
block once during each shift, at a minimum.
1. Locate the gage setting dimensions previously
printed from the Gagemaker screen in the
Thread Disk for Windows software.
2. Stack the proper size gage block(s) for the
desired setting dimension.
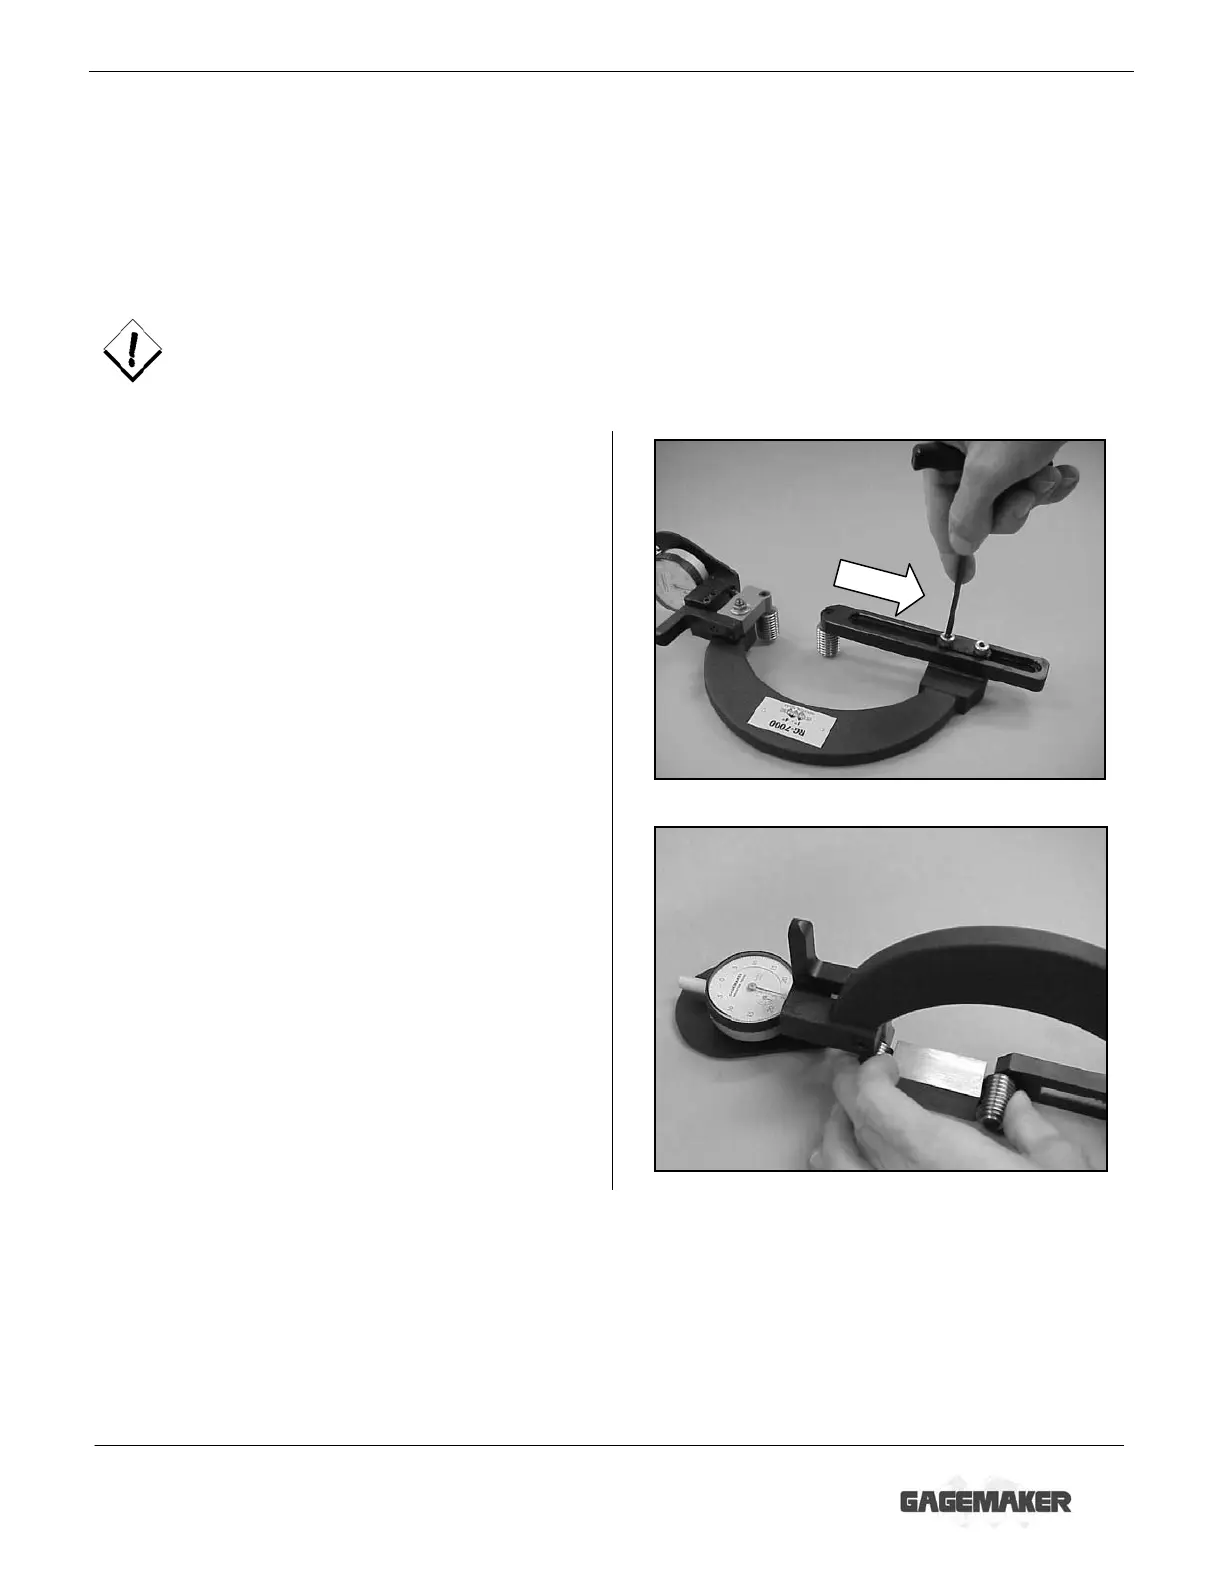
3. Using the 5/32” hex wrench, loosen the lower
adjuster arm lock bolts. Slide the adjuster arm
open enough to fit over the gage block(s).
4. Place the gage block(s) between the thread
rolls and slide the adjuster arm until the thread
rolls contact the gage block(s).
5. Remove the gage block(s).