R
R
G
G
-
-
7
7
0
0
0
0
0
0
T
T
h
h
r
r
e
e
a
a
d
d
D
D
i
i
a
a
m
m
e
e
t
t
e
e
r
r
G
G
a
a
g
g
e
e
O
O
p
p
e
e
r
r
a
a
t
t
i
i
o
o
n
n
M
M
a
a
n
n
u
u
a
a
l
l
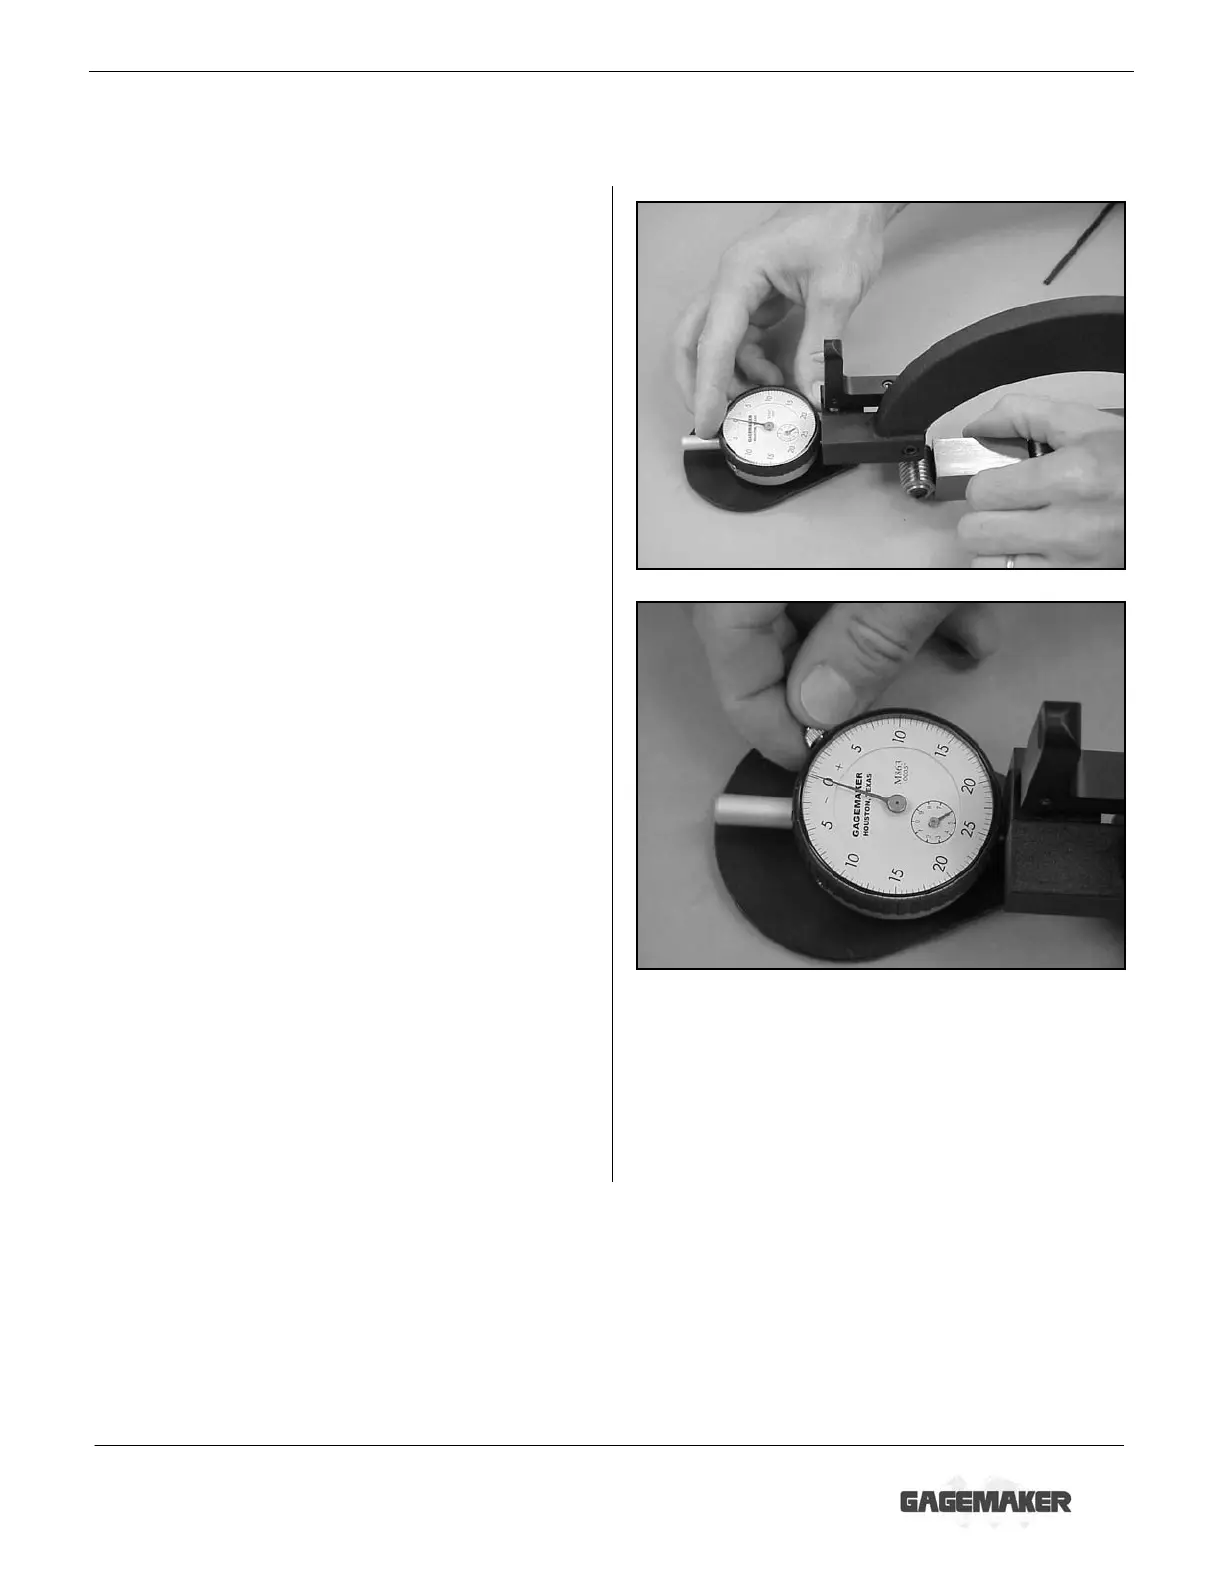
Zeroing the RG-7000 Gage Using Gage Blocks (continued)
9. Turn the indicator dial on the RG-7000 to align
the needle with zero.
10. Tighten the indicator clamp.
11. Press the retraction lever and remove the RG-
7000 from the gage block(s). Reposition the
gage between the gage block(s) to verify the
zero setting.
Note: Note the position of the small revolution
counter on the indicator before removing
the gage. Place a piece of masking tape on
the backside of the indicator and record the
dial setting of the small revolution counter
to eliminate incorrect indicator readings.
12. Press the retraction lever and remove the RG-
7000 from the gage block(s).
13. Set a frequency for verifying the zero setting of
all gages. As a minimum, the RG-7000 gage
should be zeroed on a gage block once during
each shift to ensure accurate readings.