4
TILLER
(continued)
by turning the limb bolt left or counterclockwise. To adjust tiller with no effect on draw weight, adjust each bolt in opposite
directions. Once the tiller has been changed, you must return the limb bolt caps to center by loosening the acorn nut on
top of the limb bolt assembly and using the Spanner wrench to return the dimple on the cap for the top limb to 12 o’clock,
and the dimple on the cap on the bottom limb to 6 o’clock.
LIMB ALIGNMENT
Proper centering of the limb, riser and bowstring path greatly enhances accuracy and forgiveness, arrow spine exibility
and tuning effectiveness.
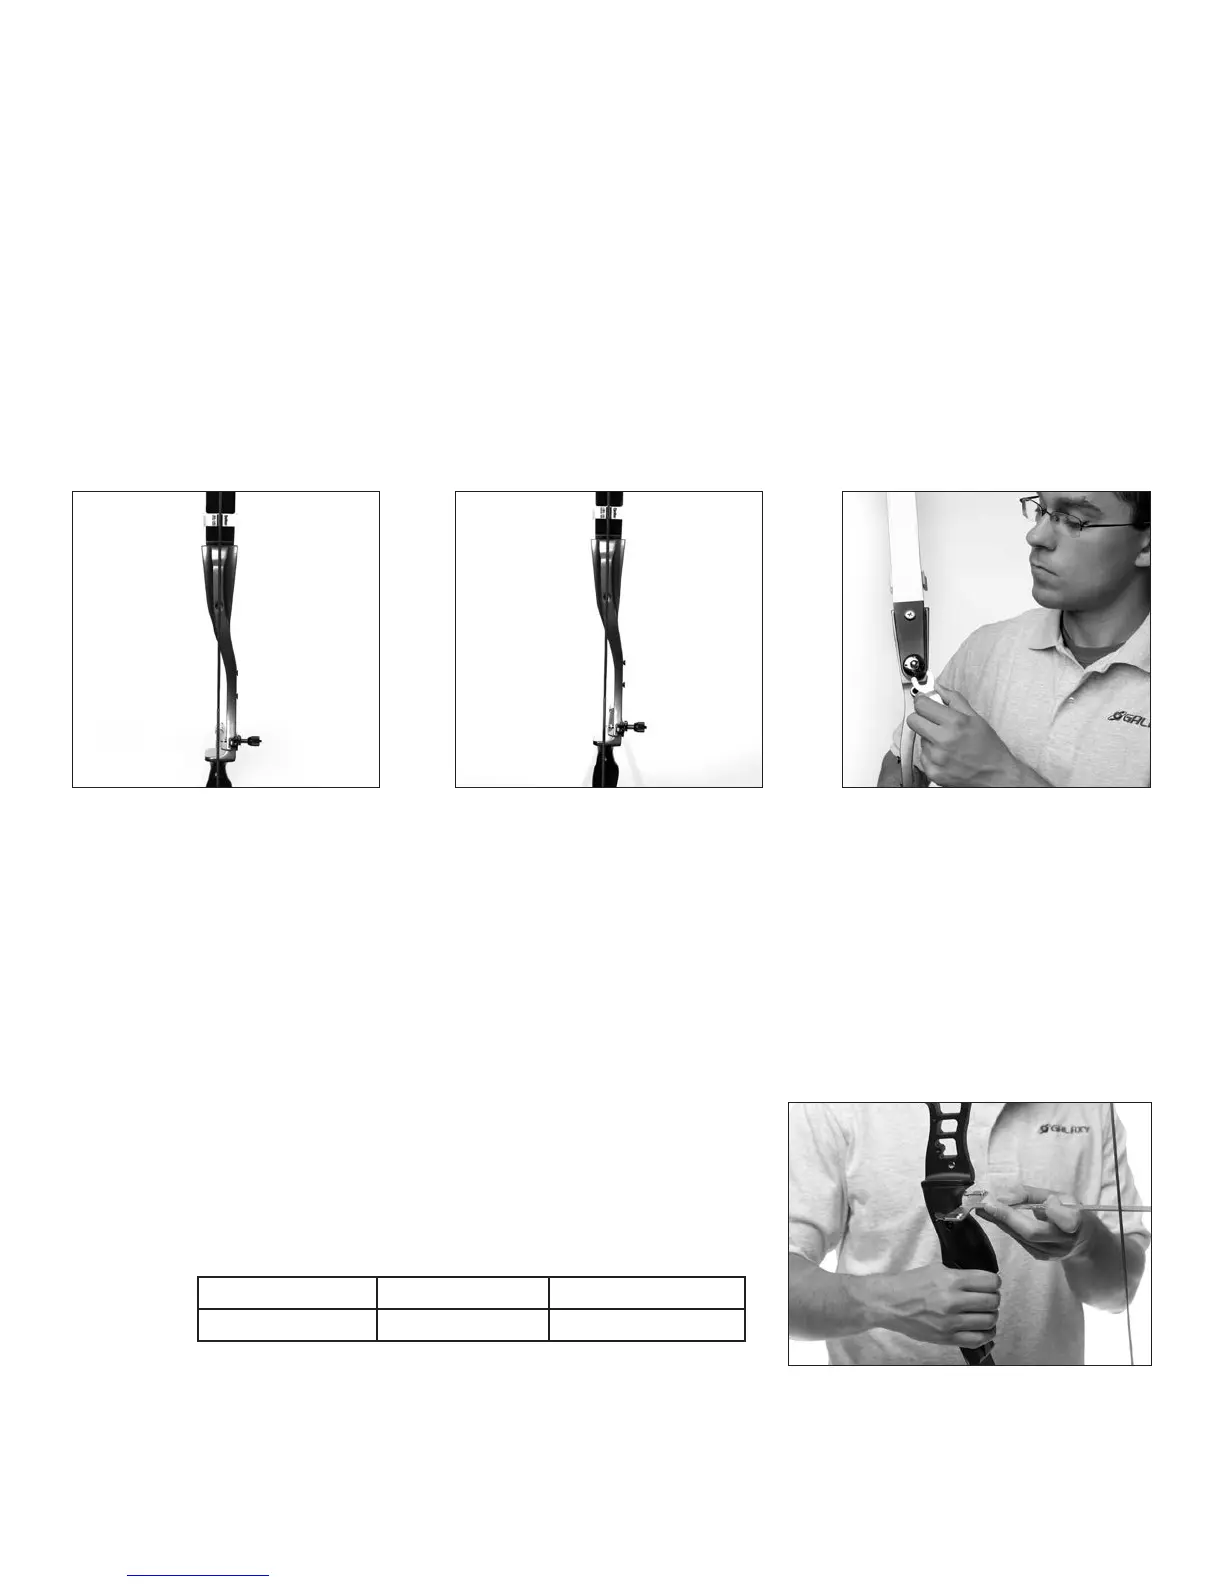
Use Beiter Limb Line Gauges or place a piece of masking tape on each limb just above and below the riser at the ILF
dovetail limb pockets. Precisely measure and mark a vertical line at the center point of each 1 ½” wide limb just as it exits
the riser at the ILF dovetail limb pockets. Screw a quality 24-36” target stabilizer into the stabilizer accessory hole and
tighten. (See Figure 6)
Rest the bow very gently on the bottom limb tip and stabilizer at nearly a vertical position. Position yourself to look per-
pendicular across the bowstring centering the bowstring along your limb center marks, riser hardware/holes and grip.
Note the position of the stabilizer to the bowstring line in relation to the top and the bottom limb separately and as a
whole. If the long stabilizer is to the right of your bowstring, (See Figure 7) then untwist the acorn nuts on top of both limb
bolt caps and unstring the bow. Using the Spanner wrench that comes with your riser, twist the top limb bolt cap from 12
o’clock to roughly 1 o’clock. (See Figure 8) Use the Spanner wrench to twist the bottom limb bolt cap from 6 o’clock to 5
o’clock. (You’d do the opposite here if the stabilizer is to the right of the bowstring.) Restring the bow and check alignment.
Keep making slight adjustments in this fashion until your string is centered through the Beiter Limb Gauges or masking
tape, the handle and the stabilizer. When nished, be sure to tighten the acorn nuts on top of the bolt assembly.
To increase draw weight from the minimum setting at this point, without affecting tiller or limb alignment, you must screw
in the bolt head in complete turns. Always return the cap dimples to the position they were in after you had set proper limb
alignment.
BRACE HEIGHT
A bow’s brace height is measured from the bowstring to the grip throat or pivot
point of the riser. (See Figure 10) Brace height is critical to your bow’s per-
formance, tuning, and quietness when shooting. Use this guide in setting the
brace height on your bow to maintain optimum performance.
You can generally make reasonable adjustments in your brace height by
twisting/untwisting your string. Adding twists will increase your brace height.
Untwisting your bowstring will lower your brace height. Ensure you do not untwist past our minimum recommended level
or it may increase noise due to limb slap, increase forearm contact, or stiffen the dynamic spine characteristics of your
arrow while increasing arrow velocity. Do not untwist any string, especially a Flemish twist bow string to a point with less
than 10 twists in it.
Figure 10
Figure 6 Figure 7 Figure 8
SHORT MEDIUM LONG
CRESCENT 7.75 - 8.75 8 - 9 8.25 - 9.25
 Loading...