PACKAGE CONTENTS
GameSir-G7 SE *1 3m USB-C Cable *1
User Manual *1 Thank You & After-sale Service Card *1
GameSir Sticker *1 Certification *1
REQUIREMENTS
*Xbox One / Xbox Series X|S / PC (Win 10 or above) with USB port
ENGLISH
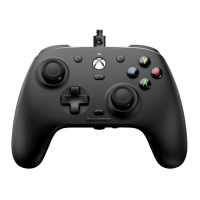
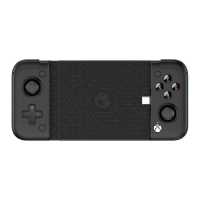
DEVICE LAYOUT
Left Joystick
D-Pad
View Button
Indicator
Xbox Button
Menu Button
ABXY Buttons
Right Joystick
M
Share Button
LBRB
RT
LT
USB-C Cable
USB-C Port
R4
3.5mm Audio
Jack
L4
Microphone
Mute Button
CONNECT
Solid White=Connected
VOLUME CONTROL
1. Hold the M button+D-pad’s Up/Down to Increase/Decrease the Master
Volume. (10 levels in total)
*There will be a beep when adjusting to the maximum/minimum level.
2. Hold the M button+D-pad’s Left/Right to Increase game volume while
Decreasing voice chat volume/Decrease game volume while Increasing
voice chat volume.
*There will be a beep when adjusting to
the maximum/middle/minimum level.
3. Microphone Mute Function: When your headphone/earphone is plugged in,
press the Microphone Mute Button, the indicator will become solid red and
the Microphone Mute function is On. Press the Microphone Mute button again,
the indicator will go out and the Microphone Mute function is Off (Default).
Solid Red=Microphone Mute
1. Set R4/L4 button value: Hold the M+R4/L4 buttons simultaneously for
3s. When the indicator blinks slowly, tap the button you want to map to
R4/L4. The indicator turns solid to indicate R4/L4 button value is set.
2. Cancel R4/L4 button value: Hold the M+R4/L4 buttons simultaneously
for 3s. When the indicator blinks slowly, tap R4/L4 button. The indicator
turns solid to indicate R4/L4 button value is canceled.
NO PRESET BUTTON VALUES
(Mappable buttons: A/B/X/Y/LB/RB/LT/RT/L3/R3/D-pad/Menu/Xbox/View Button)
BACK BUTTONS SETTINGS
1. Hold the View + Menu + Xbox buttons until the USB-C cable is
inserted into the PC’s USB port. The indicator will slowly blink white.
2. Ensure that LT & RT and the left & right joysticks are not touched. Then
Press the A button. The indicator will go out.
3. Press LT & RT to their maximum travel. Rotate the joysticks at their
maximum angles for 3 times. Press the A button. The indicator becomes
solid white to indicate the calibration is over.
4. After the calibration is over, it’s required to unplug and replug the
controller before using.
JOYSTICKS & TRIGGERS CALIBRATION
Press M + A/B/X/Y buttons in sequence to switch to the corresponding
profile.
M + Y = Default M + B = Profile 1
M + A = Profile 2 M + X = Profile 3
PROFILE SWITCH
CUSTOMIZATION VIA “GAMESIR NEXUS” SOFTWARE
Download “GameSir Nexus” software at Microsoft Store on Xbox/PC or
gamesir.hk
Use the "GameSir Nexus" software to upgrade firmware and
create 3 custom profiles. The profile includes button mapping, joystick &
trigger zones adjustment, vibration level control, etc.
*If the R4/L4 button value set in the software is different from the manual
setting, the latest setting shall prevail, and the former will be directly
overwritten.
日本語
パッケージ内容
GameSir-G7 SE *1 USB-Cデータケーブル (3m) *1
取扱説明書*1 保証書*1
GameSirステッカー*1 合格証*1
必要条件
*Xbox One/Xbox Series X|S/USBポートを備えるPC(Win 10以降)
デバイスのレイアウト
左ジョイスティック
十字ボタン
ビューボタン
インジケーター
Xboxボタン
メニューボタン
ABXYボタン
右ジョイス
ティック
M
共有ボタン
LBRB
RT
LT
USB-Cケーブル
USB-Cポート
R4 L4
3.5mmオーデ
ィオジャック
マイクミュ
ートボタン
接続
常に白色点灯=接続成功
音量調節
1. Mボタン+上または下の方向ボタンを同時に押すと、マスター音量を上げるまた
は下げることができます。(10段階で設定)
*最大/最小まで調節すると、お知らせの音が鳴ります。
2. Mボタン+左または右の方向ボタンを同時に押すと、ゲーム音量を上げる(同時
に人の声の音量を下げる)または下げる(同時に人の声の音量を上げる)ことがで
きます。
*最大/中間/最小まで調節すると、
お知らせの音が鳴ります。
3. マイクミュート機能:ヘッドホン/イヤホンが接続されているときに、マイクミ
ュートボタンを押すと、インジケーターが赤く点灯し、マイクミュート機能がオン
になります。マイクミュートボタンをもう一度押すと、インジケーターが消え、マ
イクミュート機能がオフになります(デフォルト)。
常に赤色点灯=マイクミュート
1. R4またはL4ボタンを設定するには、Mボタン+R4またはL4ボタンを同時に3
秒間長押ししてください。インジケーターがゆっくり点滅するのでその間に、R4
またはL4ボタンに割り当てたいボタンをクリックします。インジケーターが点灯
し、R4またはL4ボタンの設定が完了したことを示します。
2. R4またはL4ボタンの設定を取り消すには、Mボタン+R4またはL4ボタンを
同時に3秒間長押ししてください。インジケーターがゆっくり点滅するのでその間
に、R4またはL4ボタンをクリックします。インジケーターが点灯し、R4または
L4ボタンの設定の取り消しが完了したことを示します。
デフォルトで設定値なし
(マッピング可能なボタン:A/B/X/Y/LB/RB/LT/RT/L3/R3/十字/メニュー/Xbox/ビューボタン)
背面ボタンの設定
ジョイスティックおよびトリガーのキャリブレーション
1. ビューボタン +メニューボタン +Xboxボタンを同時に長押しし、USB-Cケ
ーブルをPCのUSBポートに差し込んだら、ボタンを離します。このとき、インジケ
ーターがゆっくりと白色に点滅します。
2. LT、RTおよび左右のジョイスティックを触らない状態でAボタンを押すと、イン
ジケーターが消灯します。
3. LTとRTを最大限まで押し込み、ジョイスティックを最大角度でゆっくり3回回転
させた後、Aボタンを押すと、インジケーターが白色に点灯して、キャリブレーシ
ョンが終了したことを示します。
4. キャリブレーション終了後、正しく使用するためには、コントローラーを再接続
する必要があります。
プロフィールスイッチ
M + A/B/X/Yボタンを順番に押すと、対応するプロフィールに切り替わります。
M + Y = デフォル M + B = プロフィール1
M + A = デフォルト2 M + X = プロフィール3
GameSir Nexusアプリを使用して設定をカスタマイズします
Xbox、PCのMicrosoft Storeまたはgamesir.hkサイトから「GameSir Nexus」を
検索してダウンロードします。
GameSir Nexusアプリを使用すると、ファームウェアのアップグレードおよび3つ
のプリセットが可能になります。プリセットにはキー変更、ジョイスティックとト
リガーの有効範囲調整、振動強度設定などが含まれています。
*アプリ内のR4またはL4背面ボタンの設定値は、手動設定と異なる場合、最新の
設定が優先され、古い設定を直接上書きします。
한국어
제품구성
GameSir-G7 SE*1 USB-C 케이블(3m)*1 제품 사용설명서*1
구매 감사 카드*1 GameSir 스티커*1 품질보증서*1
요구사양
*Xbox One / Xbox Series X|S / USB 포트 사용 가능한 컴퓨터(Win 10 이상)
제품 구성도
L 버튼
십자 버튼
보기 버튼
표시등
Xbox 버튼
메뉴 버튼
ABXY 버튼
R 버튼
M
공유 버튼
LBRB
RT
LT
USB-C 케이블
USB-C 포트
R4 L4
3.5mm
오디오 포트
음소거 버튼
연결
흰색 LED 켜짐=연결 성공
음량 조절
1. M 버튼 + 상하 방향 버튼을 누르면 메인 음량을 올리거나 내릴 수 있습니다.
(총 10단계)
*음량을 최대/최소로 조절하면 알림음이 울립니다.
2. M 버튼 + 좌우 방향 버튼으로 게임 음량을 올리거나 내릴 수 있으며, 이때
음성채팅 음량은 게임 음량과 반대로 조절됩니다.
*음량을 최대/중간/최소로 조절하면 알림음이 울립니다.
3. 마이크 음소거 기능: 헤드폰이나 이어폰을 연결하고 마이크 음소거 버튼을
누르면, 빨간색 표시등이 켜지면 마이크 음소거 기능이 활성화됩니다. 마이크
음소거 버튼을 다시 누르면 표시등이 꺼지며 마이크 음소거 기능도
꺼집니다(기본값).
빨간색 LED 켜짐=음소거
후면 버튼 설정
사전 설정된 기본값 없음
(매핑 가능 버튼: A/B/X/Y/LB/RB/LT/RT/L3/R3/십자/메뉴/Xbox/보기 버튼)
1. R4/L4 버튼 설정: M 버튼 + R4/L4 버튼을 동시에 3초간 누릅니다. 표시등이
천천히 깜빡이면 매핑할 R4/L4 버튼을 한 번 누릅니다. 표시등이 계속 켜져 있다면
R4/L4 설정이 완료된 것입니다.
2. R4/L4 버튼 설정 취소: M 버튼 + R4/L4 버튼을 동시에 3초간 누릅니다.
표시등이 천천히 깜빡이면 R4/L4 버튼을 한 번 누릅니다. 표시등이 계속 켜져
있다면 R4/L4 버튼 설정이 취소된 것입니다.
아날로그 스틱 및 트리거 버튼 교정
GameSir Nexus로 사용자 지정 설정
Xbox, PC Microsoft Store 또는 당사 홈페이지인 gamesir.hk에서 "GameSir Nexus"를
다운로드합니다.
“GameSir Nexus”에서 펌웨어를 업그레이드하고, 프리셋 설정을 3개까지 저장할 수
있습니다. 프리셋 설정에는 버튼 변경, 스틱 및 트리거 유효 범위 설정, 진동 세기 등의
설정이 포함됩니다.
* GameSir Nexus에서 설정한 값과 직접 R4/L4 버튼으로 설정한 값이 다르면, 최신
설정 값을 사용합니다.
1. 보기 버튼 + 메뉴 버튼 + Xbox 버튼을 길게 누른 상태에서 PC의 USB
포트에 USB-C 케이블을 연결하고 버튼에서 손을 뗍니다. 이때 표시등에 흰색 LED가
천천히 깜빡입d니다.
2. LT, RT 버튼과 L, R 스틱을 누르지 않은 상태로 A 버튼을 누르면 표시등이 꺼집니다.
3. LT와 RT를 끝까지 누르고 각 스틱을 최대 각도로 3바퀴 돌립니다. A 버튼을 눌렀을
때 흰색 LED가 계속 켜져 있으면 교정이 완료된 것입니다.
4. 보정 후 케이블 연결을 해제했다가 다시 연결하면 정상 사용 가능합니다.
프로필 전환
M + A/B/X/Y 버튼을 순서대로 누르면 해당 프로필로 전환할 수 있습니다.
M + Y = 기본값 M + B = 프로필 1
M + A = 프로필 2 M + X = 프로필 3
PУССКИЙ
КОМПЛЕКТАЦИЯ
GameSir-G7 SE x 1 Кабель USB-C длиной 3 м x 1
Руководство пользователя x 1
Сервисная карта с благодарностью за покупку x 1
Наклейка GameSir x 1 Сертификат соответствия x 1
ТРЕБОВАНИЯ
*Xbox One / Xbox Series X|S / ПК (ОС Windows 10 или более поздней версии) с
доступным портом USB
СХЕМА УСТРОЙСТВА
Левый джойстик
Крестовина
Кнопка «Просмотр»
Индикатор
Кнопка Xbox
Кнопка меню
Кнопки ABXY
Правый джойстик
Кнопка М
Кнопка
«Поделиться»
Левый бамперПравый бампер
Правый триггер
Левый триггер
Кабель USB-C
Порт USB-C
Кнопка R4
Кнопка L4
Разъем 3,5 мм
Кнопка выключения
микрофона
ПОДКЛЮЧЕНИЕ
Соединение установлено — индикатор светится белым
УПРАВЛЕНИЕ ГРОМКОСТЬЮ
1. Удерживая кнопку M, нажимайте на крестовину вверх / вниз, чтобы увеличить /
уменьшить общий уровень громкости (всего предусмотрено 10 уровней громкости).
*Вы услышите звуковой сигнал при настройке до максимального или
минимального уровня.
2. Удерживая кнопку M, нажимайте на крестовину влево / вправо, чтобы
увеличить громкость в игре и уменьшить громкость голосового чата / уменьшить
громкость в игре и увеличить громкость голосового чата.
*Вы услышите звуковой сигнал при настройке
до максимального, среднего или
минимального уровня.
3. Чтобы отключить микрофон при подключенной гарнитуре, нажмите на кнопку
выключения микрофона (индикатор загорится красным). Нажмите на эту кнопку
еще раз, чтобы включить микрофон обратно (это состояние по умолчанию,
индикатор при этом не горит).
Микрофон выключен —
индикатор светится красным
НАСТРОЙКИ КНОПОК НА ЗАДНЕЙ ПАНЕЛИ
ПО УМОЛЧАНИЮ ФУНКЦИИ КНОПОК НЕ НАЗНАЧЕНЫ
(можно назначить: A / B / X / Y / LB / RB / LT / RT / L3 / R3 /
крестовина / «Меню» / Xbox / «Просмотр»)
1. Настройка функции кнопки R4 / L4: одновременно нажмите и удерживайте
кнопки М + R4 / L4 в течение 3 секунд. Когда индикатор начнет медленно мигать,
нажмите на кнопку, функцию которой вы хотите назначить кнопке R4 / L4.
Индикатор начнет светиться — функция для кнопки R4 / L4 успешно назначена.
2. Сброс функции кнопки R4 / L4: одновременно нажмите и удерживайте кнопки
М +R4 / L4 в течение 3 секунд. Когда индикатор начнет медленно мигать,
нажмите на кнопку R4 / L4. Индикатор начнет светиться — функция кнопки
R4 / L4 успешно сброшена.
КАЛИБРОВКА ДЖОЙСТИКОВ И ТРИГГЕРОВ
1. Нажмите и удерживайте кнопки «Просмотр» + «Меню» + Xbox,
подключите контроллер к порту USB на ПК с помощью кабеля USB-C и отпустите
кнопки. Индикатор начнет медленно мигать белым.
2. Не касайтесь триггеров LT и RT, а также левого и правого джойстиков.
Нажмите на кнопку А. Индикатор погаснет.
3. Зажмите триггеры LT и RT до упора. Максимально отклоните джойстики и
медленно опишите полный круг 3 раза. Нажмите на кнопку А. Индикатор
загорится белым — калибровка окончена.
4. После калибровки отсоедините, а затем снова подключите контроллер к ПК.
ПЕРЕКЛЮЧЕНИЕ ПРОФИЛЯ
Нажмите M одновременно с кнопкой A, B, X или Y для переключения на
соответствующий профиль.
M + Y = профиль по умолчанию M + B = профиль 1
M + A = профиль 2 M + X = профиль 3
НАСТРОЙКА ПОЛЬЗОВАТЕЛЬСКИХ ПАРАМЕТРОВ С
ПОМОЩЬЮ ПО GAMESIR NEXUS
Загрузите ПО GameSir Nexus из Microsoft Store на Xbox / ПК или с сайта
gamesir.hk.
С помощью ПО GameSir Nexus вы можете обновлять прошивку устройства и
создавать до 3 пользовательских профилей. Профили позволяют назначать
функции клавиш, регулировать зоны действия джойстиков и триггеров, уровень
вибрации и т. д.
* Если функция кнопки R4 / L4 в ПО отличается от функции, установленной
вручную, то действует самое последнее назначение кнопки.
DEUTSCH
PAKETINHALT
GameSir-G7 SE *1 USB-C-Kabel 3 m *1 Benutzerhandbuch *1
Danke- und Kundendienstkarte *1 GameSir Aufkleber *1
Zertifikat *1
ANFORDERUNGEN
*Xbox One / Xbox Series X|S / PC (Win 10 oder höher) mit USB-Anschluss
GERÄTELAYOUT
Linker Joystick
Steuerkreuz
Anzeigetaste
LED-Anzeige
Xbox-Taste
Menütaste
ABXY-Tasten
Rechter Joystick
M
Share-Taste
LBRB
RT
LT
USB-C-Kabel
USB-C-Anschluss
R4
L4
3,5-mm-
Audiobuchse
Mikrofon-
Stumm-Taste
VERBINDUNGSANZEIGE
Weiß leuchtend = Verbunden
LAUTSTÄRKESTEUERUNG
1. Halte die M-Taste gedrückt und drücke auf dem Pad nach oben oder unten, um die
Gesamtlautstärke zu erhöhen bzw. zu reduzieren (insgesamt 10 Lautstärkestufen).
*Wenn die niedrigste oder höchste Stufe eingestellt wird, ertönt ein Piepton.
2. Halte die M-Taste gedrückt und drücke auf dem Pad nach links oder rechts, um die
Spiellautstärke zu erhöhen und die Sprachchat-Lautstärke zu reduzieren bzw. die
Spiellautstärke zu reduzieren und die Sprachchat-Lautstärke zu erhöhen.
*Wenn die niedrigste, mittlere oder höchste
Stufe eingestellt wird, ertönt ein Piepton.
3. Mikrofon stumm schalten: Drücke die Mikrofon-Stumm-Taste, während die
Kopfhörer angeschlossen sind. Die Anzeige leuchtet rot und das Mikrofon ist dann
auf stumm geschaltet. Wenn du dieselbe Taste erneut drückst, erlischt die
LED-Anzeige daraufhin und die Mikrofon-Stummschaltung ist
ausgeschaltet (Standardeinstellung).
Rot leuchtend = Mikrofon stummgeschaltet
EINSTELLUNGEN DER HINTEREN TASTEN
KEINE VOREINGESTELLTEN TASTENWERTE
(Zuweisbare Tasten: A/B/X/Y/LB/RB/LT/RT/L3/R3/Pad/Menü/Xbox/Anzeigetaste)
1. R4-/L4-Tastenzuweisung: Halte die M-Taste sowie die R4-/L4-Taste 3 Sek. lang
gedrückt. Wenn die LED-Anzeige langsam blinkt, drücke die Taste, die du R4-/L4-
zuweisen möchtest. Die LED-Anzeige leuchtet durchgehend, um anzuzeigen, dass
die R4-/L4-Taste zugewiesen wurde.
2. R4-/L4-Tastenzuweisung aufheben: Halte die M-Taste sowie die R4-/L4-Taste 3
Sek. lang gedrückt. Wenn die LED-Anzeige langsam blinkt, drücke die R4-/L4-Taste.
Die LED-Anzeige leuchtet durchgehend, um anzuzeigen, dass die R4-/L4-
Tastenzuweisung aufgehoben wurde.
KALIBRIERUNG DER JOYSTICKS UND TRIGGER
1. Halte die Anzeige- , die Menü- und die Xbox-Taste gedrückt, bis das USB-C
-Kabel mit dem USB-Anschluss des PCs verbunden wurde. Die LED-Anzeige blinkt
daraufhin langsam weiß.
2. Stelle sicher, dass du LT und RT sowie den linken und den rechten Joystick
nicht berührst. Drücke dann die A-Taste. Die LED-Anzeige erlischt daraufhin.
3. Drücke LT und RT vollständig durch. Drehe die Joysticks 3 Mal bis zum maximalen
Winkel. Drücke dann erneut die A-Taste. Die LED-Anzeige leuchtet weiß, um
anzuzeigen, dass die Kalibrierung abgeschlossen ist.
4. Nach Abschluss der Kalibrierung musst du den Controller trennen und dann erneut
verbinden, bevor du ihn verwenden kannst.
UMSCHALTEN ZWISCHEN PROFILEN
Drücke die Tasten M + A/B/X/Y der Reihe nach, um zum entsprechenden Profil zu
wechseln.
M + Y = Standardeinstellung M + B = Profil 1
M + A = Profil 2 M + X = Profil 3
PERSONALISIERUNG ÜBER DIE „GAMESIR NEXUS“-
SOFTWARE
Lade die „GameSir Nexus“-Software im Microsoft Store auf Xbox/PC oder über die
Website gamesir.hk herunter.
Aktualisiere über die „GameSir Nexus“-Software die Firmware und erstelle bis zu 3
benutzerdefinierte Profile. Du kannst für jedes Profil eigene Tastenzuweisungen,
Joystick- und Triggerzonen, die Vibrationsstärke und noch mehr festlegen.
*Wenn sich die der R4-/L4-Taste zugewiesene Taste in der Software von der
manuellen Festlegung unterscheidet, hat die letzte durchgeführte Einstellung
Priorität und überschreibt die vorletzte Einstellung.
GAMESIR G7 SE
WIRED CONTROLLER FOR XBOX
https://www.gamesir.hk/pages/manuals-gamesir-g7-se
(E-MANUAL)
GAMESIR G7 SE
WIRED CONTROLLER FOR XBOX
https://www.gamesir.hk/pages/manuals-gamesir-g7-se
(E-MANUAL)
GAMESIR G7 SE
WIRED CONTROLLER FOR XBOX
https://www.gamesir.hk/pages/manuals-gamesir-g7-se
(E-MANUAL)
GAMESIR G7 SE
WIRED CONTROLLER FOR XBOX
https://www.gamesir.hk/pages/manuals-gamesir-g7-se
(E-MANUAL)
GAMESIR G7 SE
WIRED CONTROLLER FOR XBOX
https://www.gamesir.hk/pages/manuals-gamesir-g7-se
(E-MANUAL)
L4 Schnelles
Verriegeln
R4 Schnelles
Verriegeln
Быстрая
блокировка
кнопки L4
Быстрая
блокировка
кнопки R4
L4 빠른 잠금R4 빠른 잠금L4クイックラッチR4クイックラッチR4 Quick-LatchR4 Quick-Latch
https://www.gamesir.hk/pages/ask-for-help
(CUSTOMER SERVICE)
Microsoft, Xbox, Xbox "Sphere" Design, Xbox
Series X, Xbox Series S, Xbox Series X|S,
Xbox One, Xbox Game Pass, Windows 10/11
are trademarks of the Microsoft group of
companies. All other trademarks are the
property of their respective owners.
www.gamesir.hk
JUST IN GAME.