GANSHORN Medizin Electronic GmbH Service Manual Ref.No. 03 140 0 046
PowerCube-Ergo-CASE_ENG_rev.02, 23.11.2012 chapter 3, Disassembly, page 9of 10
_____________________________________________________________________
How to Remove / Replace the O2-Analyser
1) Detach the cover correctly from the base assembly
2) Remove the electronic unit correctly
3) Remove the CO2-Analyzer correctly
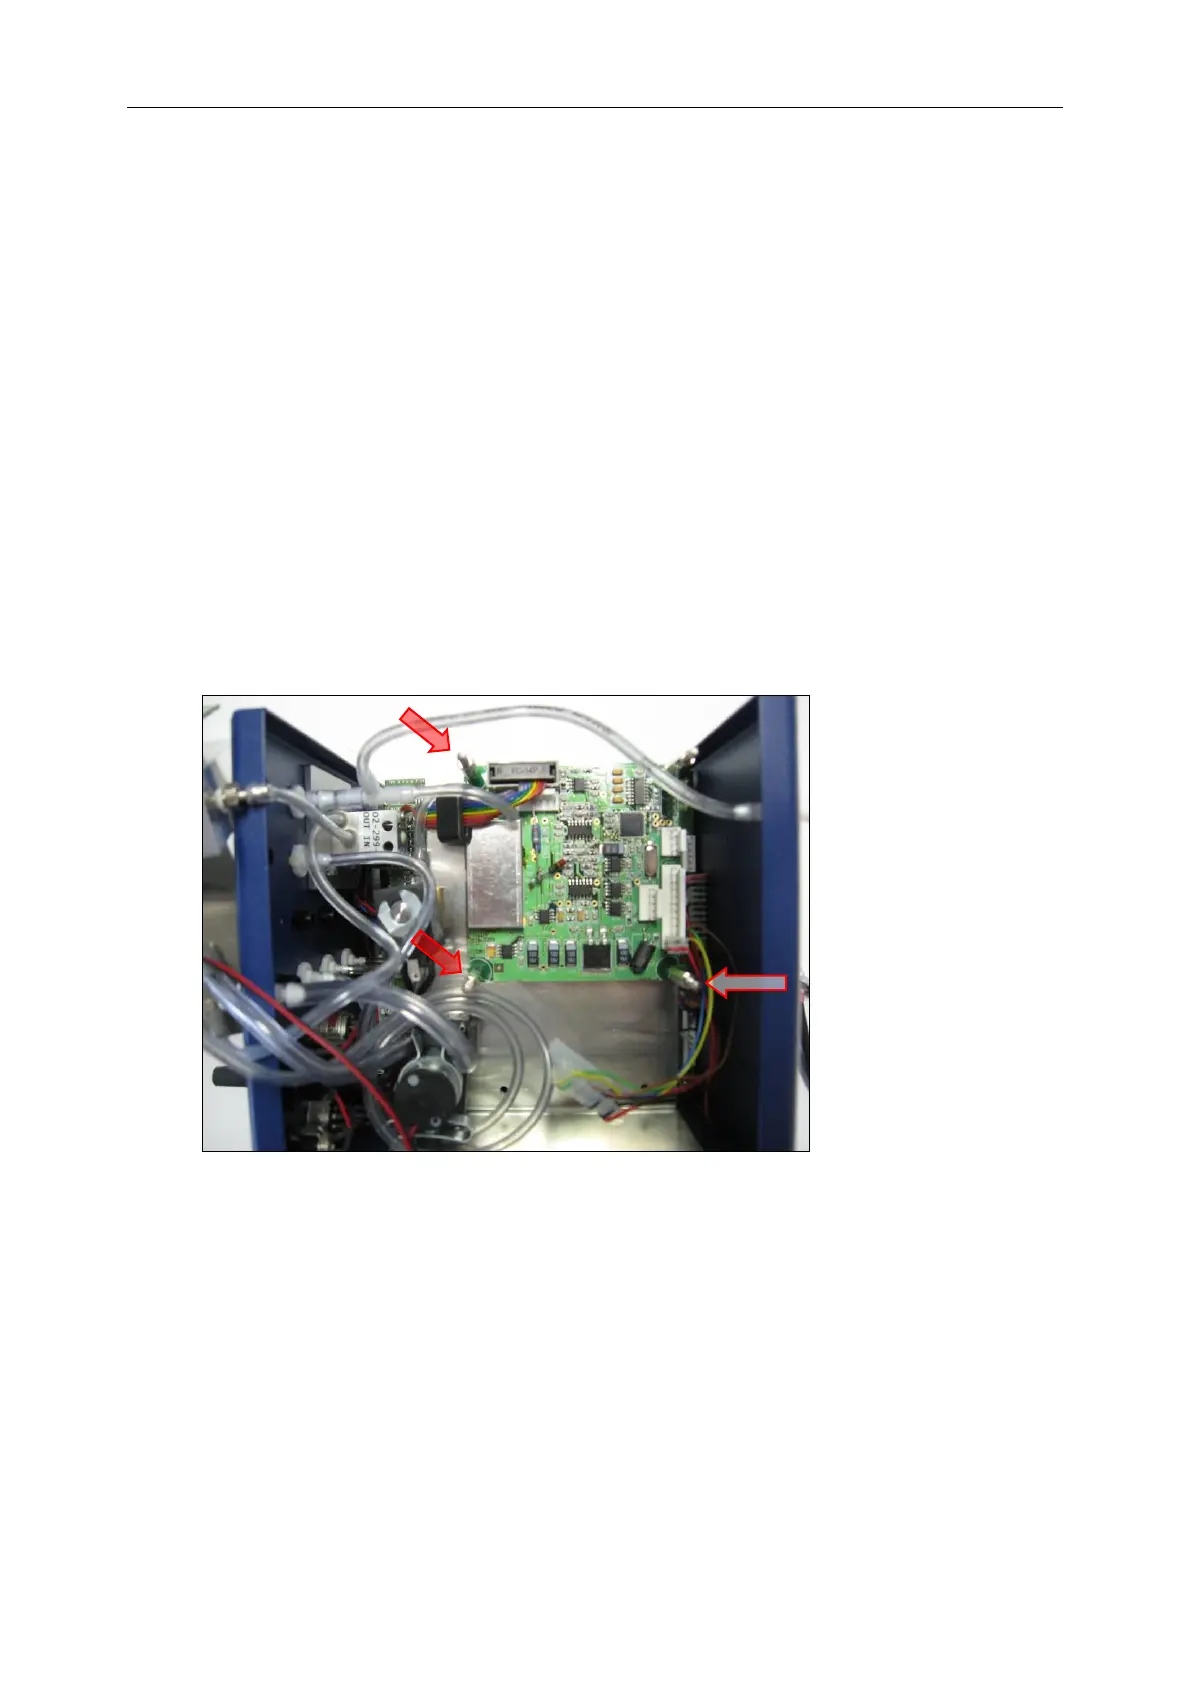
4) Unplug the signal cable from the O2-Analyser
5) Unscrew the three distance bolts that couple the O2- and CO2-Analyser to the montage plate
To assemble the modules again perform the same steps backwards
Please take care to ensure the correct flow direction when connecting the tubing:
a. To the IN-socket of the O2-Analyzer connect the thin tube coming from the M-gas-IN-
socket in the PowerCube’s rear panel
b. To the OUT-socket of the O2-Analyzer connect the thin tube coming from compensation
vessel
To assemble the modules again perform the same steps backwards
After replacement of the O2-Analyser please perform:
4) O2-Offset adjustment (see chapter 6, Troubleshooting, checks and adjustments)
5) O2-Gain adjustment
6) Gas calibration
Pict.: PowerCube-Ergo, inner lateral: O2-Analyzer board (dashed line)
with attachment bolts
 Loading...