2. INITIAL OPERATION
If the Irrigation Valve is installed below ground
level, it must be installed in a sturdy and step-
proof valve mount
1
(valve box) e. g. GARDENA
Art. 1254 / 1255 / 1290 / 1292.
Install the valve mount [ Fig. I1 / I2 ]:
1. Draw up a plan (see e. g. Fig. I3).
Additional information is provided in the
GARDENA Sprinklersystem Planning Guide
which is available from your GARDENA dealer.
2. For underground installation, place a layer of
coarse gravel
2
underneath the valve mount
1
.
This ensures proper drainage of the box.
3. Install the valve box with the top edge of the box
at ground level.
This avoids damage when mowing the lawn.
Please refer to the relevant operating instructions
for information on how to install the Irrigation
Valves in GARDENA Valve Boxes V1 and V3.
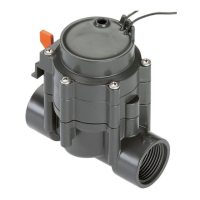
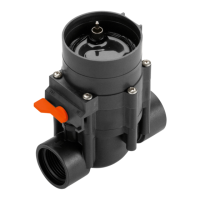
Installing the Irrigation Valve without
a Valve Box [ Fig. I4 ]:
The integrated solenoid valve works only correctly
with the Irrigation Valve connected in flow direction.
CAUTION!
Flow direction!
v Pay attention to the flow direction (arrows)
when installing the Irrigation Valve
3
.
v Seal the screw connections with PTFE sealing
tape, Art. 7219.
Connecting GARDENA Connecting pipes
8
(2700 / 2701 / 2718) or other commercially avail-
able connecting pipes:
1. Screw a GARDENA Connector
7
2763
(1" = 25 mm) into the Irrigation Valve
3
.
2. Connect the GARDENA connecting pipes
8
or other commercially available connecting pipes
(25 mm).
Conventional installation [ Fig. I5 ]:
If using Art. 2750 / 2751 / 2752 / 2753 / 2755 the
points marked with an arrow must be sealed with
sealing tape (e. g. Art. No. 7219).
14
EN