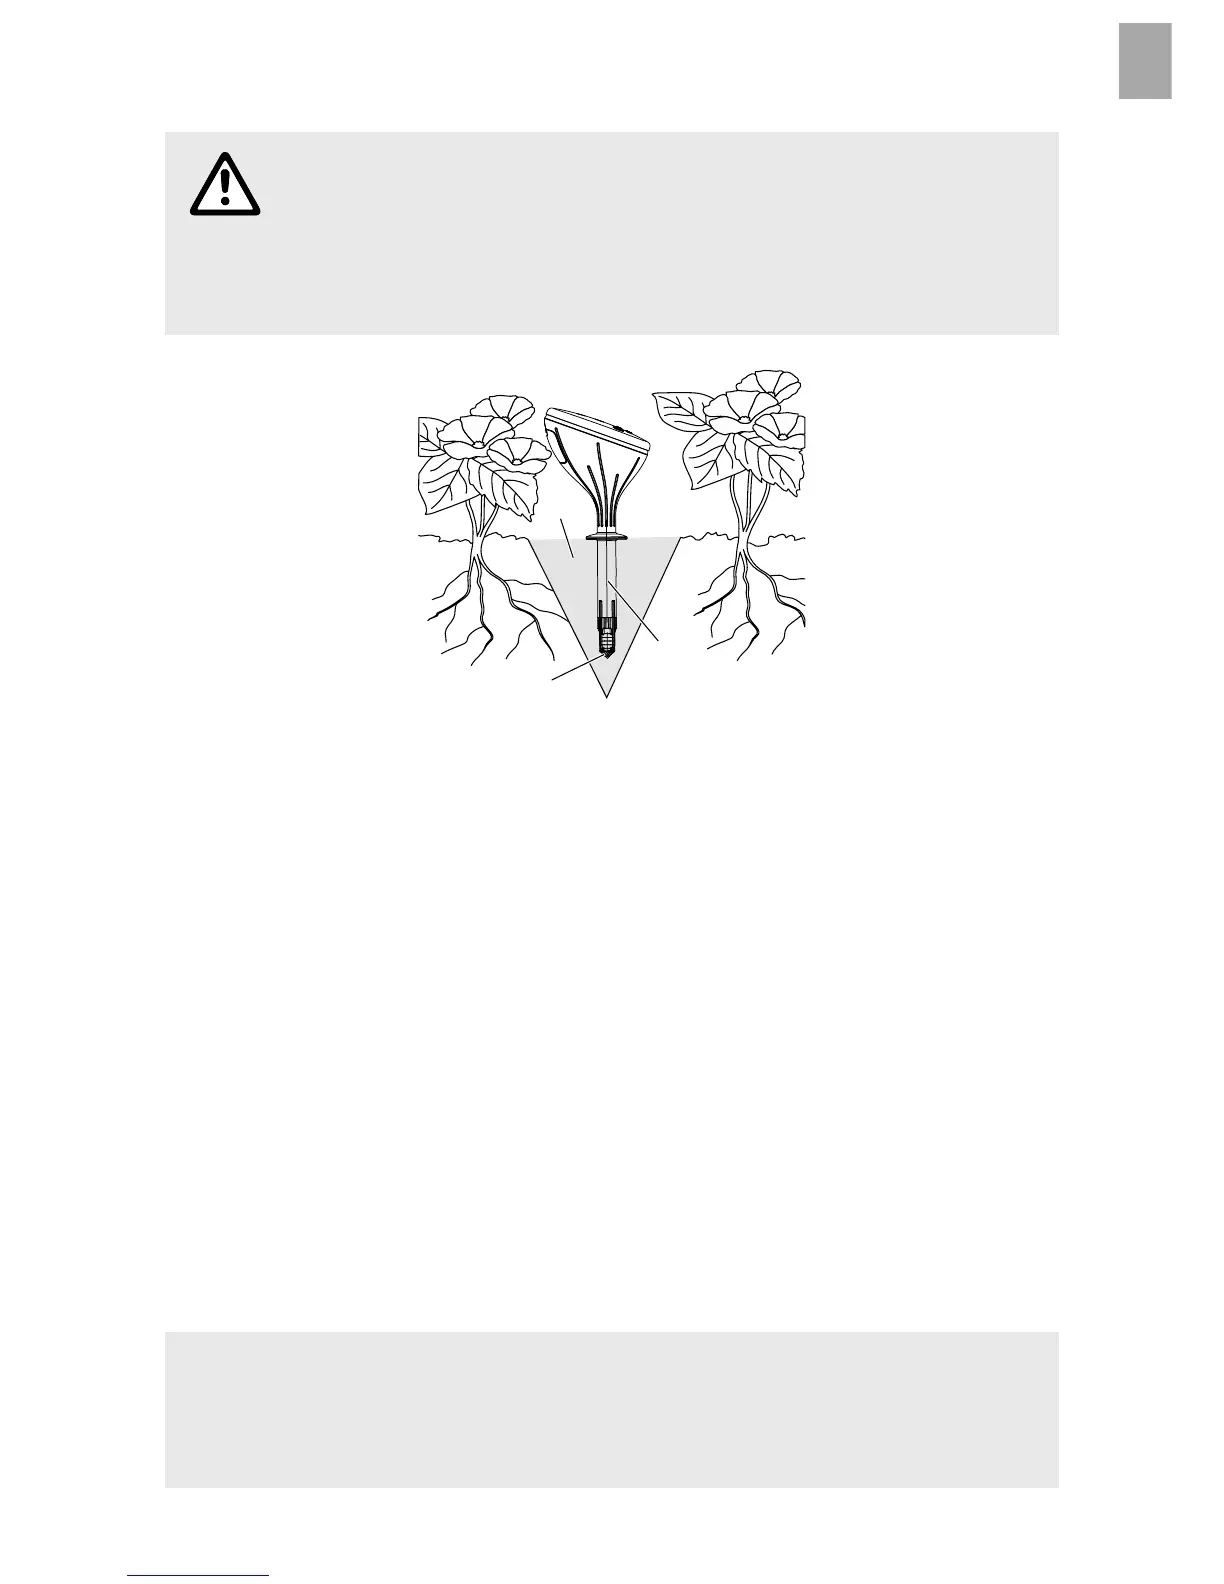
To plant the Sensor:
CAUTION!
The tip of the sensor will only measure the soil moisture
correctly if the sensor tip is in full contact with the ground
on all sides! No air should be trapped at the sensor tip in
the ground.
4
0
8
1. Dig a funnel-shaped hole in the ground
8
at least 12 cm deep.
2. Break up the soil
8
removed and take out any stones.
3. If the soil is dry, moisten.
4. Replace the damp broken-up soil
8
in the funnel-shaped hole without
packing tight.
5. Immerse entire sensor tip
4
in water (felt must be wet).
6. Insert the Sensor to the upper edge of the sensor
0
in the broken-up
soil
8
.
Here the sensor tip
4
must be in full contact with the damp soil on all
sides.
7. Press down the soil
8
around the sensor
0
lightly.
The Sensor should not stand loose in the ground.
8. Water the area around the Sensor with approx. 1 litre water.
Depending on the ground it may take several hours until the Sensor
measures the actual soil moisture.
HINT: To Connect GARDENA Micro-Drip-System:
To ensure that the quantity of water delivered is registered by the sensor
tip when using the GARDENA Micro-Drip-System, a drip head should be
installed directly above the sensor.
9
 Loading...