EasyManua.ls Logo

Garmin Fishfinder 400C User Manual

Garmin Fishfinder 400C
21 pages
To Next Page IconTo Next Page
Page #1 background imageLoading...
Page #1 background image
GARMIN - GEOTRADE FISHFINDER 400C
РЪКОВОДСТВО ЗА РАБОТА - 1 -
FishFinder 400C цветен сонар с възможност за избор на вида на екрана, двулъчев
или двучестотен, в зависимост от Вашия избор.
GARMIN - GEOTRADE FISHFINDER 400C
РЪКОВОДСТВО ЗА РАБОТА - 2 -
Fishfinder 400C - основни функции:
Натиснете HOME от кой да е екран, за да идете на страница Home.
Натиснете MENU от кой да е екран, за да влезете в менюто.
Натиснете и пуснете , за да промените екранните настройки.
Регистриране на продукта:
Помогнете ни по-добре да Ви подпомагаме, като се регистрирате по интернет при
нас още днес! Свържете се с нас на www.garmin.com/registration/.
Използвайте това място, за да запишете серийния номер (8-цифреното число на
гърба на Fishfinder 400C) в случай, че Ви потрябва сервиз. Пазете оригинала или
копие на документите, които сте получили при закупуването на уреда.
Сериен номер: ___________________________
Свързване с Garmin
Свържете се с Garmin, ако имате някакви въпроси по време на работа с Вашия
Fishfinder 400C. В САЩ използвайте телефон (913) 397-8200 или (800) 800-1020, а в
Европа +44(0) 870-8501241
Кажете ни какво мислите

Other manuals for Garmin Fishfinder 400C

Question and Answer IconNeed help?

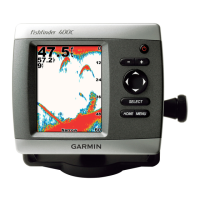
Do you have a question about the Garmin Fishfinder 400C and is the answer not in the manual?

Garmin Fishfinder 400C Specifications

General IconGeneral
Display TypeColor TFT
Transducer TypeDual-beam
Waterproof RatingIPX7
TransducerIncluded
Maximum Depth1500 feet
Operating Temperature5°F to 158°F (-15°C to 70°C)

Summary

Fishfinder 400C Basic Functions

Fishfinder 400C Installation Overview

Installation Preparation

Follow instructions, select tools, and check cable reach for screen and transducer.

Installation Steps

Steps include choosing location, mounting, installing transducer, wiring, and testing.

Choosing the Fishfinder Mounting Location

Fishfinder Mounting Methods

Surface Mount Installation

Mount the Fishfinder to the provided bracket for surface attachment.

Installing Fishfinder on Bracket

Transducer Installation

Transducer Assembly

Insert ring/separator, route cable, slide transducer into mount, and secure with screws.

Transducer Mounting on Trolling Motor

Transom Transducer Mounting

Transom Mounting Procedures

Hull Slot Transducer Installation

Power and Data Cable Installation

NMEA Device Connectivity

Installation Testing and Configuration

Transducer Installation Testing

Basic Fishfinder Operations

Screen View Modes Overview

Full Screen Display Details

Split Screen Display Details

Flasher Screen Display Details

Split Screen Display (Dual-Frequency)

Digital (Numbers) Display Details

Temperature Graph Display Details

Sonar Configuration Menu

Alarms Configuration

Set alarms for shallow/deep water, fish, temperature, battery, and drift.

Display Configuration

Change screen modes (Day/Night) and adjust brightness.

Sonar Settings

Adjust sonar specific settings like scroll speed and noise reduction.

System Settings

Change system settings including beeper and language.

Transducer Settings

Select transducer type and adjust keel offset.

Changing Fishfinder Settings

Alarm Settings

Configure alarms for shallow/deep water, fish, temperature, battery, and drift.

Sonar Settings Customization

Sonar Performance Tuning

System Settings Management

Transducer Settings Management

Transducer Type Selection

Select the transducer type, Dual-beam or Dual-frequency.

Keel Offset Adjustment

Adjust depth readings based on the keel's position relative to the water surface.

Speed Sensor Calibration

Sonar Menu Options Explained

Zoom Functionality

Magnify screen views by 2x or 4x, with options like Bottom Lock and Split Zoom.

Related product manuals