The other hole on the nut plate should line up with the inner hole on the template.
12 If the inner hole on the nut plate does not line up with the inner hole on the template, mark the new hole
location.
13 If you are using a nut plate, using a 3 mm (
1
/
8
in.) drill bit, drill a hole in the inner hole location.
14 Repeat to verify placement of the remaining nut plates and holes on the template.
15 Remove the template from the mounting surface.
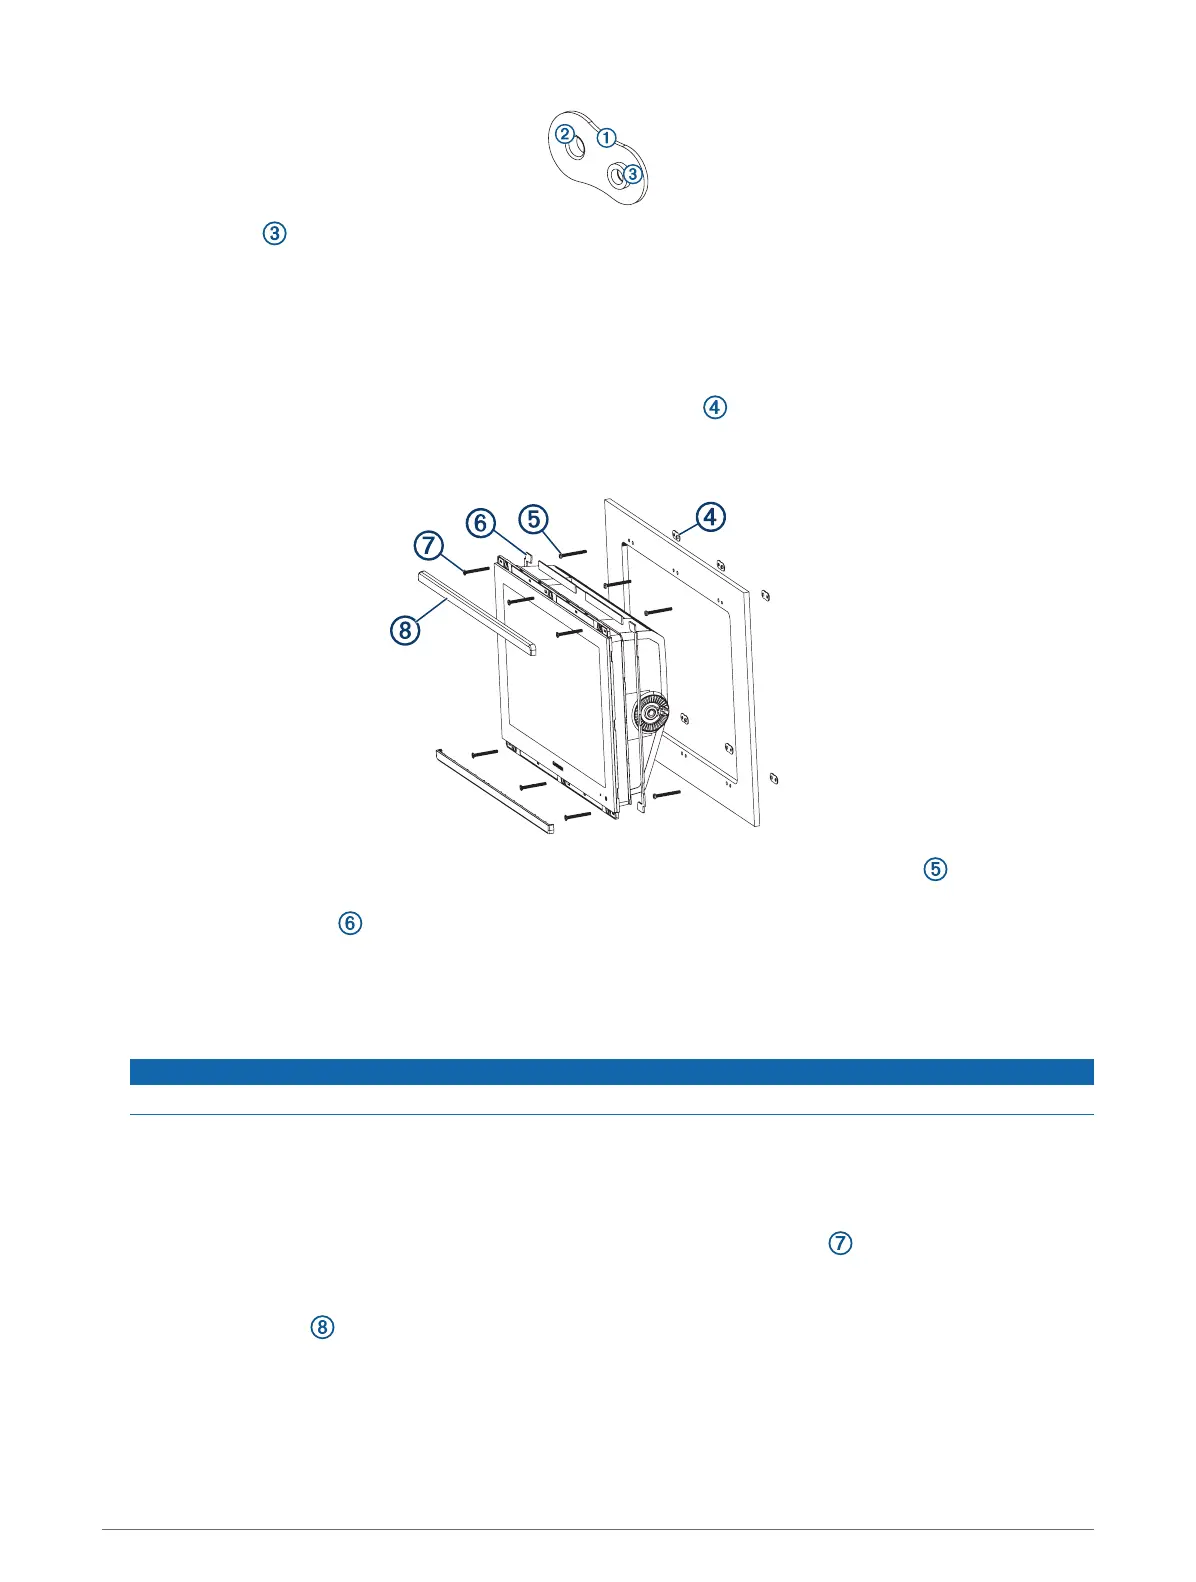
16 Starting in one corner of the mounting location, place a nut plate on the back of the mounting surface,
lining up the holes.
The raised portion of the nut plate should fit into the inner hole.
17 Secure the nut plates to the mounting surface by fastening the pan head machine screws through the
inner holes.
18 Install the foam gasket on the back of the device.
The pieces of the foam gasket have adhesive on the back. Make sure you remove the protective liner before
installing them on the device.
19 If you will not have access to the back of the device after you mount it, connect all necessary cables and
install microSD cards in the back of the device before placing it into the cutout.
NOTICE
To prevent corrosion of the metal contacts, cover unused connectors with the attached weather caps.
20 Apply marine sealant between the mounting surface and the device to properly seal and prevent leakage
behind the dashboard.
21 If you will have access to the back of the device, apply marine sealant around the cutout.
22 Place the device into the cutout.
23 Secure the device to the mounting surface using the flat head machine screws or the included wood
screws.
24 Wipe away all excess marine sealant.
25 Install the trim caps by snapping them in place around the edges of the device.
Connection Considerations
After connecting the cables to the device, tighten the locking rings to secure each cable.
6