Do you have a question about the Garmin GT15M-IH and is the answer not in the manual?
Transducer mounts on solid fiberglass hulls up to 16mm thick.
Avoid mounting near water pickups, protrusions, or strakes; ensure flat mounting.
Refer to the Transducer Placement Guide at garmin.com/manuals/gt15mih.
Requires Phillips screwdriver, sandpaper, marine-grade adhesive, and antifreeze fluid.
Angle between horizontal line and hull. Use smartphone app, angle finder, or ask manufacturer.
Select tank (0°, 5°, 12°, 20°) based on hull deadrise angle for optimal installation.
Test transducer feedback in water before permanent mounting. Repeat if necessary.
Sand, clean, apply adhesive, place tank level with waterline, align with keel arrow.
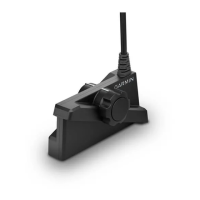
Insert O-ring, fill tank with fluid, insert transducer, align notch, secure with screws.
Details transmit power, maximum depth, frequency range, and operating temperatures.
This document provides installation instructions and specifications for the Garmin GT15M-IH in-hull transducer.
The Garmin GT15M-IH is an in-hull transducer designed to provide sonar feedback for chartplotters or fishfinders. It operates by transmitting and receiving sonar signals through the boat's hull, eliminating the need for external mounting that could be subject to damage or drag. The transducer is installed within a tank filled with a fluid (RV/marine antifreeze or mineral oil) to ensure optimal signal transmission through the hull. This setup is particularly suitable for solid fiberglass hulls, allowing for a clean installation without hull penetration.
The GT15M-IH transducer is designed for in-hull mounting, which offers several advantages:
The installation involves several key steps:
The GT15M-IH is a robust solution for boat owners seeking reliable sonar performance without compromising hull integrity or aesthetics.
| Brand | Garmin |
|---|---|
| Model | GT15M-IH |
| Category | Transducer |
| Language | English |