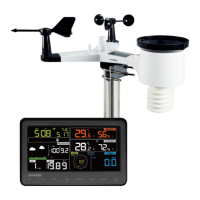
U-bolts installation
Slide the U-bolts into the metal plate on the underside of the integrated wireless sensor and screw
the nuts from the other side so that the bar on which the integrated wireless sensor is placed can
be inserted into this hole.
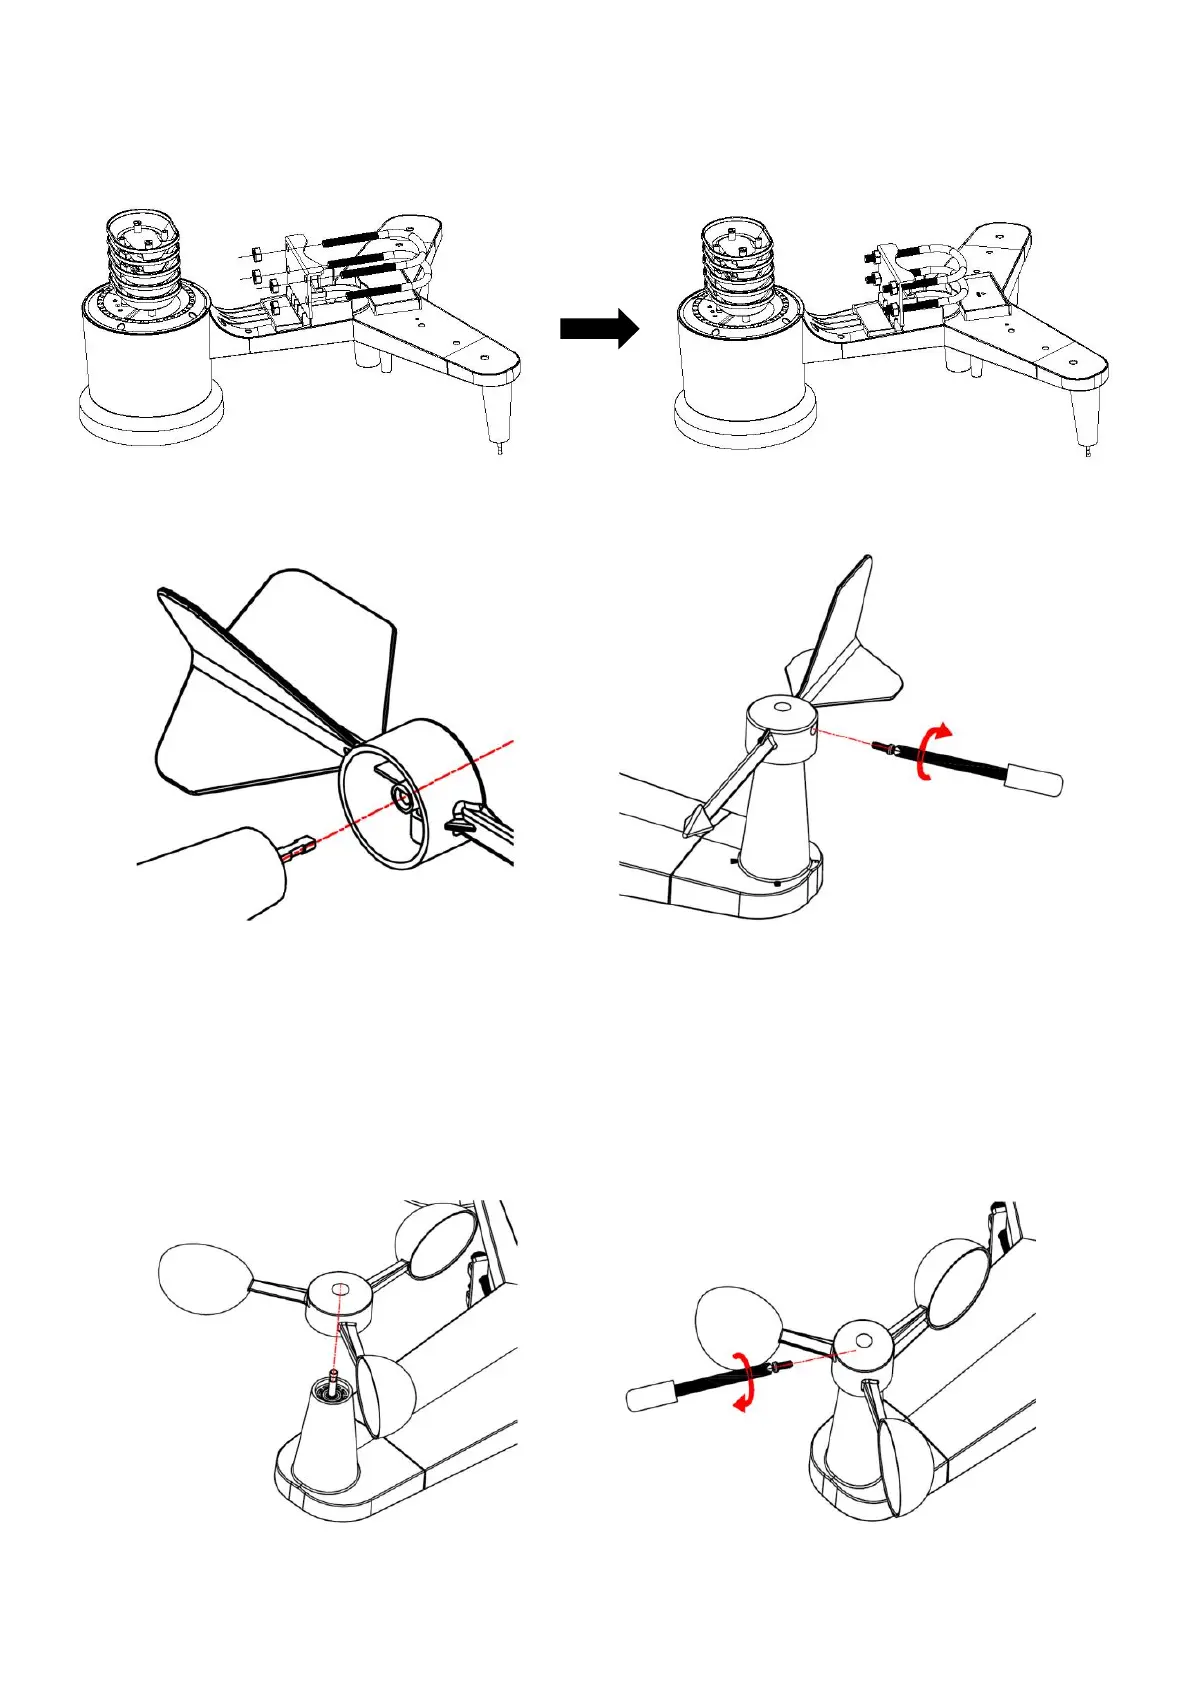
Weather vane installation
Place the vane on the right holder and tighten the bolt. Make sure that the vane rotates freely. A
small amount of friction ensures more precise measurement of wind direction.
The wind direction section on the main unit display shows the letters N (North), E (East), S (South)
and W (West). The integrated wireless sensor must be oriented so that the arrow marked “North”
on the top of the wireless sensor is pointing north. If the integrated wireless sensor is oriented
incorrectly, wind direction measurement will be inaccurate.
Propeller installation
Place the propeller on the right holder and tighten the bolt. Make sure that the propeller rotates
freely.