10
www.gateway.com
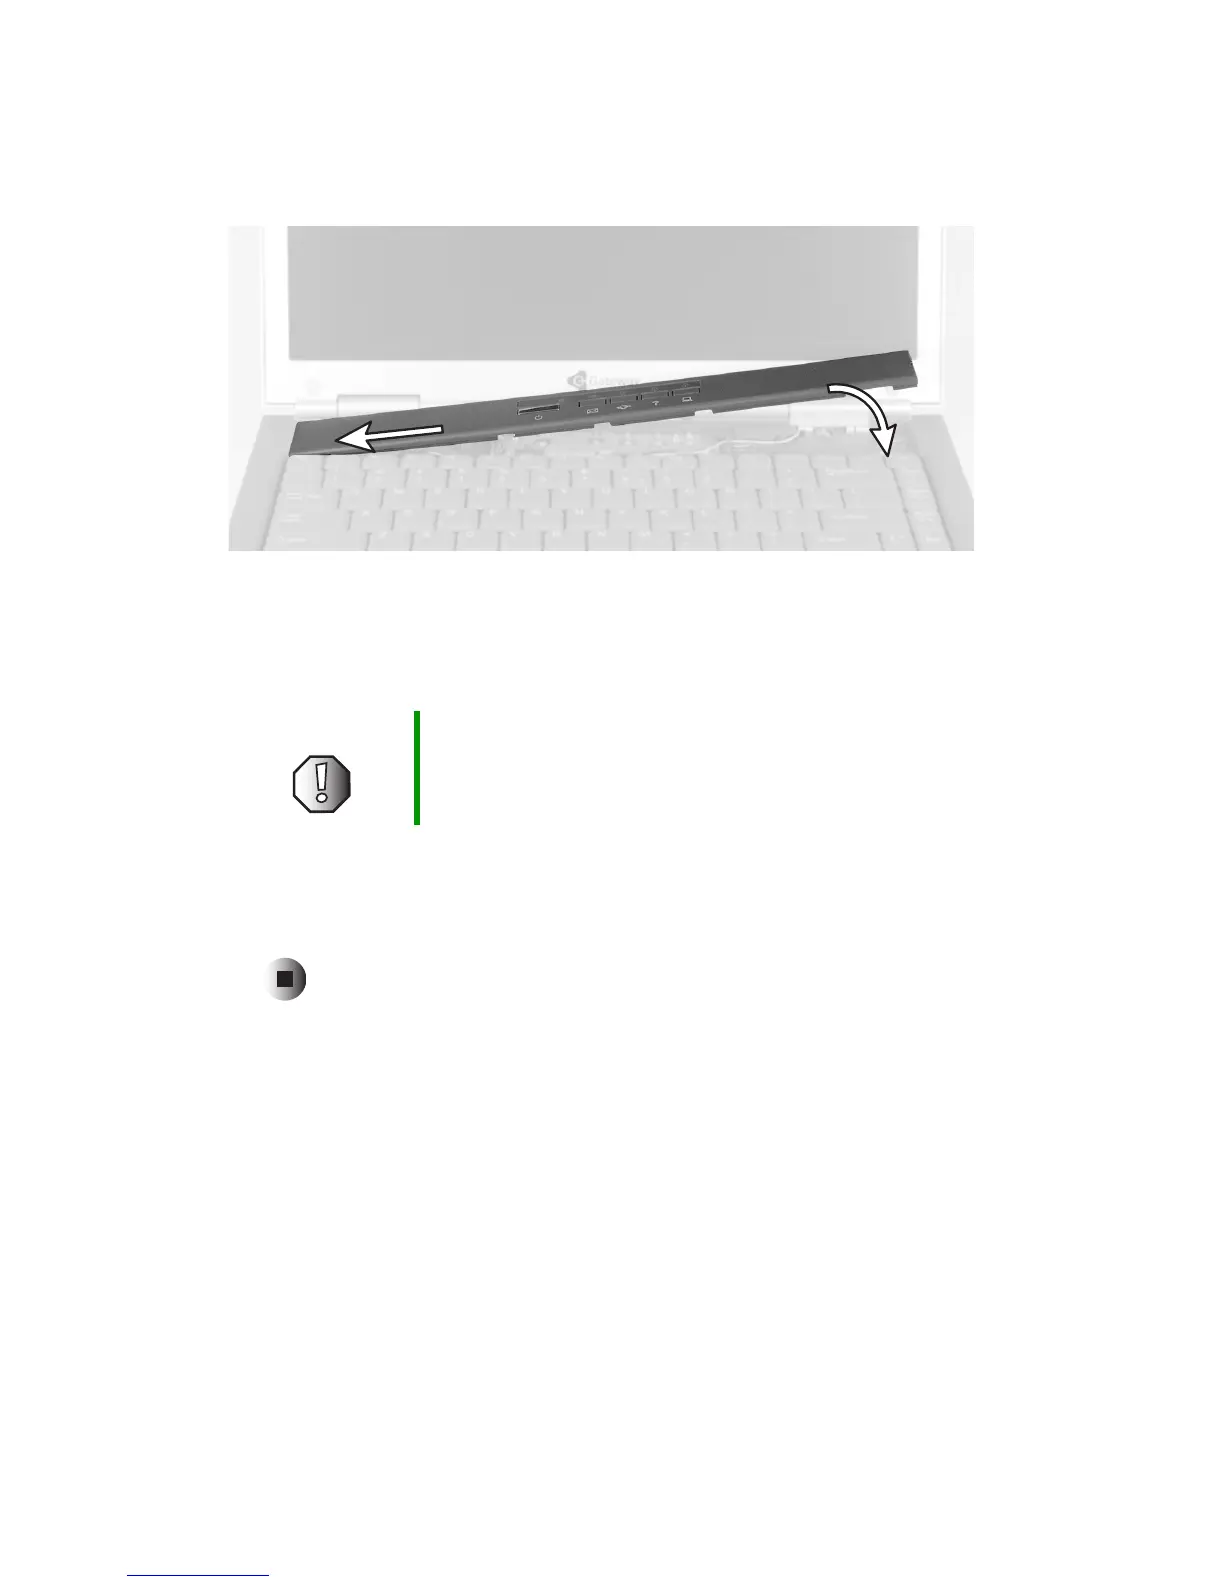
7 Slide the two tabs on the left end of the bezel under your notebook frame.
8 Press down on the bezel in several places until it clicks in place.
The bezel is correctly mounted when you can run you finger along the
bezel and find no loose spots. The bezel should be flat all the way across.
9 Replace the main and optional secondary batteries.
10 Connect the power adapter and modem and network cables, then turn on
your notebook.
Technical Support
See your user’s guide for Gateway Technical Support information.
Safety, Regulatory, and Legal Information
See your user’s guide for important safety, regulatory, and legal information.
© 2003 Gateway, Inc. All rights reserved. Gateway, Gateway Country, the Gateway stylized logo, and the
black-and-white spot design are trademarks or registered trademarks of Gateway, Inc. in the United States and
other countries. All other brands and product names are trademarks or registered trademarks of their respective
companies.
Warning If the bezel is not correctly replaced, your notebook could
be damaged when you try to close the LCD panel.
 Loading...