Do you have a question about the Gateway MULTIMEDIA NOTEBOOK SYSMAN017AAUS and is the answer not in the manual?
Connect the AC adapter and power cord to the unit and an electrical outlet for initial use and charging.
Press the power button to turn on the Gateway 2000 Solo notebook.
Steps to insert and launch the Gateway 2000 Solo System CD for initial experience.
Details on copyright, all rights reserved, and trademark acknowledgments.
Compliance with FCC rules for digital devices to prevent harmful interference.
Critical safety warnings regarding battery replacement, explosion risks, and electrical hazards.
Guidelines for protecting the notebook from environmental factors and damage.
Specifications for the notebook's physical size and weight.
Technical specifications for the active-matrix LCD display, including resolution and contrast.
Details on the CPU, RAM capacity, cache, and BIOS configuration.
Information on PCMCIA slots, I/O ports, and modular bay options for expandability.
Specifications for hard disk drive, battery, AC adapter, and PCMCIA options.
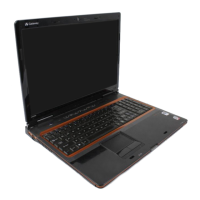
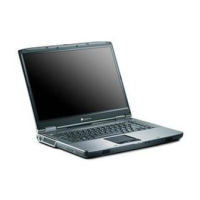
Identification of components and ports on the front and back of the notebook.
Identification of components and ports on the bottom and left side of the notebook.
Location and function of the power button, brightness control, and status display bar.
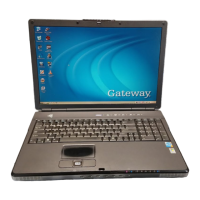
Description of the keyboard, EZ Pad pointing device, and built-in speakers.
Explanation of various icons on the status display bar for system functions.
Details on the 86-key layout, Windows keys, and external keyboard connection.
How to use Fn key combinations and the function keypad for various operations.
Instructions for using the EZ Pad for cursor control, clicking, and drag-and-drop.
Notes on potential audio feedback between built-in microphone and speakers.
Adjusting brightness, viewing angle, and notes on image persistence.
How to connect and use an external monitor with the notebook.
Proper connection of AC adapter and initial battery charging recommendations.
Details on battery charging time, expected run time, and status indicators.
Step-by-step guide to removing the battery and charging it separately.
Information on the bridge battery's role and how to replace it.
Procedures for powering on and properly shutting down the notebook.
How to enter and exit Standby and Suspend modes for power conservation.
Procedures for resolving system freezes using keyboard shortcuts or the reset button.
Description of the modular bay and its compatible drives or covers.
Step-by-step guide for removing and installing drives in the modular bay.
Requirements for installing and using the CD-ROM drive.
Requirements for installing and using the floppy disk drive.
How to connect an external floppy disk drive to the unit.
Information on removing the hard disk drive for replacement.
Step-by-step instructions for removing and installing the hard disk drive.
Procedure for inserting PCMCIA cards into the unit's slots.
How to remove PCMCIA cards using eject buttons and hot-swapping.
Information on compatible memory module types and sizes for upgrades.
Step-by-step guide for installing memory modules in the expansion sockets.
How to connect and use the IR module for infrared communication.
Description of the docking bar and its function as a port replicator.
Step-by-step instructions for physically connecting and securing the docking bar.
How to access system configuration menus using keyboard shortcuts.
Overview of the Main Setup Menu and how to navigate its options.
How to modify system settings like time, date, boot drive, and power switch.
How to manage system passwords, including enabling, disabling, and changing them.
How to configure serial, IR, parallel, and audio port assignments.
How to access and control the unit's power management features.
Details on setting battery life, performance, and timer options for power management.
Settings for low battery beep, wake-up alarm, and L2 cache.
How to configure keyboard settings like key switch, type, delay, and rate.
Diagnosing and resolving issues with hard disk, battery, AC power, and display during startup.
Solutions for common problems like incorrect date, drive errors, password issues, and screen darkness.
Phone numbers for customer service, technical support, and other Gateway 2000 services.