12
IRIS
En montaje a techo, dejar sufi ciente espacio hasta
la pared para la llave de regulación.
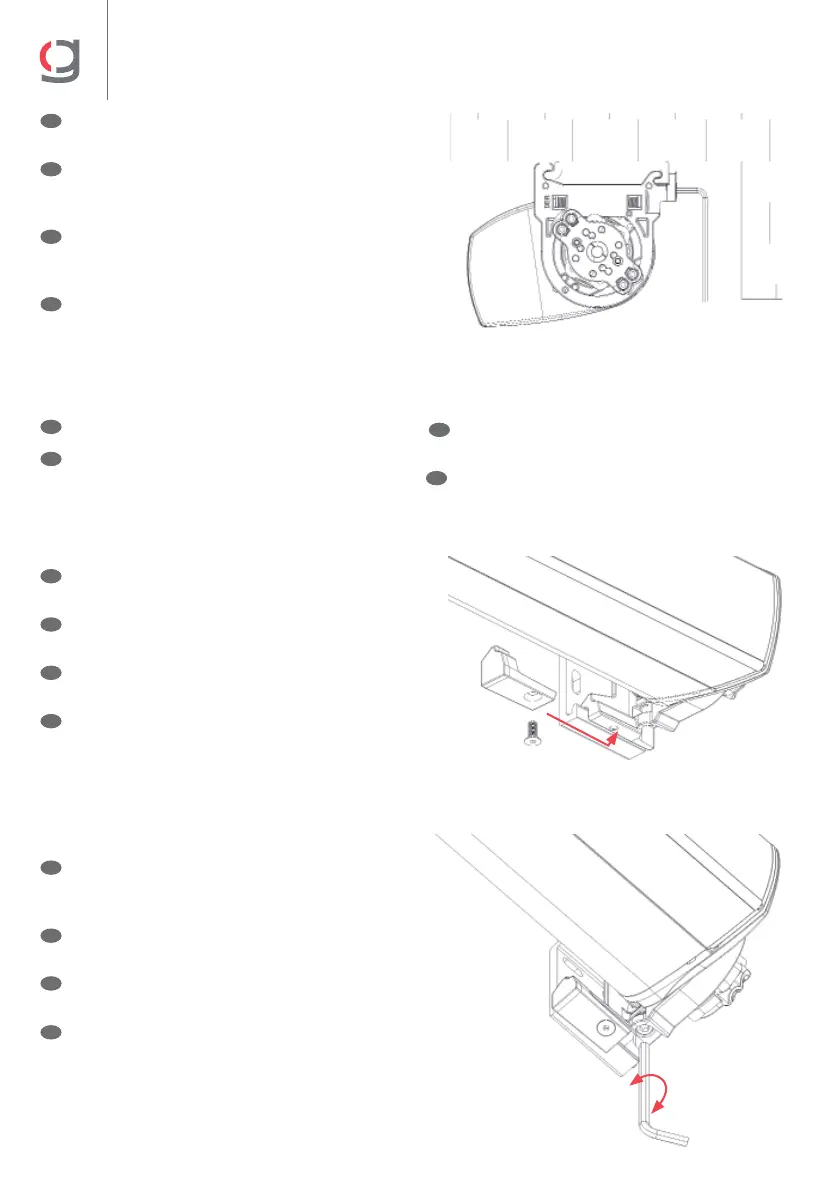
Paso 9: Atornillar las dos placas que limitan los
desplazamientos (vertical y horizontal).
Paso 10: Regular la inclinación del cofre y después,
apreetar los dos soportes fi jos (tornillosM6).
In ceiling option, let enough space before the wall
for being able to operate the adjustment tool.
Step 9: Screw down the two brackets that control
the movement (vertical & horizontal).
Step 10: Adjust the box inclination, tightening then
the two fi xed supports (M6 screws).
Pour le montage à plafond, laisser un espace
su sant jusqu´au mur pour permettre l´utilisation
de la clé de réglage.
9: Visser les deux plaques qui limitent les
déplacements (vertical et horizontal).
10: Régler l´inclinaison du co re et après, visser
les deux supports fi xes (vis M6).
Nel montaggio a so tto, lasciate abbastanza spazio
fi no alla parete per operare successivamente con
lo stumento di regolazione.
Fase 9: Avvitare le 2 placche che limitano i
movimenti (verticali e orizzontale).
Fase 10: Regolare l’inclinazione del casssonetto,
stringendo poi i 2 supporti fi ssati. (viti M6).
Paso 8:
Colgar el cofre en los soportes pared.
Step 8: Place the box in the wall supports.
8: Suspendre le co re en l´accrochant aux
supports à mur.
Fase 8: Collocare il cassonetto nei supporti
pareti.
E
E
E
E
GB
GB
GB
GB
F
F
F
F
I
I
I
I
 Loading...