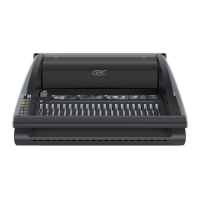
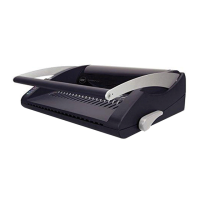
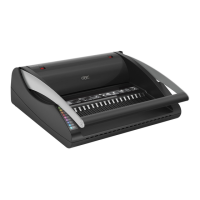
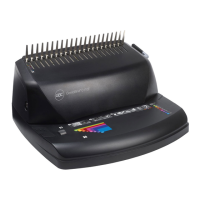
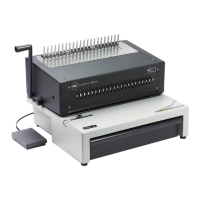
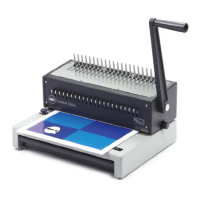
Punching Handle ( C340 ONLY)
Punching Slot
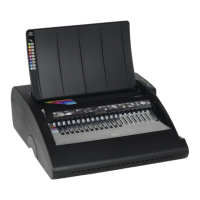
On/Off Switch (C450E ONLY)
Spine Opening Knob
Electric Punch Button
(C450E ONLY)
Paper Punch Centering Dial
Comb Opening Teeth
Clip Tray
(Located on side of machine)
Document Separator
GETTING STARTED
Welcome
Thank you for choosing the GBC
®
C340 or C450E Binding System. We aim to
produce quality binding machines with features that enable you to create excellent
results every time. Before using it for the first time, please take a few minutes to
read this guide. We hope this enables you to bind documents easily. For other
great tools and tips, please visit us at www.gbc.com
Safety Tips
In order to avoid overloading, this machine can punch a maximum of 25 sheets
at one time.
Do not punch metal objects such as staples or paper clips.
Empty the waste tray regularly.
Make sure the machine is operated on a flat stable surface.
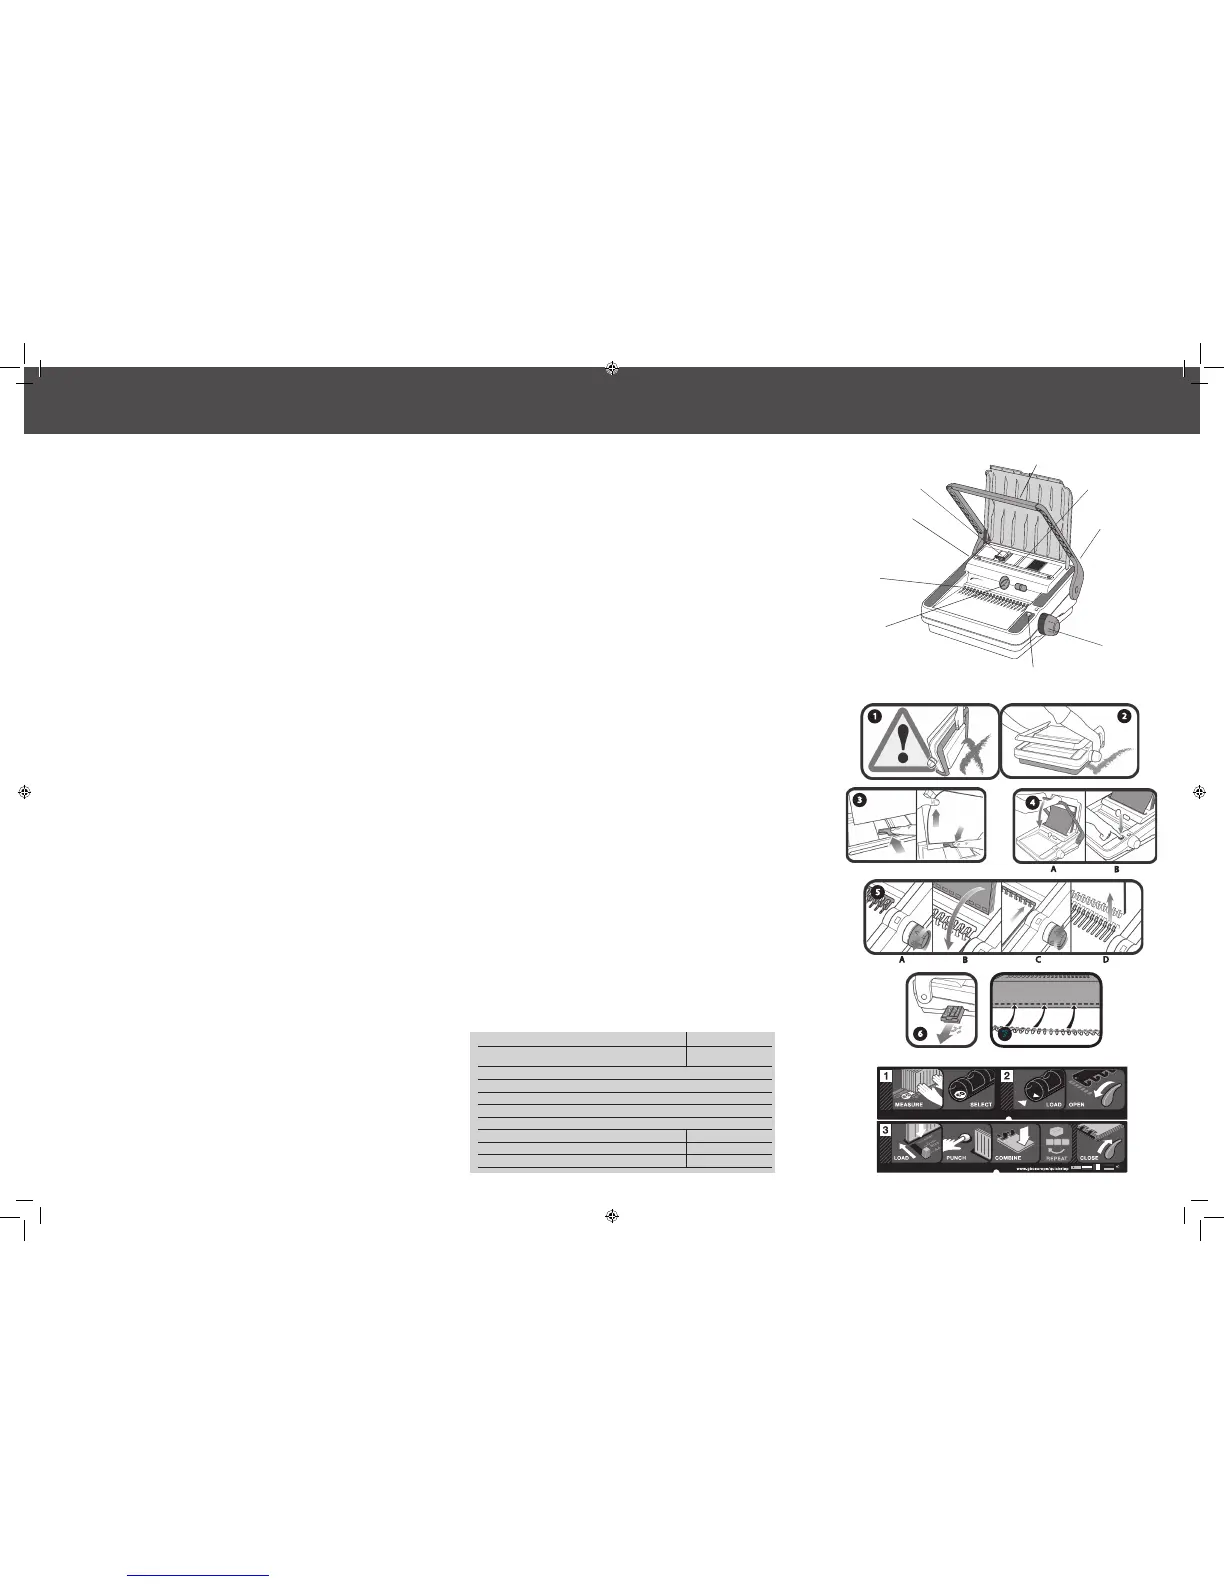
Never lift the machine by the punching handle (Fig. 1). Always use the hand grips
located on the side of the machine (Fig. 2).
Safety Tips for the GBC C450E Only
Do not block air intakes and outlets.
Do not use the machine if the power cord is damaged.
Do not place the power cord where it may be tripped over or pulled. Make sure
that it does not come into contact with hot surfaces such as pipes or radiators.
Make sure the cable is not crushed or pinched.
Do not use an extension cord unless absolutely necessary.
Do not leave the C450E connected to the electrical outlet when not in use.
Do not immerse the C450E in water or other liquids. Doing so will result in electric
shock.
Do not attempt to disassemble the C450E.
Unpacking
Your machine is ready to use when removed from the box. Retain the packaging
in case you need to return the machine for repair.
The punching mechanism is coated with a protective film of lubricant which will
mark your paper. Clean this by punching scrap paper until clean prior to binding.
Setting Up the C450E
Connect the C450E to the electric outlet using the power cord supplied.
Turn on using the On/Off switch located at the rear of the C450E.
Wait while the C450E goes through an automatic check procedure and both LEDs
light up before using. When complete, the green LED will remain On, and the
C450E is ready for operation.
WARNING: The C450E must be grounded. If in doubt, consult a qualified
electrician.
Troubleshooting C450E
This machine is designed to finish 5 bound documents per minute, up to a
maximum of operating for 30 minutes on and for 30 minutes off.
This machine has a thermal overload safety feature. If the motor overheats, this
safety feature activates and will prevent the machine from punching until it has
cooled sufficiently.
The thermal overload switch will automatically reset after approximately 15
minutes of rest.
Selecting the CombBind
®
Spine Size
Lift the lid and punch handle to the upright position. Place entire document so
it rests on the lid. Check the CombBind
®
spine size needed by using the paper
thickness guide.
Sorting the Paper
For large documents, use the document separator.
Place the stack of paper to be punched on the top shelf against the opened top
cover lid.
Push the separator into the stack of paper and push down on the lever. This will lift
an appropriate stack of 25 sheets maximum for easy punching (Fig. 3).
Continue this procedure until all of the paper is punched.
Punching the Paper
For the C340, always make sure that the punch handle is in the upright position
before centering the paper.
Load the first paper stack into the punch slot.
Center the paper using the dial located at the front of the machine.
Lower the raised handle until the paper is punched, and support the machine
when lifting the handle to the upright position (Fig. 4-A).
For electric punching with the C450E:
Load the first paper stack into the punch slot.
Center the paper using the dial located at the front of the machine.
Press the punch button located on the right panel of the machine (Fig. 4-B).
Note: If the machine is overloaded and fails to complete the punch cycle, the red
LED will light. Press the punch button to cancel the red LED. If this does not work,
contact service at (800) 989-4923.
Binding
Place the CombBind
®
spine open side up on the metal teeth. Open the spine
turning the spine opening knob located at the side of the machine (Fig. 5-A).
Punch and then load each paper stack face down onto the opened spine until the
entire document is loaded (Fig. 5-B).
Close the spine by rewinding the spine opening knob (Fig. 5-C) and lift the bound
document from the metal teeth (Fig. 5-D).
Binding Tips
Load the front cover onto the open CombBind
®
spine first, followed by the internal
sheets and back cover.
To edit your document, additional sheets may be included or removed by placing
your document, spine open side up, onto the metal teeth and follow the binding
instructions again.
Maintenance
Make sure that the waste tray is emptied on a regular basis to prevent your
machine from overloading (Fig. 6).
QuickStep Guide 1-2-3
The QuickStep Guide label on the machine is a quick reference guide to how to
bind in three quick and simple steps.
Understand the comb size required by measuring on the document size area 1,
select the appropriate ProComb.
Load the ProComb with the dot to the left and open until you see the coloured
arrow.
Punch and load your document on to the spine until your document is complete.
Close the spine.
ZipComb Spine
The ZipComb spine allows you to create an easily editable document with comb
punch orientation.
Place the spine into the zip holder as shown in Fig. 7.
Load and punch paper as per ‘Binding’ section.
Load punched paper on to spine.
Remove document and spine, close the ZipComb using the zipper included in the
ZipComb boxes.
Complete by flipping the back cover around the spine, for a professional finish
where the spine is hidden.
Technical data C340 C450E
Operation Mode manual electric
Max. Binding 8.5” X11” Letter (standard 20 lb paper)
Punching Paper max. 25
Punching PVC Plastic Covers max. 3
Max. Spine Diameter 1/4”- 2”
Binding Capacity (sheets) 425
Net Weight (lb) 23 lbs 32 lbs
Dimensions WxDxH (in.) 17.325x17.75x7.875 17.325x17.75x6.7
Voltage 120V 60Hz
1
3
4
5
6
A
B
C D
2
A
B
7
 Loading...