9
Reversing the Door. ge.com
Consumer Support
Troubleshooting
Tips
Operating
Instructions
Safety Instructions
Installation
Instructions
Care and Cleaning
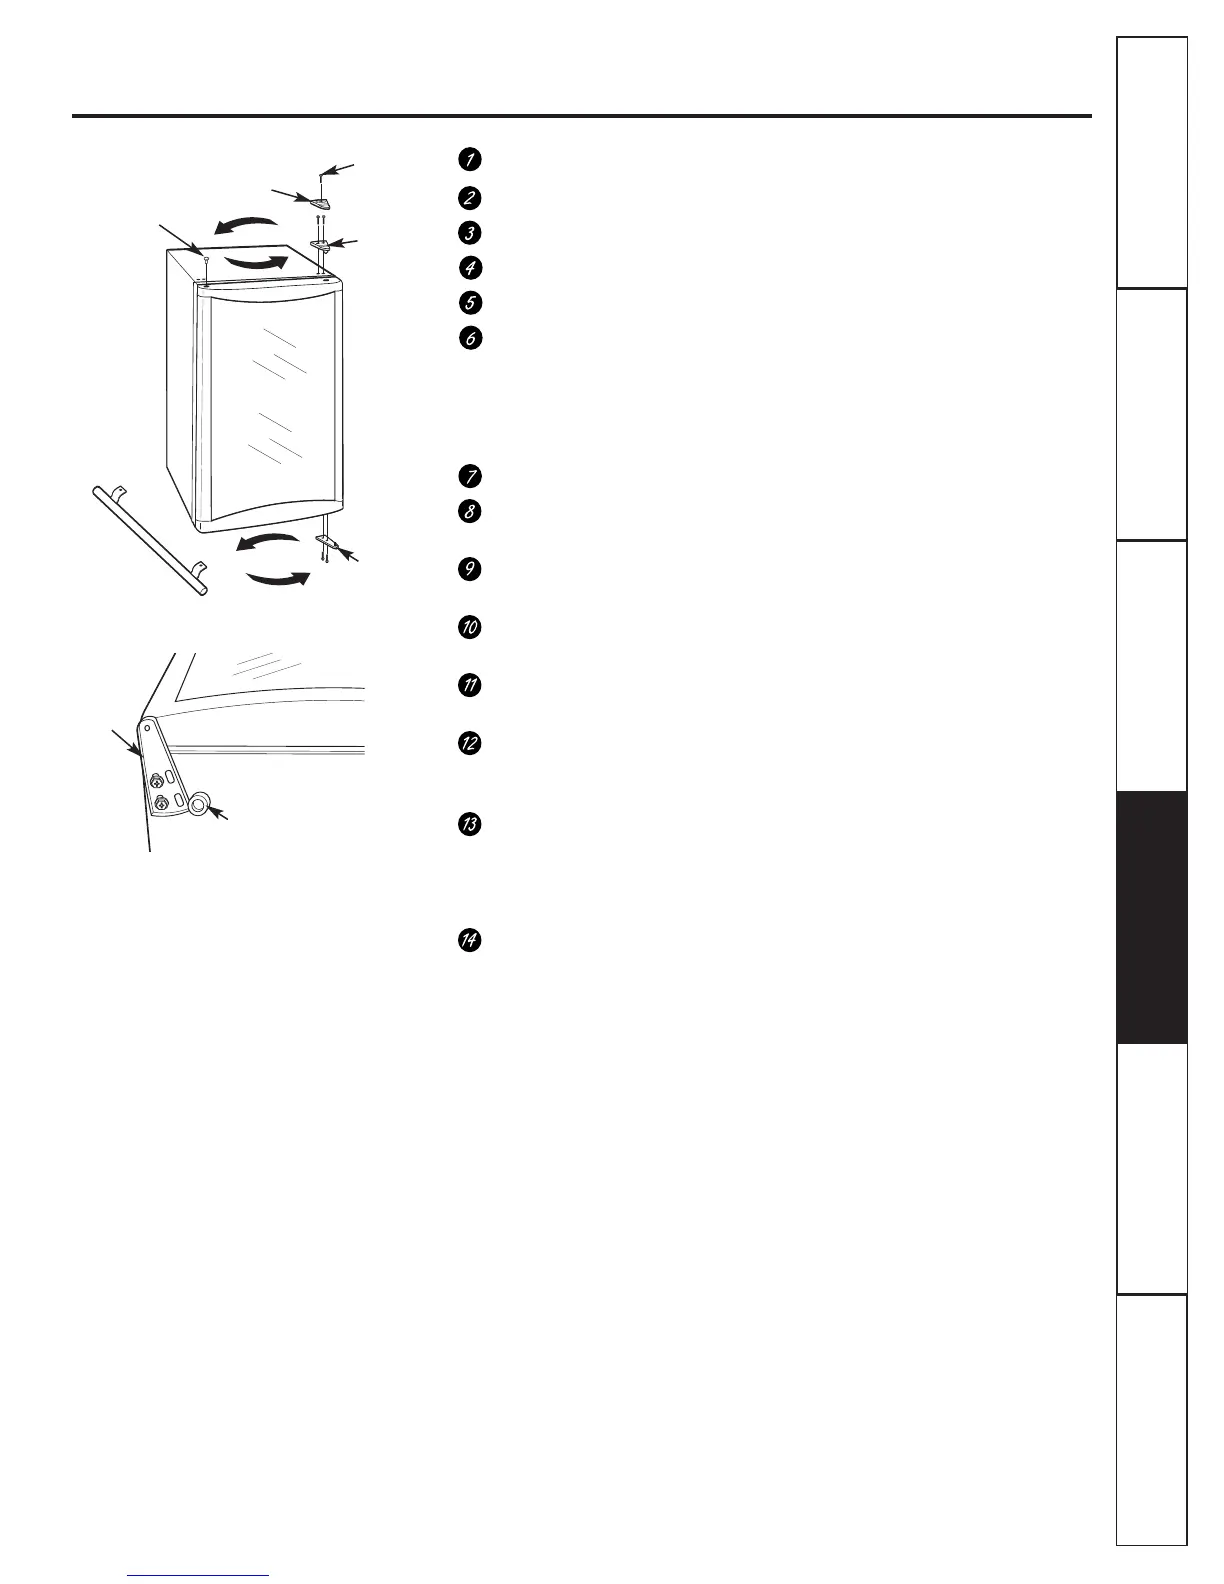
Unplug the beverage center/wine chiller.
Tape the door shut with masking tape to secure alignment.
Remove the top hinge cover by removing the screw.
Remove the 2 screws securing the top hinge to the frame.
Lean the beverage center backward to access the bottom hinge.
Remove the 2 screws securing the bottom hinge assembly to the
frame.
NOTE: If you lay the unit on its back, be sure to let it stand upright for
at least 2 hours before connecting to the power source; this will reduce
the possibility of a malfunction in the cooling system.
Remove the Plug Button from the top left side of the door.
Install the Plug Button into the hinge hole on the right side.
Press firmly to secure.
If the handle has been installed, remove it and install it
on the opposite side. Refer to
Door Handle section for instructions.
Hold the door securely in place and install the bottom hinge
on the opposite side.
Install the top hinge and cover on the opposite side. Make sure
the door is aligned with the cabinet before tightening the screws.
Remove the tape. Open and close the door to check alignment with
the cabinet. If necessary, loosen the screws on the bottom hinge,
realign the door, and retighten the screws.
Plug in the beverage center/wine chiller.
NOTE: If you had to lay the unit on its back, be sure to let it stand
upright for at least 2 hours before connecting it to the power source;
this will reduce the possibility of a malfunction in the cooling system.
Set the temperature controls to the desired setting.
Hinge cover
Top Hinge
Bottom Hinge
Plug Button
Bottom
Hinge
Leveling Leg
Screw


 To Next Page