TOP
A
TREE ASSEMBLY DIAGRAM
2. When you connect two tree sections,
it is important that you align the mark
on the tree poles. See {Fig. C}
A
B
8.25”x11.25”
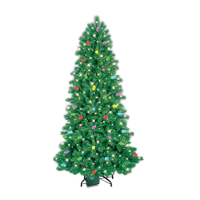
GE Branded Christmas Trees
with
Easy Light Technology
®
eliminates cord connections
Color Choice
®
LED Technology
Assembly Instructions
C
NOTE: No tools required
Tree Sections Tree Stand Approx. Asm Time *
7 ft ~7.5 ft trees 3 Metal 10 – 15 minutes
* Does not include time for shaping branches, estimated shaping time is 30 minutes/section.
7 FT & 7.5 FT
TOP
B
A
B
Nicolas Holiday Ltd. thanks you for purchasing this pre-lit Christmas
tree. Should you have any problems with your tree, visit us at
www.geholidaylighting.com for more information. You can call our
toll free number at 1-877-398-7337.
Check our website for latest service hours and assembly instruction videos.
The tree stand should be open and set at 90 angle.
Remember to tighten the thumbscrew after
connecting section A and tree stand. See
{Fig. B}
Untwist the red metal tie wrap holding the
branches in place.
Gently position any branches that do not fall
into place.
Thumbscrew
90
DISCLAIMER : DO NOT USE OR INSTALL ANY ADDITIONAL CHRISTMAS
LIGHTING OR ORNAMENTATION THAT IS POWERED BY A LIGHT BULB
SOCKET. DOING THIS MAY RESULT IN DAMAGE TO YOUR CHRISTMAS
TREE OR CAUSE PERSONAL INJURY. DOING THIS, WILL RESULT IN A
VOID OF THE LIMITED WARRANTY OF THIS PRODUCT.
Disconnect the decorative item from the power source before
performing any maintenance or cleaning.
For indoor use only 120V
THIS IS NOT A TOY, FOR DECORATIVE USE ONLY.
GE is a trademark of General Electric Company
and is under license by Nicolas Holiday Ltd.
Distributed by Nicolas Holiday Ltd.
©2020 Nicolas Holiday Ltd.
9 F., No. 37, Guangfu North Rd.,
Taipei, Taiwan 10560 All rights reserved.
Printed in China
HG20-DUAL-ONEPLUG-MICRO
AC PLUG
FOR
TREE TOP
Color change
foot pedal
OPEN
4. To change colors,
step on the color
change foot pedal
to the desired
function as listed on
the back of the
foot pedal.
3. Assemble section by section.Firmly seat both sections together.
Note:
a. Always unplug this product before installing.
Do not plug in tree to a power outlet until the entire tree is assembled.
b. This tree is provided with an extension cord for a tree topper, which can be
attached to the top section along the pole.
c. As an option, the tree adapter can be plugged into the back of the tree top
extension cord as an add-on. This feature allows you to utilize only one outlet.
IMPORTANT: Store your carton neatly in a cool, dry location protected from
sunlight to prolong the tree life and to better keep the light sets in working order.
Do not place a heavy load on the carton to avoid damage to or crushing the carton
and tree inside.
Troubleshooting Tips
If the tree does not illuminate, try stepping on the Color change foot pedal and
make certain the wall switch is turned on.
If one section of your tree does not illuminate, check that section for cut or damage
wires or that all electrical connections on tree are made.
Due to unique construction of the light sets, the individual LEDs are not replaceable.
The light sets are designed for continued operation even if an individual LED fails to light.
Tree Storage
1. Remove the tree’s main extension cord plug from the wall outlet.
2. Starting at the top, disconnect the top and section B.
Step A: Gently fold the branches up
toward the center.
Care should be taken
to avoid damage to the lights.
3. Disconnect sections B and A.
4. Refer to the drawing on how to
repack your tree.
7 FT & 7.5 FT TREES
B
A
TOP
SPARE PARTS: Your tree includes a plastic bag containing spare two (2) 3-amp
fuses as replacements for the plug.
SCHEMATIC DIAGRAM
1. Carefully unpack, removing any bubble wrap and inspect the
contents of your tree. {Fig. A}
You should have sections 7’ & 7.5’ A, B, & Top