11
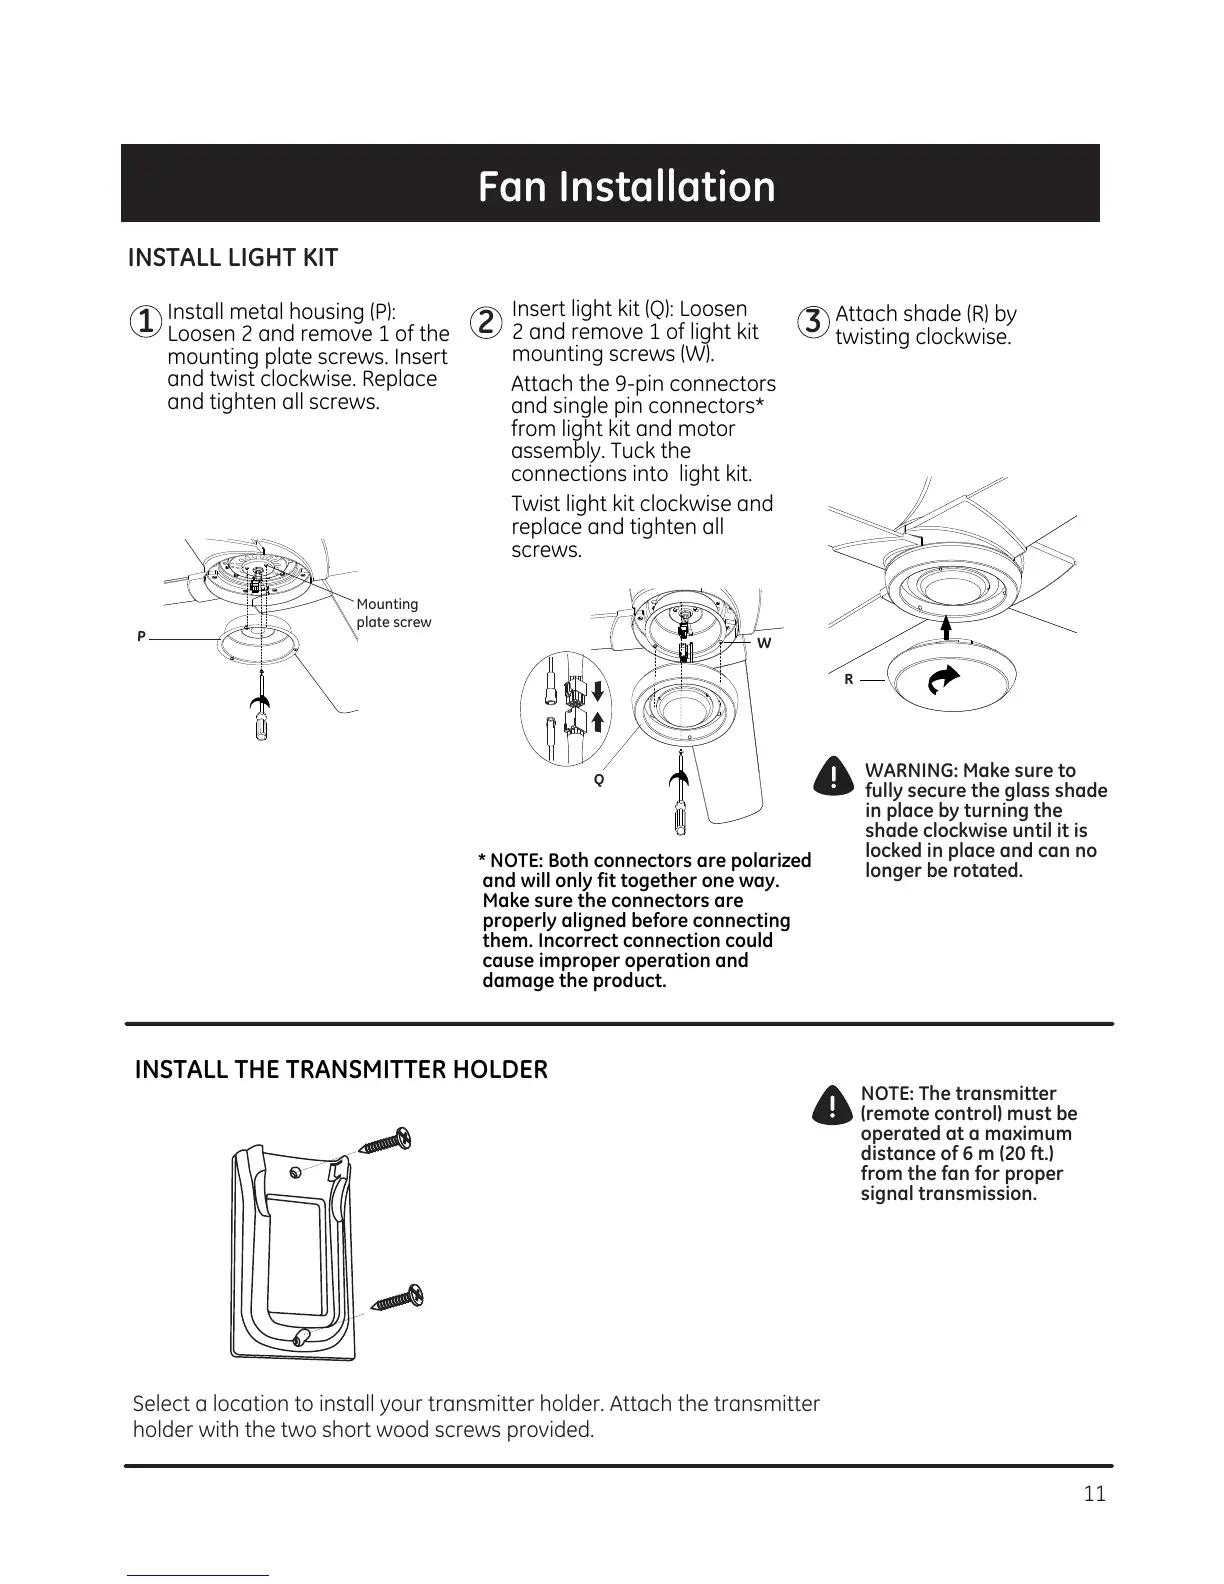
Fan Installation
R
Attach shade (R) by
twisting clockwise.
Install metal housing (P):
Loosen 2 and remove 1 of the
mounting plate screws. Insert
and twist clockwise. Replace
and tighten all screws.
* NOTE: Both connectors are polarized
and will only fit together one way.
Make sure the connectors are
properly aligned before connecting
them. Incorrect connection could
cause improper operation and
damage the product.
Insert light kit (Q): Loosen
2 and remove 1 of light kit
mounting screws (W).
Mounting
plate screw
P
INSTALL LIGHT KIT
WARNING: Make sure to
fully secure the glass shade
in place by turning the
shade clockwise until it is
locked in place and can no
longer be rotated.
W
1
2
Attach the 9-pin connectors
and single pin connectors*
from light kit and motor
assembly. Tuck the
connections into light kit.
Twist light kit clockwise and
replace and tighten all
screws.
3
Q
INSTALL THE TRANSMITTER HOLDER
NOTE: The transmitter
(remote control) must be
operated at a maximum
distance of 6 m (20 ft.)
from the fan for proper
signal transmission.
Select a location to install your transmitter holder. Attach the transmitter
holder with the two short wood screws provided.