GEAppliances.com
Terminal Connections Remote Thermostat - Class 2 (on some models)
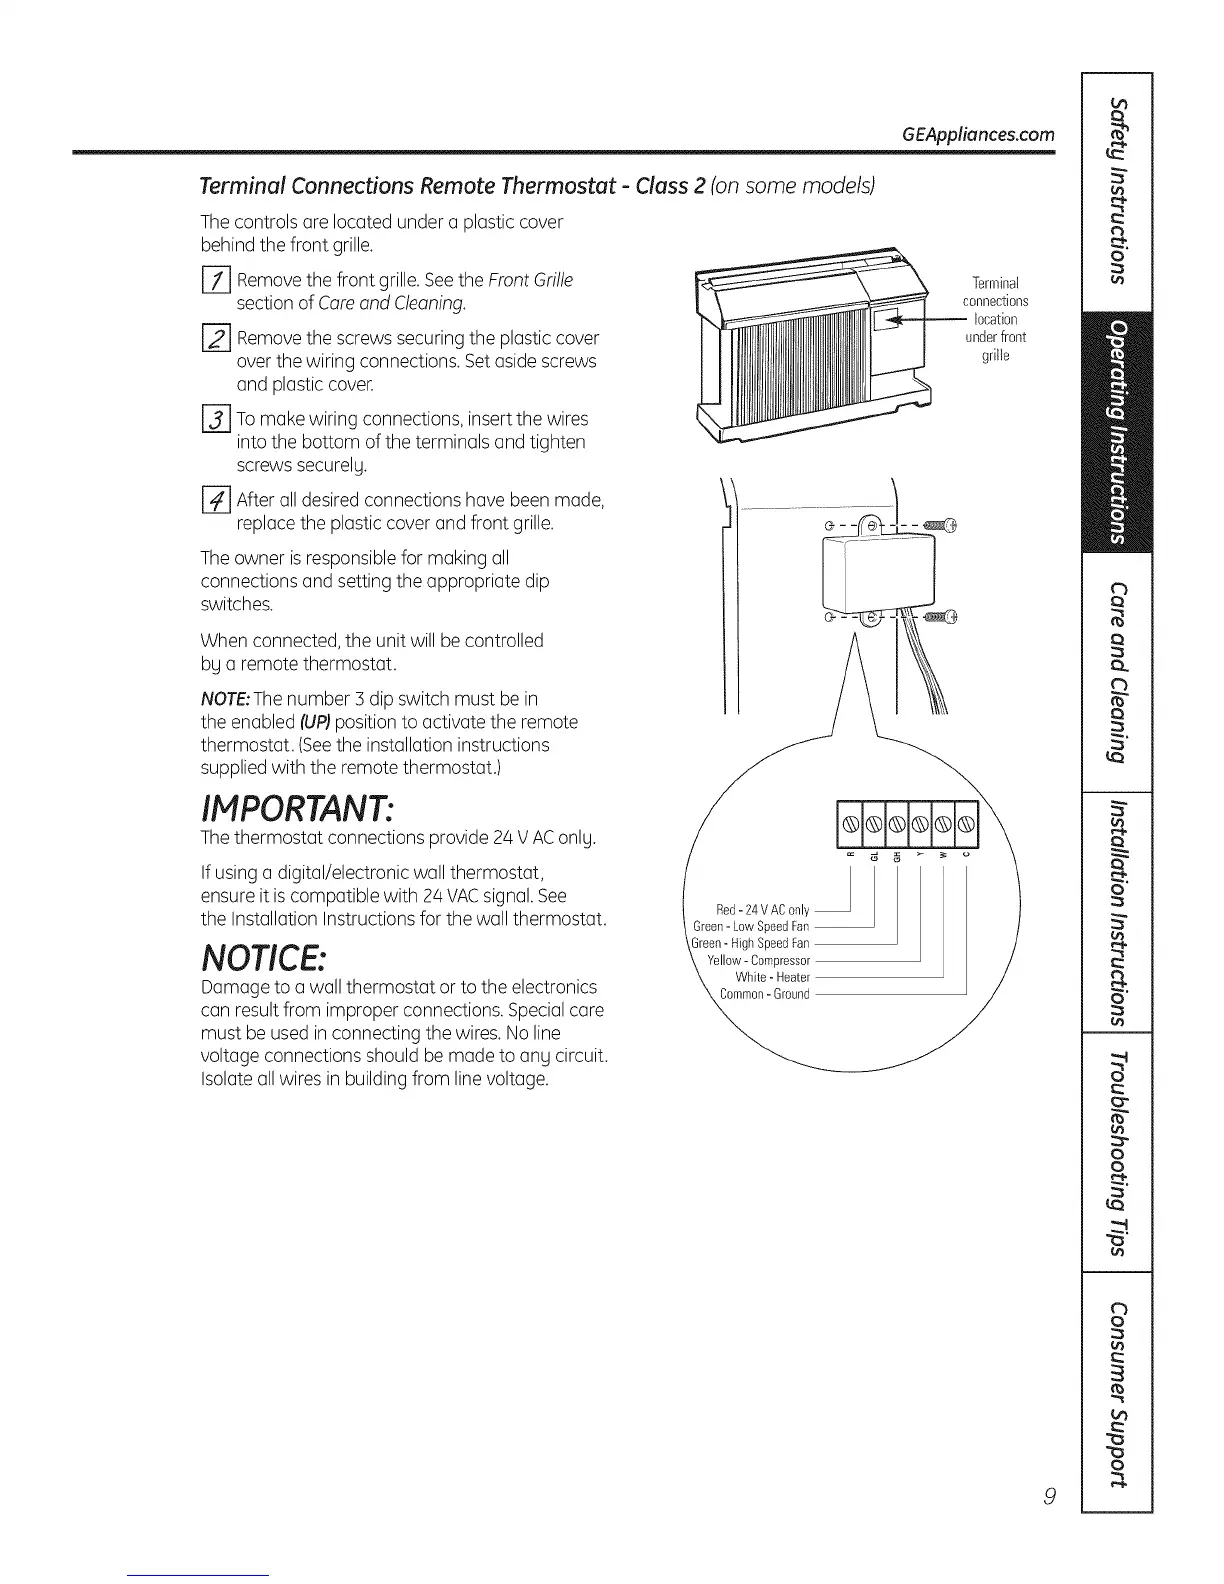
Thecontrols are located under a plastic cover
behind the front grille.
E_] Removethe front grille. Seethe FrontGrille
section of Coreand Cleaning.
r_ Removethe screws securing the plastic cover
over the wiring connections.Set aside screws
and plastic cover.
I-j] Tomake wiring connections, insert the wires
into the bottom of the terminals and tighten
screws securelg.
[] After all desired connections have been made,
replace the plastic cover and front grille.
Theowner is responsiblefor making all
connections and setting the appropriate dip
switches.
When connected, the unit will be controlled
by a remote thermostat.
NOTE:Thenumber 3 dip switch must be in
the enabled (UPJposition to activate the remote
thermostat. (Seethe installation instructions
suppliedwith the remote thermostat.)
_u Terminal
onnectlons
location
nderfront
grille
...................................]
IMPORTANT:
Thethermostat connections provide 24 V AConly.
Ifusing a digital/electronic wall thermostat,
ensure it iscompatible with 2/4VACsignal. See
the Installation Instructions for the wall thermostat.
NOTICE:
Damage to a wall thermostat or to the electronics
can result from improper connections. Specialcare
must be used in connecting the wires. Noline
voltage connections should be made to any circuit.
Isolateall wires in building from line voltage.
/
Red-24 VAConly•
Green- Low SpeedFan
Green- HighSpeedFan
Yellow- Compressor
White - Heater
Common- Ground
9


 To Next Page
 Loading...