Installation
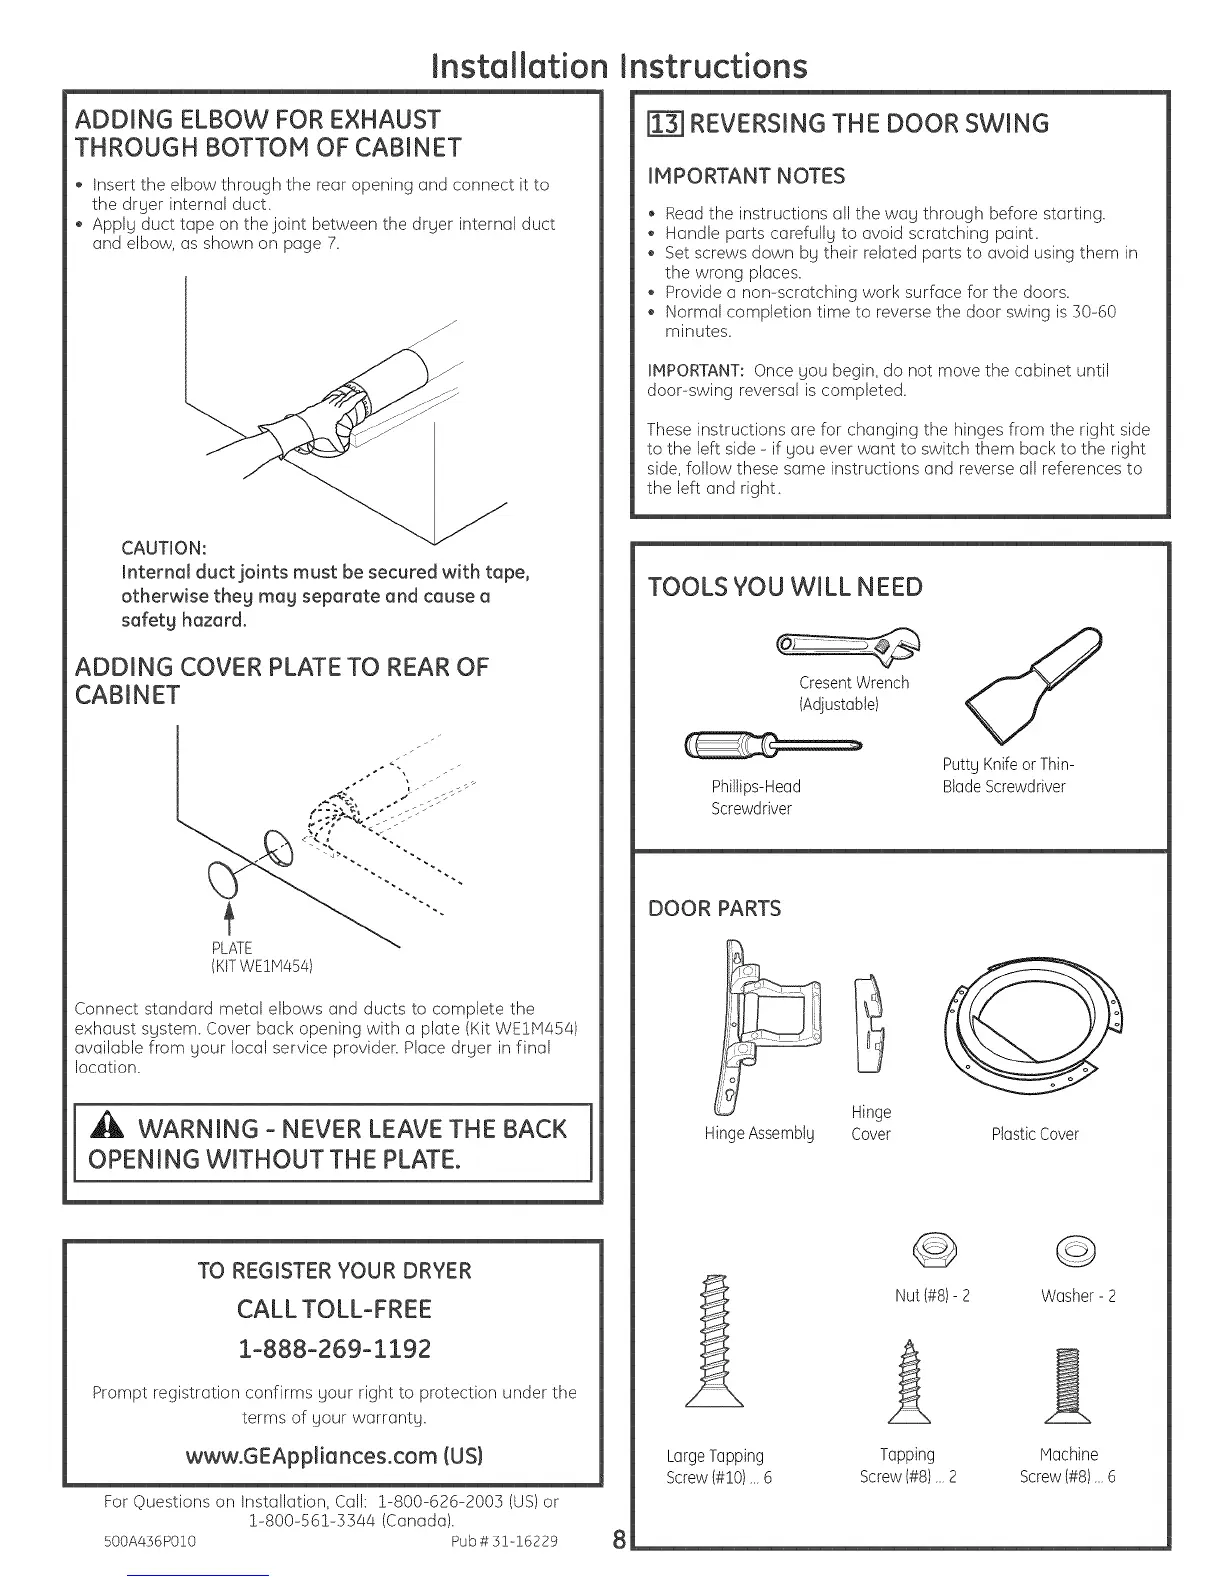
ADDING ELBOW FOR EXHAUST
THROUGH BOTTOM OF CABINET
Insert the elbow through the rear opening and connect it to
the drger internal duct
Applg duct tape on the joint between the drger internal duct
and elbow, as shown on page 7.
CAUTION:
Internal duct joints must be secured with tape,
otherwise they mag separate and cause a
safety hazard.
ADDING COVER PLATE TO REAR OF
CABINET
PLATE
°-'°'"°'i i_
(KIT WE1H454)
Connect standard metal elbows and ducts to complete the
exhaust sgstem. Cover back opening with a plate (Kit WEIH454)
available from gour local service provider. Place drger in final
location.
_1_ WARNING - NEVER LEAVE THE BACK
OPENING WITHOUT THE PLATE.
TO REGISTER YOUR DRYER
CALLTOLL-FREE
1-888-269-1192
Prompt registration confirms gour right to protection under the
terms of gour warrantg.
www.GEAppliances.com (US)
For Questions on Installation, Call: 1-800-626-2005 (US)or
1-800-561-5544 (Canada).
500A456P010 Pub # 51-16229
nstructions
| REVERSING THE DOOR SWING
IMPORTANT NOTES
Read the instructions all the wag through before starting.
Handle parts carefullg to avoid scratching paint
Set screws down bg their related parts to avoid using them in
the wrong places.
Provide a non-scratching work surface for the doors.
Normal completion time to reverse the door swing is 30-60
minutes.
IMPORTANT: Once gou begin, do not move the cabinet until
door-swing reversal is completed.
These instructions are for changing the hinges from the right side
to the left side - if gou ever want to switch them back to the right
side, follow these same instructions and reverse all references to
the left and right
TOOLS YOU WILL NEED
CresentWrench
(Adjustable)
Phillips-Head
Screwdriver
C¢
PuttgKnifeor Thin-
BladeScrewdriver
DOOR PARTS
HingeAssembtg
Hinge
Cover
PlasticCover
LargeTapping
Screw(#10)...6
O
Nut (#8)- 2
A
Tapping
Screw(#8)...2
©
Washer- 2
Machine
Screw(#8)...6
8