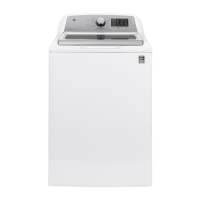
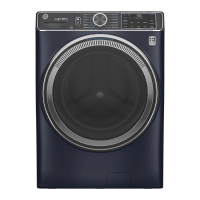
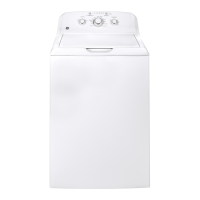
Operating instructions.
Cycle Options
Soak
This option begins with a brief agitation, soaks for a specified period of time, then moves through the rest of the cycle automatically.
Repeatedpressing of the Soak button will add 15,then 30 and then return back to 0 soak minutes.
Extra Rinse
When you useextra detergent or bleach to clean heavily soiled clothes,use the Extra Rinse option to better remove additional residues.
NOTE:Thisoption isnot allowed for some cycles.
Fabric Softener
Setthis option to provide a deeprinse or when manually adding fabric softener to the rinse cycle. NOTE:Thisoption isnot allowed for some
cycles.When allowed, it may change other settings (e.g.Spin may go to a higher setting) to maximize performance.
NOTE:Do not usefabric softener dispensing balls with this washer. Theydo not work correctly in high e_ciency washers.
Pretreat/Bleach
Setthis option to add pretreatment -OR- bleach in the next load. Pressonce to indicate adding pretreatment (light on above button), twice
to specify bleach (light on below button),three times to turn off (no light). Pretreatment or bleach will be added at the optimal time during the
wash cycle (differsfor pretreatment or bleach).
NOTE:Do NOTuse pretreatment and bleach in the same load. tfyou forget to dispense (did not press button once or twice), you can flush
out the dispenser by pouring water into the compartment and running a Quick Rinse cycle to remove from the tub.
Delay Wash
When the Delay Wash button is repeatedly pressed,the delay time isset from ! (01H)to 9 (09H)hours and back to clear (00H)hours. If you
press and hold the Delay Wash button for 5 seconds, it will immediately reset.
Additional Options
Ply Settings
As the cycle selector knob isturned, the Soil, Tamp and Spin settings change to automatic pre-set default settings. Ifyou desire a different
setting, selectthe desired options or changes to cycle settings. Pressand hold the My Settings button for 5 seconds,the washer will save
these settings for that cycle and the status heart V and My Settings button will light when active. In the future, when you turn the selector
knob to that cycle,your settings will be automatically recalled.To temporarily (i.e.for this load) return to the pre-set default settings, press
the My Settings button for 1/2 second.The status heart V and button lights will turn off and the options will change back to these defaults.
To make these default settings permanent, hold the My Settings button again for 5 seconds to make them your preferred settings (the
lightswill turn back on).NOTE:My Settings includesStain Removal Guide and Steam Assist but NOTDelay Wash or Variable Signal.
Variable Signal
Usethe Variable Signal button to change the volume of the end of cycle signal. Pressthe button until you reach the desired volume (high,
medium, low) or off.
Basket Light
Thebasketlight willturn on when the Basket Light button ispressed,the lid islifted,or the cycleknob isturned.It willstay onfor 5 minutesor untilthe
BasketLight button or Power button ispressed.
Control Lock
You can lock the controls to prevent any selections from being made. Oryou can lockthe controls after you have started a cycle. Children
cannot accidentally start the washer by touching buttons with this option selected.
To lock the washer controls, pressand hold the Control Lock button for 5 seconds.The control lock icon will light up when it ison.
To unlock the washer controls, pressand hold the Control Lock button for 5 seconds.
NOTE: The Power button can still be used when the machine is locked.
eWash
When the eWash button ispressed, the cycle changes to its most energy efficient settings and all of the eMonitor lights will light to indicate
that the most efficient settings are on. if you change settings,the eWash light will go off and the number of eMonitor lights will decrease (or
increase)to indicate decreased (or increased)energy efficiency settings.
Automatic Load Sensing
This provides the correct amount of water suited to the size and type of load placed in the unit. The washer will not fill with water
during automatic load sensing ifthe lid is open. When the lid is closed the machine is able to begin filling with water in order to
sense the load size.
NOTE: This is a high efficiency washing machine with lnfusor TM wash action. This system requires less water while providing effective
cleaning action. You may notice that the water level is lower than on your previous washer. This is normal for an lnfusorm-equipped
washer.
Average Small Load Average Medium Load Average Large Loud
6
Clothes Level
Clothes Level
Water Level
Water Level
Clothes Level
Water Level
 Loading...